 From cracking the coconut open to extracting the oil. I’ll show you how to make Cold Pressed Virgin Coconut Oil in a kitchen right here in North America!
I grew up eating coconut, and coconut oil is what I use in most of my daily cooking. Surprisingly, I had no idea how it’s made before.As I become more serious about eliminating waste from my cooking, I try to make as many packaging-free foods from scratch using raw material as I can–from sprouted tofu, almond milk, soy sauce and more.
Now, I have mastered how to make Cold Pressed Virgin Coconut Oil from scratch. However, It was almost impossible for me at the beginning–why?
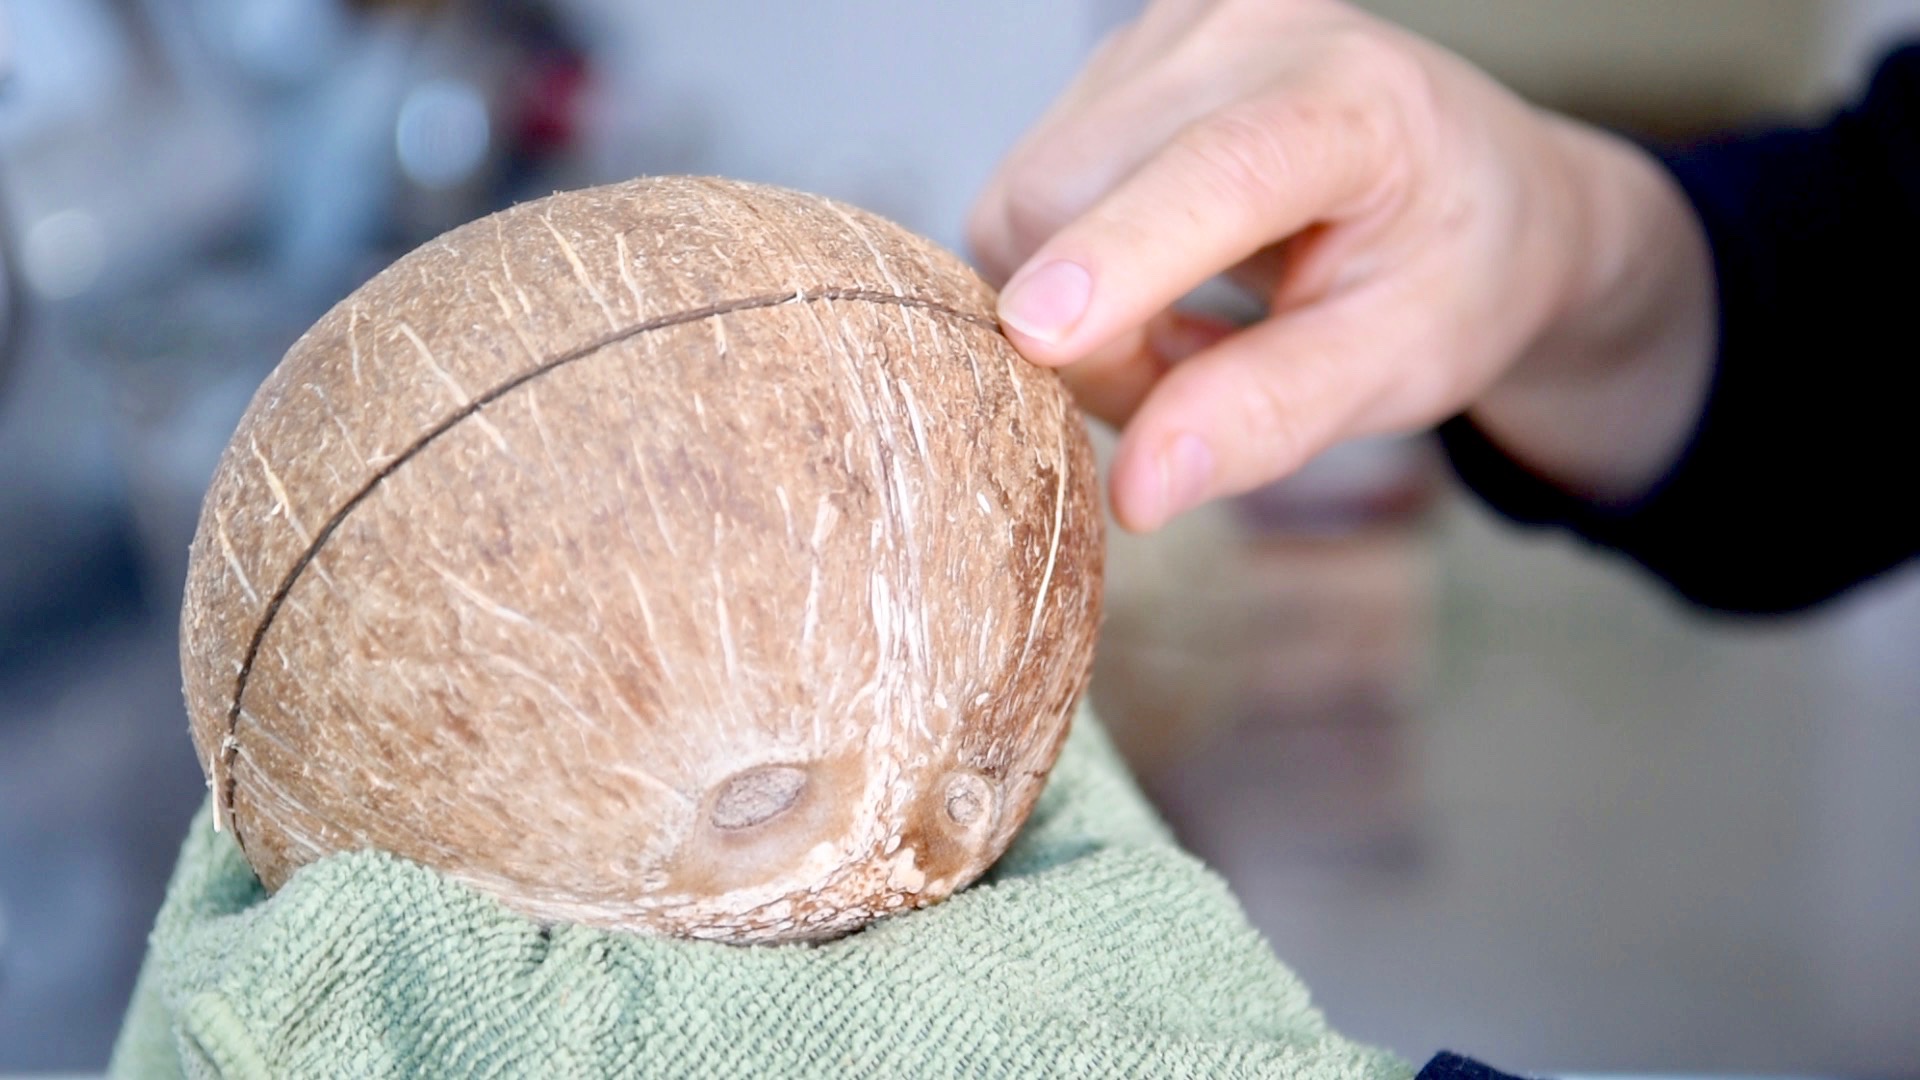
hold it with a kitchen towel and use a cleaver to crack in the middle
First of all, coconut has a thick-hard shell (or skull) that is not easy to crack, and grating the coconut meat can be overwhelming. After I learning to crack it, I tried to grate it the way we do in Thailand. It was too difficult, so I gave up, many times.
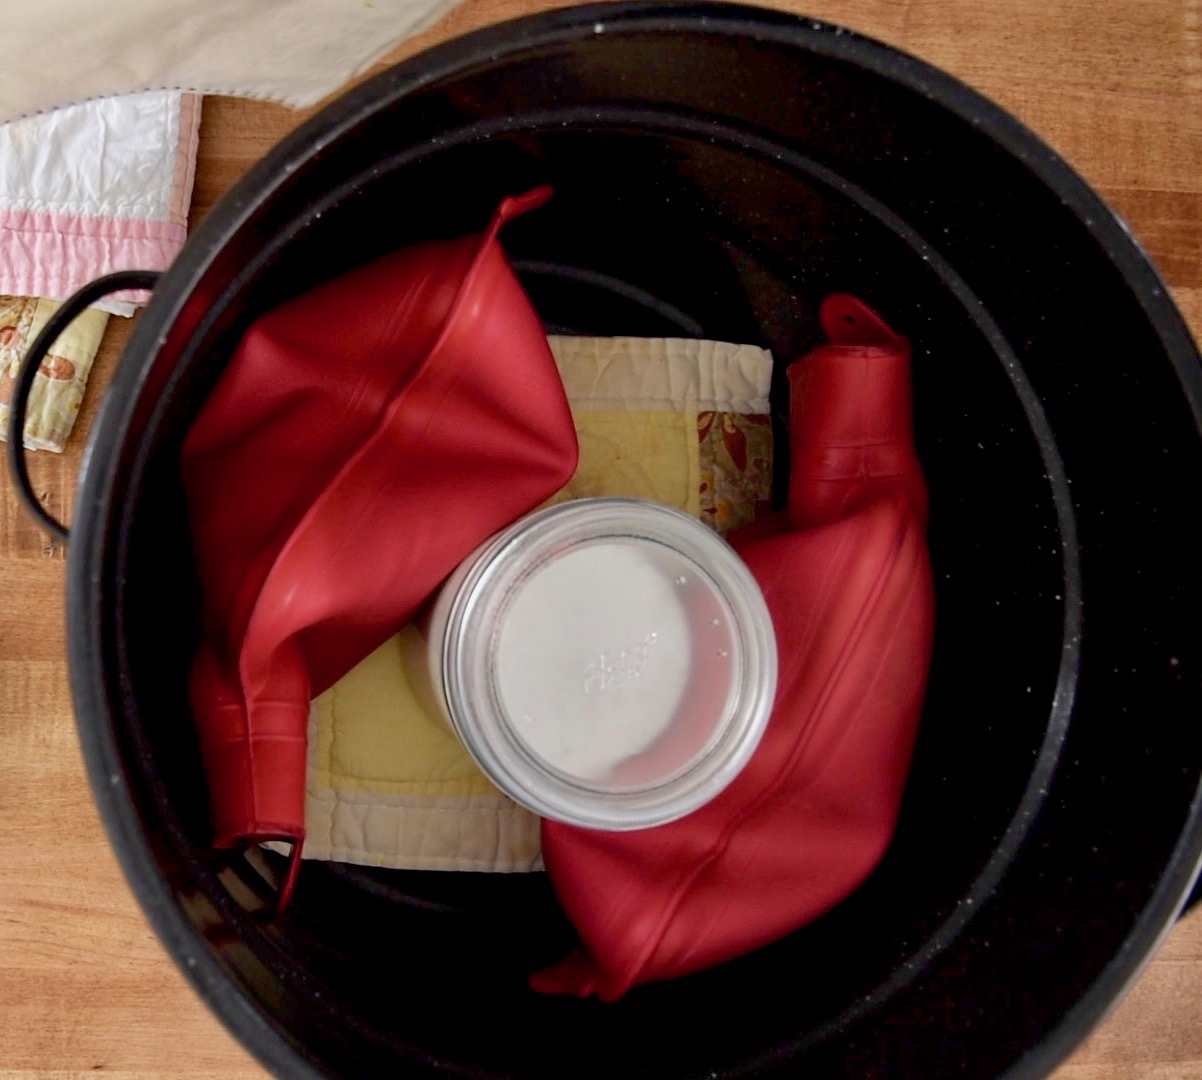
Create a warm spot to ferment it
Second of all, it’s cold most of the time in North America and the process of extracting the oil needs to be done in a warm climate.
Those two obvious things stopped me from being successful so many times. However, my curiosity about the possibility of making it kept me going.
Even though I combined elements from the methods I learned online, and created my own method. I have to admit that I failed many times before I could make it reliably.
As making Cold Pressed Virgin Coconut Oil is a very time consuming process. I only planned to do it until I knew I could reproduce the results. Obviously, I didn’t stop after the first success–I’m still doing it now.
Once I got my system down, it’s actually not that hard at all. In fact, it’s rather fun and satisfying to see the result.
If you are reading this, and trying to make your own Cold Pressed Virgin Coconut Oil. I’m sure you know about its health benefits.
Despite there are so many articles claiming that coconut oil is bad for you. From my own experience using and eating it my entire life–I believe it’s very beneficial to health!
Ready to give it a try? Let me show you how!
Ingredients:
mature coconut and lukewarm water
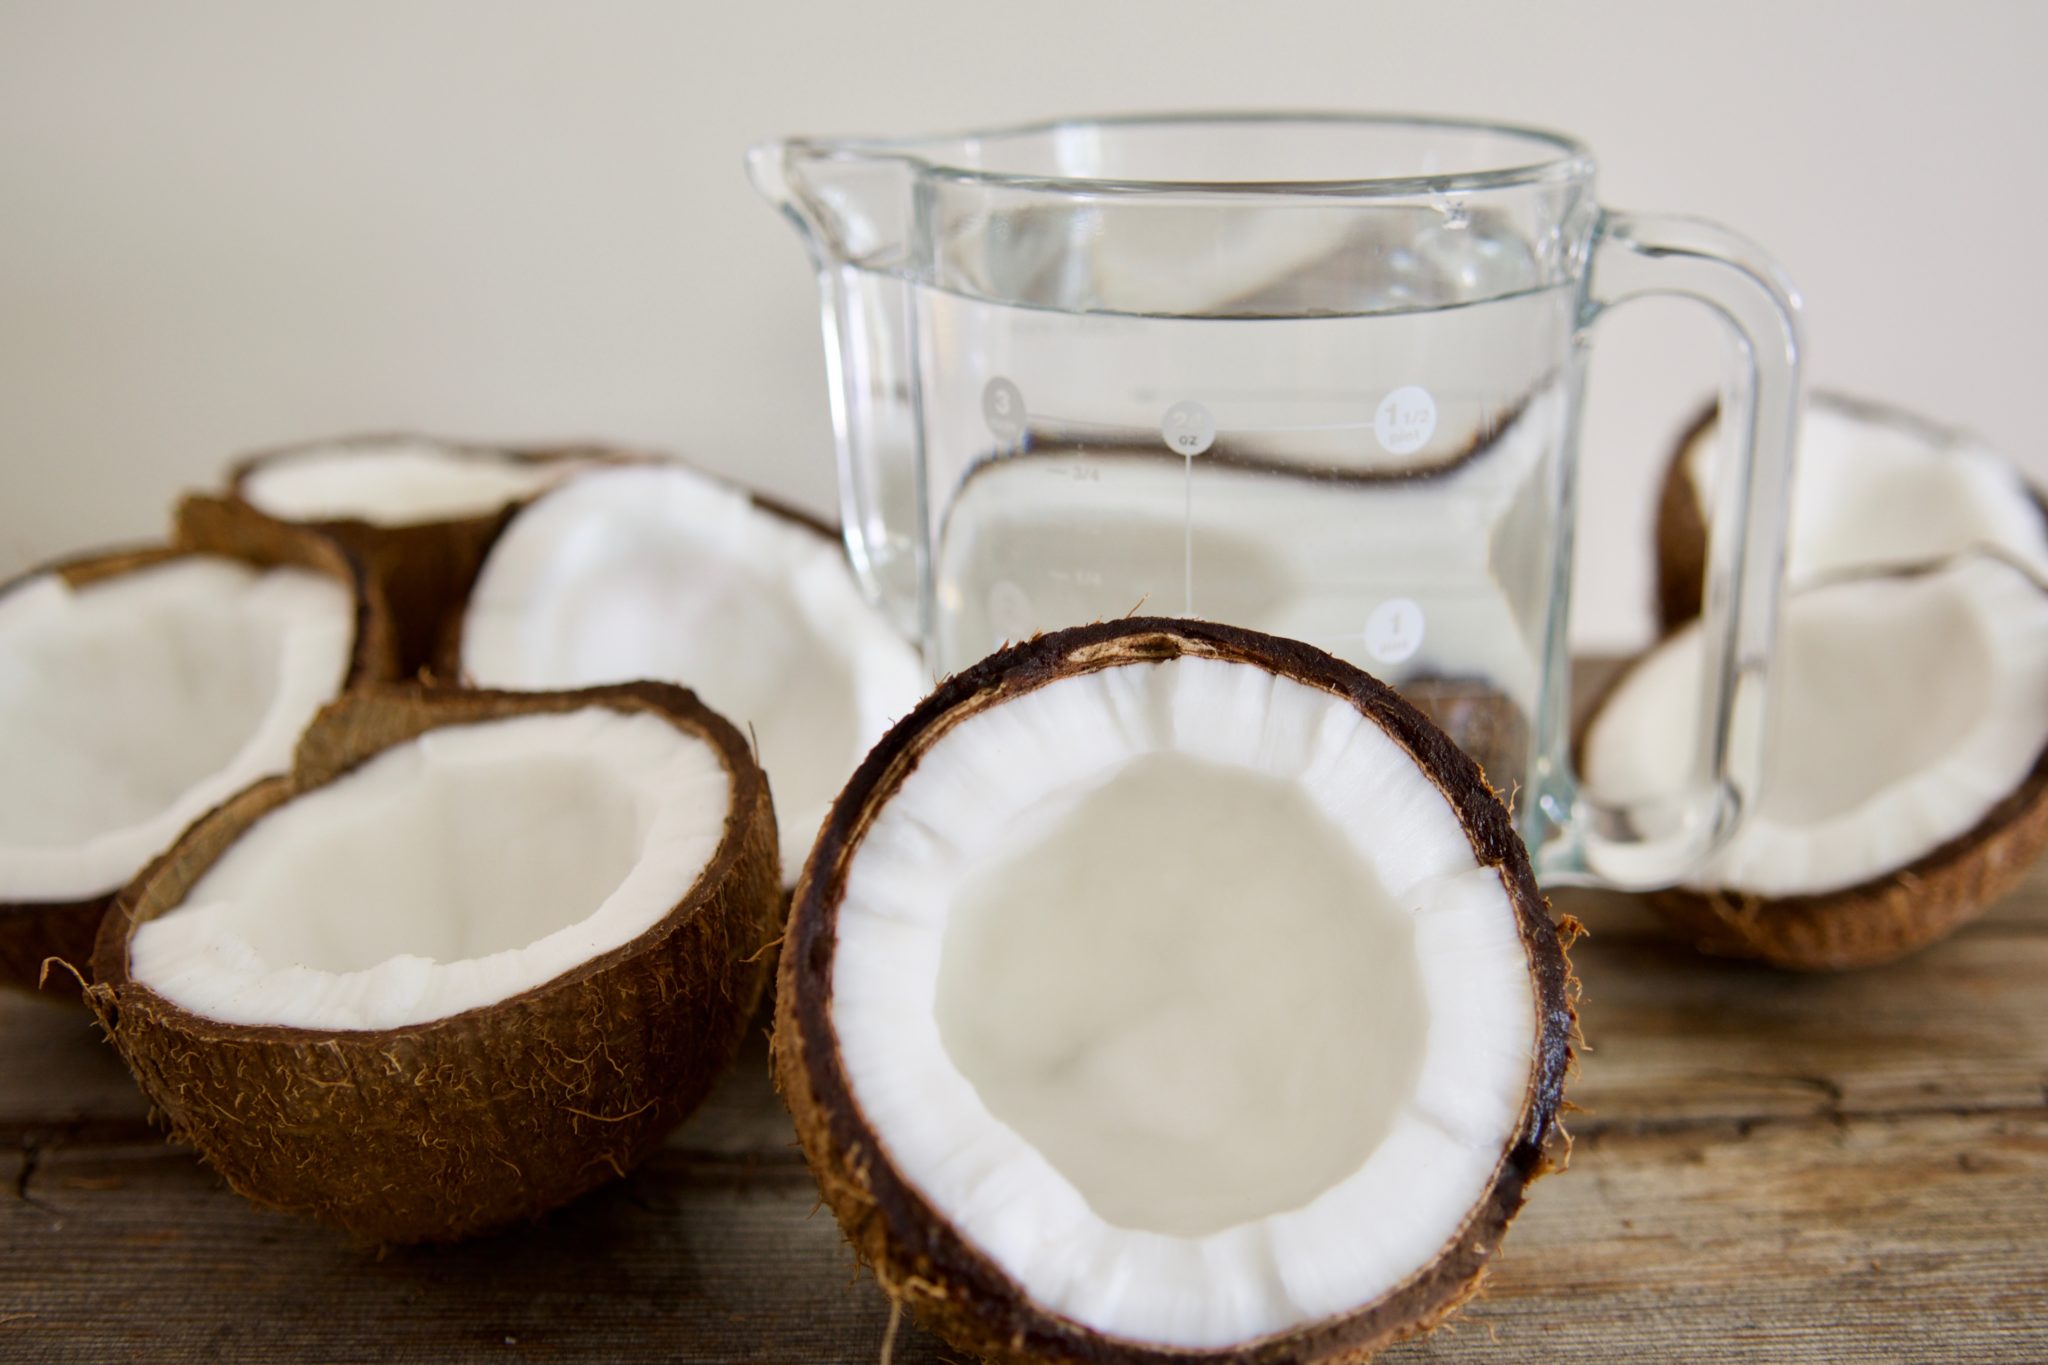
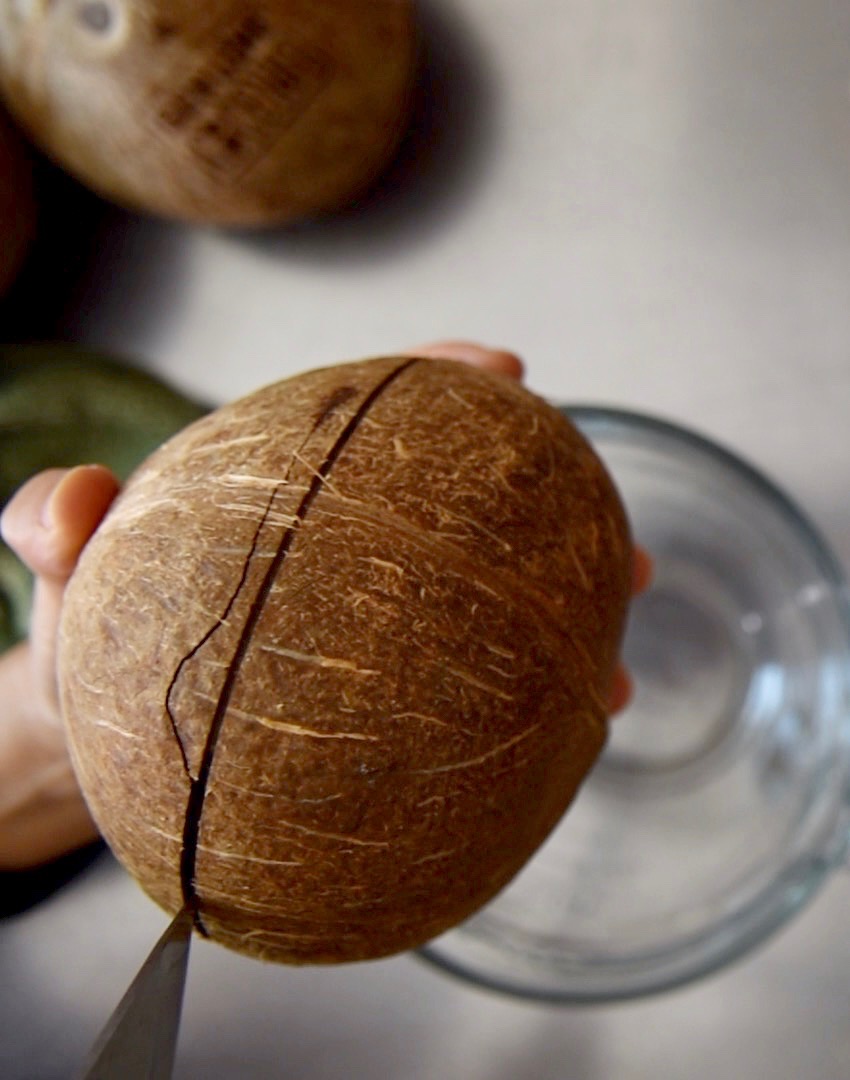
- 3 mature coconuts (most of them now have a mark in the middle that makes them easy to crack)
- Filtered lukewarm water. The amount of water varies.
Note: This makes about 10-11 cups (3.4-3.74 kg) of raw coconut meat. 16 cups (128 fl oz) of coconut milk, and 1 pint (16 fl oz) of coconut oil.
Guidance equipment:
- A cleaver, and a small knife . These are for cracking the coconuts, and getting the meat out of the shell. (a serrated knife works great)
- Bowls or containers of your choice
- A blender, a nut milk bag or cheesecloth for squeezing the coconut milk, and a small one for straining the oil, and a small strainer, rubber bands & a stick
- A makeshift warm place. I use a canning pot, hot water bottles, and a few towels. If you make this during the hot summer weather and the room temperature is about 85 degrees fahrenheit (29.5 degrees celsius), you won’t need heat.
Note: watch the video to get some ideas on what to use to create a warm space–using what you already have is the ideal.
Instructions:
- Day 1: Early in the morning, wipe the coconut shell down with a damp cloth to get rid of small particles on it, so they don’t get into the coconut water.
- Use a washcloth or a glove to hold the coconut as the impact might be hard on your hand when you crack it. Hold it by the ends and tap in the middle with the cleaver, and turn it as you tap until it cracks. Once it cracks, use the tip of the cleaver to slightly open the crack and pour the coconut water into a bowl. You can drink the water or store it for later.
- Use the small knife and cut a small part of the meat out.Once you have one part open, it’s easy to take out the rest. If the coconut is mature, the meat should come out cleanly and easy.
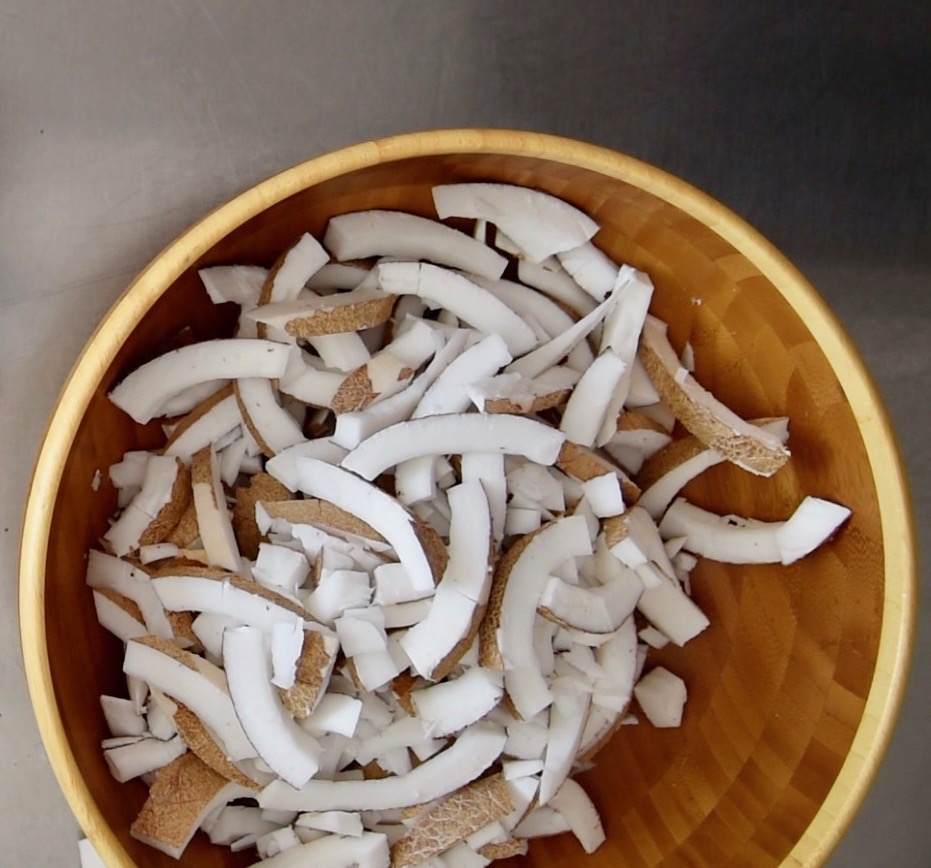
- Cut the meat into small pieces to make it easier to blend.
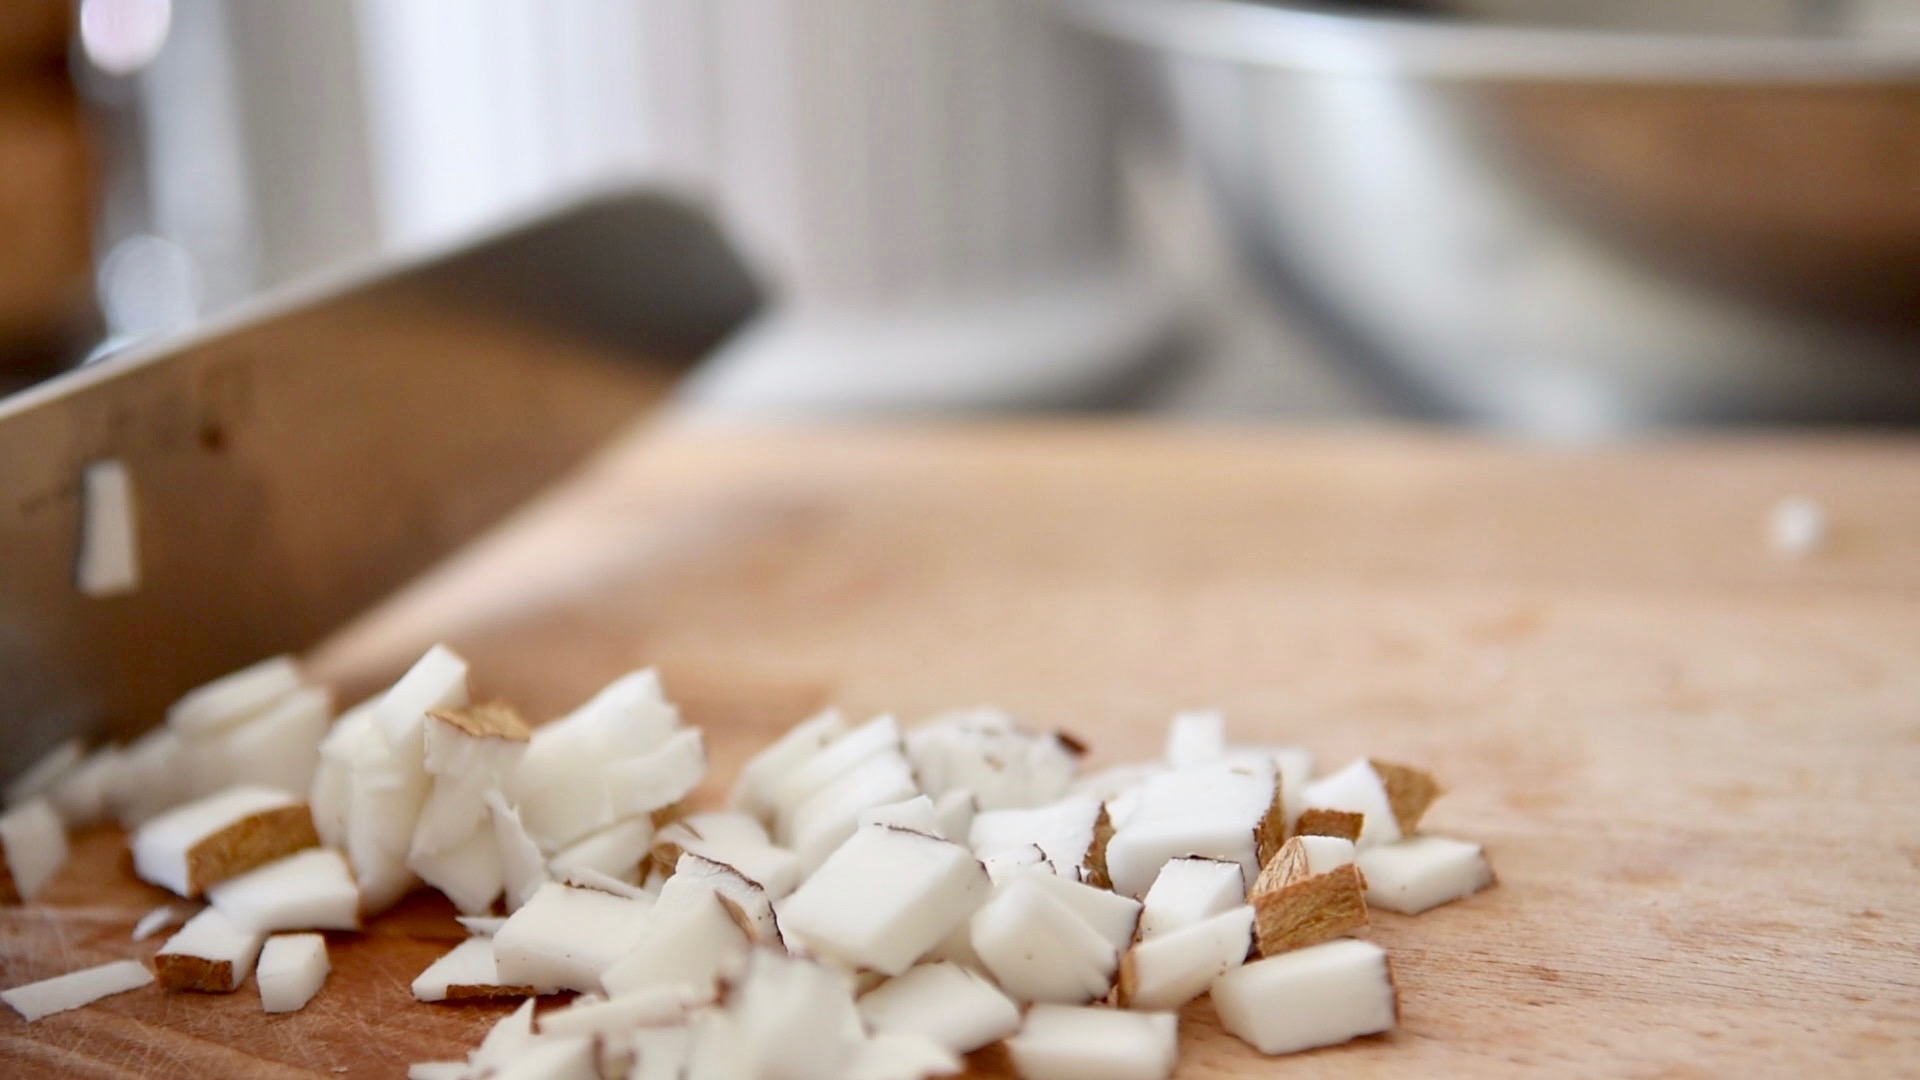
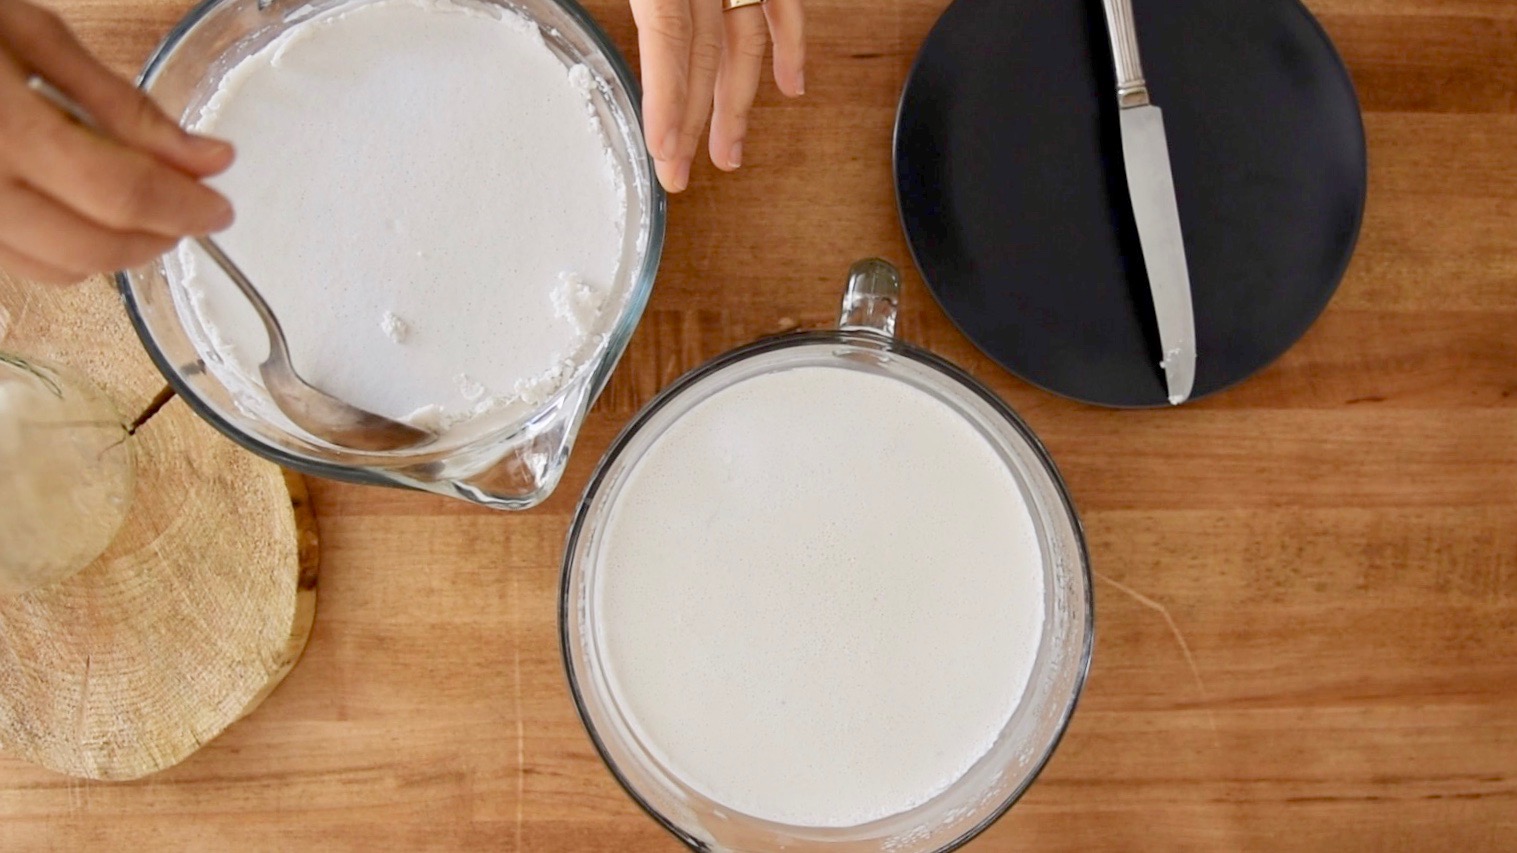
- Blend 2 cups (680 g) of the coconut meat with 11/2 cups (12 fl oz) of lukewarm water. This ratio is perfect for creamy coconut milk. You can blend more at a time, but 2 cups at a time makes it easier to squeeze (for me anyway).
- Put the well- blended coconut in a nut milk bag over a bowl and squeeze as much milk out as you can. Use the pulp to repeat the process one more time. Note: For blending the pulp, I use 2 cups (680 g) of pulp with 2 cups (16 fl oz) of lukewarm water.
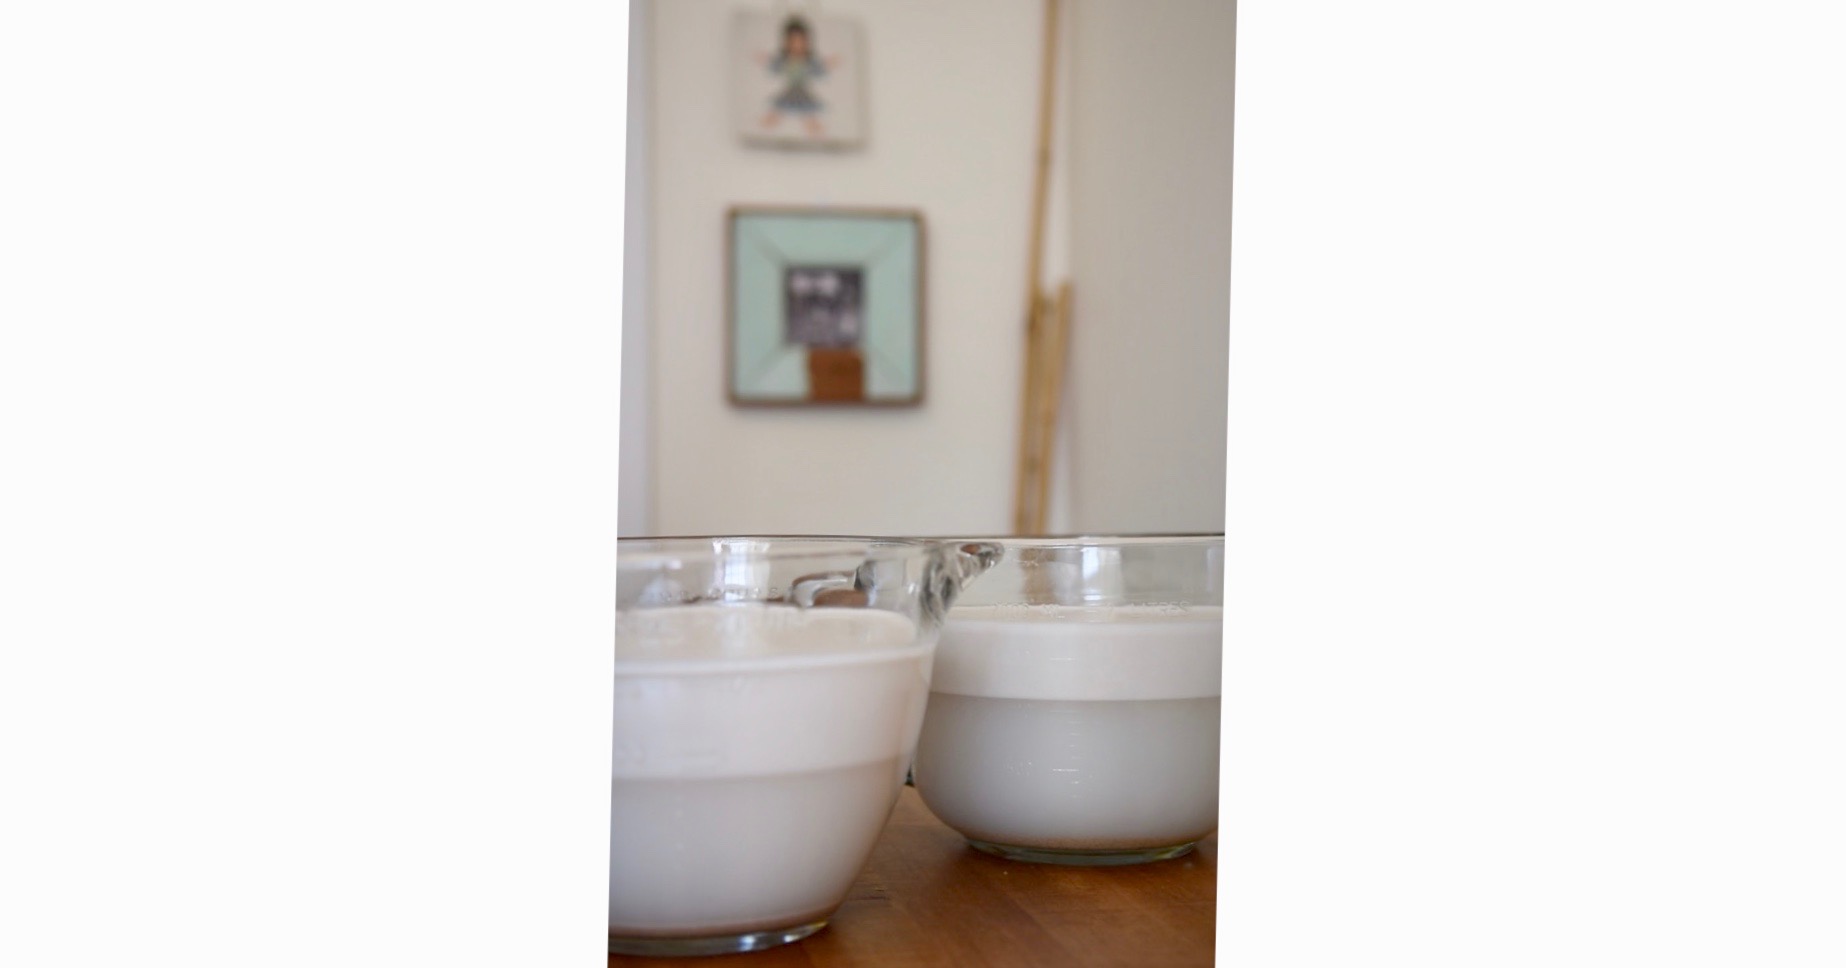
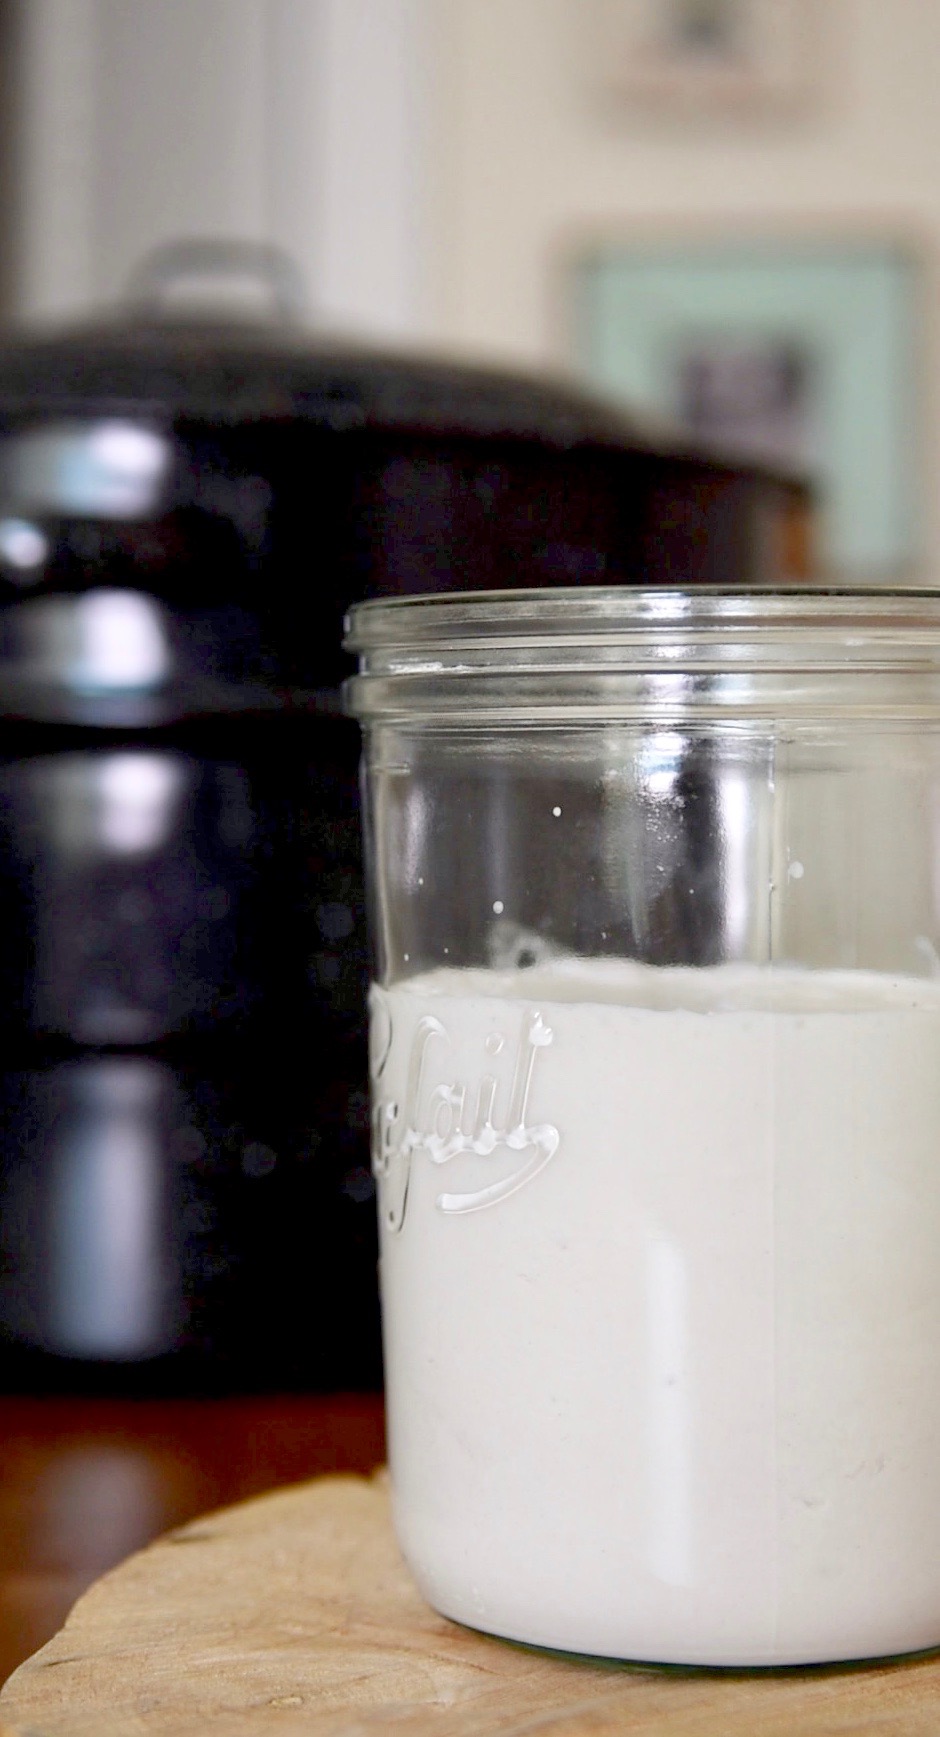
- Now, you should have about 16 cups (128 fl oz) of coconut milk. Put it in a fridge for a few hours, so the cream can separate from the water. Note: If you start early in the morning, the cream should be firm enough by late afternoon. However, if you start the project late in the evening, keep the coconut milk in the fridge overnight is perfectly fine.
- When the coconut cream is solid to the touch, gently scoop it into a smaller container (I use a glass jar). You can keep the water for cooking, or get rid of it. Though, it doesn’t have a lot of flavor left, sometimes I keep a small amount for cooking white rice as a treat!
- Loosely cover the container, and put it somewhere warm to ferment overnight. I use a canning pot with 2 hot water bottles and cover it with a few towels. A good temperature for fermenting is about 85 degrees fahrenheit (29.5 degrees celsius).
- Day 2: You can see three layers now: the top is the coconut curds, the middle is the coconut oil, and the bottom is water. Put the container in a fridge for a few hours, so the curd and the oil can harden up which makes it easy to separate them from the water.
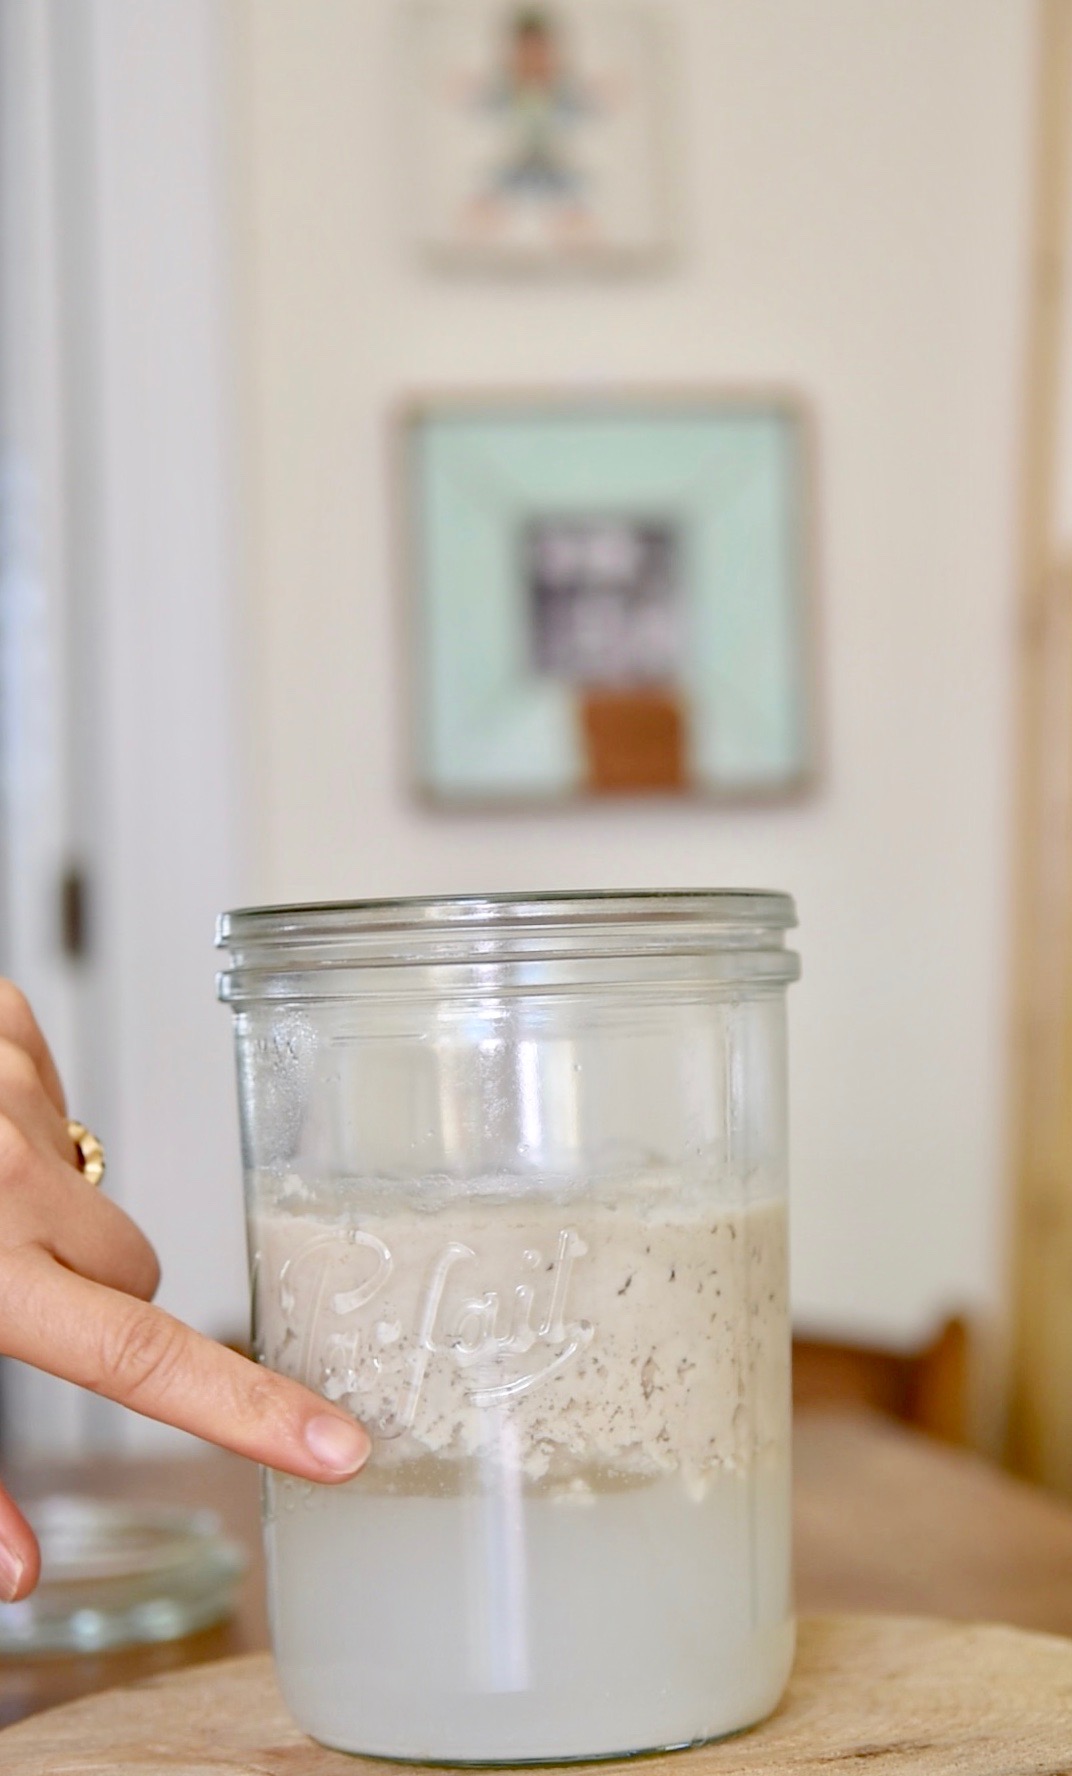
- Separate the curd & oil from the water and put it into another container. Loosely cover the container, and put it back in a warm place. Let the oil separate from the curd for another night.
- Day 3: Now you can see the curd and the oil separate more, with a little bit of water on the bottom. It’s time to strain.

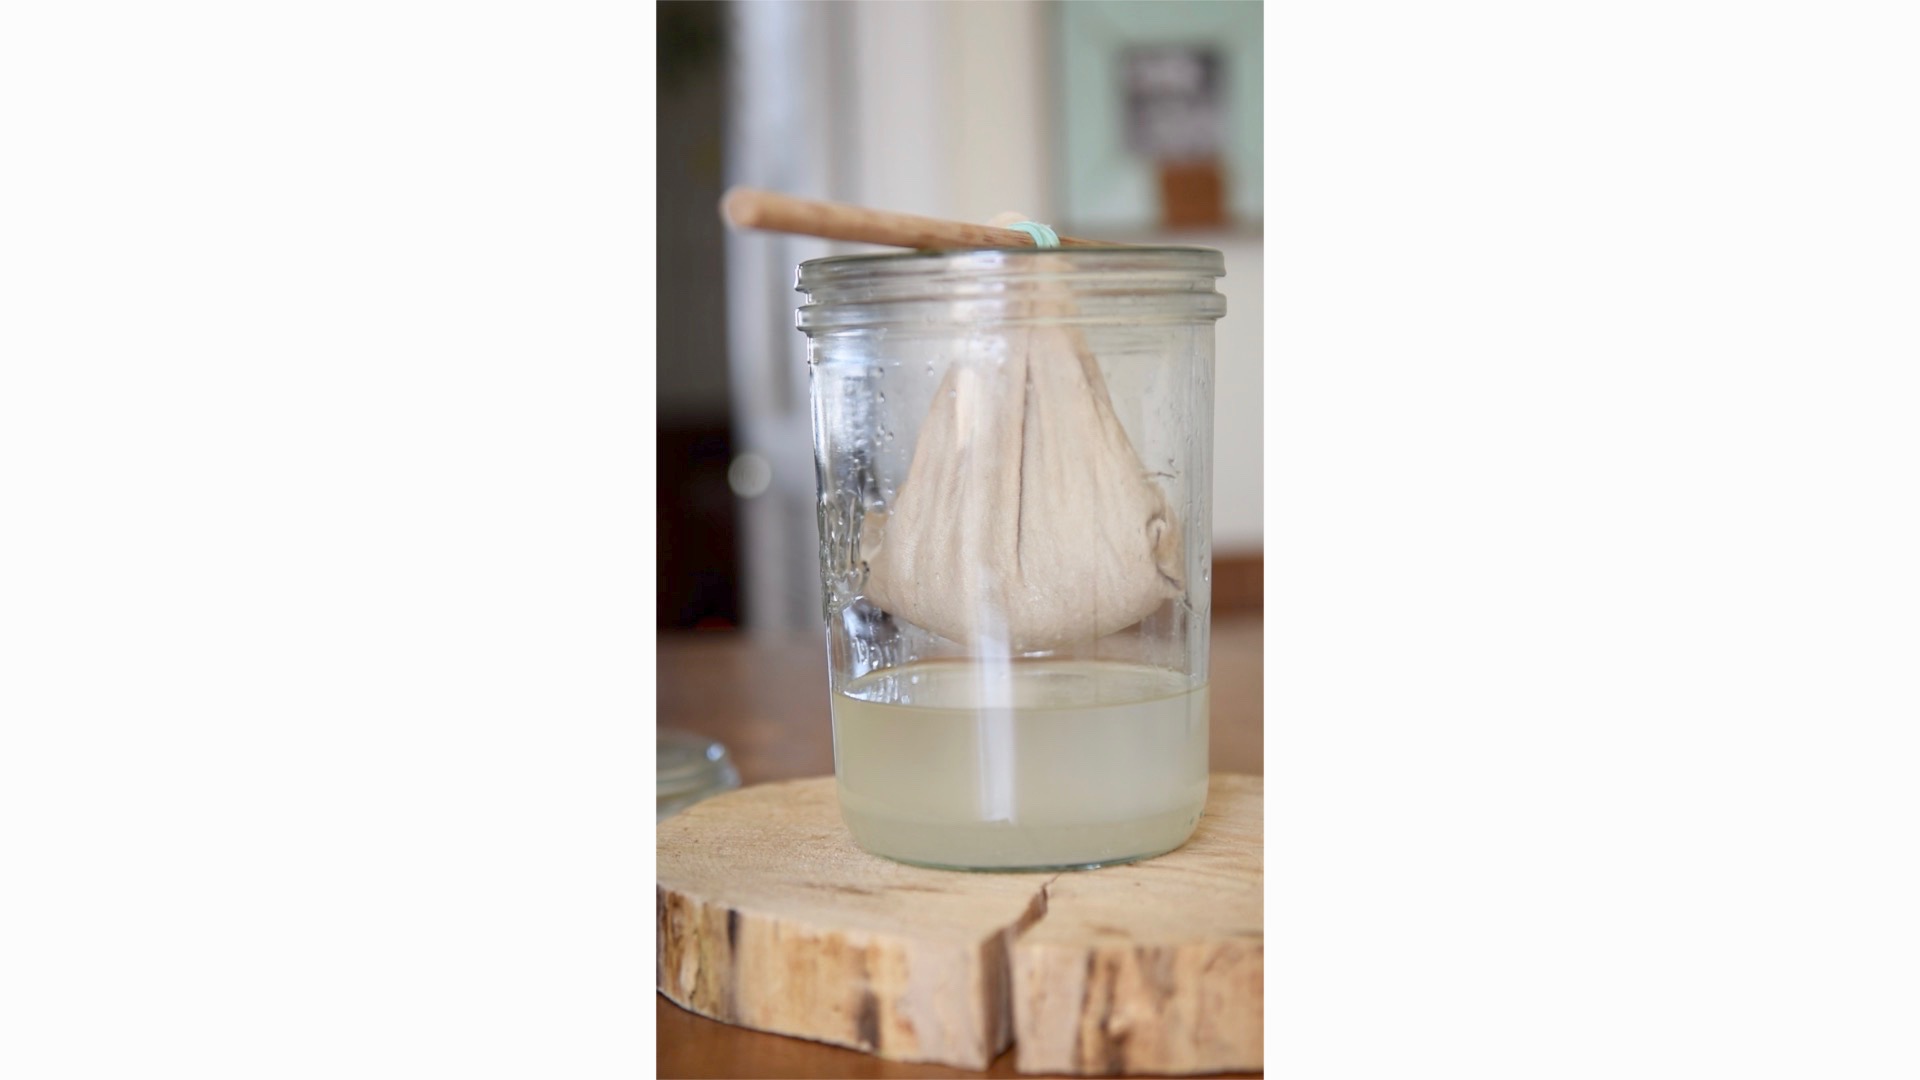
- Place a small strainer on the container and put a small cheesecloth (or a small cloth bag) inside the strainer. Gently scoop the oil, and strain it through the cloth first as it goes through fast. When it’s harder to scoop just the oil, just pour the rest into the bag. This way the oil that’s mixed with the curd can drip out.
- Use a rubber band to tie the cloth/bag. Insert a stick through the band, and hang the bag over the container. Put the container back in a warm place. If the room temperature is cold, the oil and curd can harden up and can’t be strained.
- Let it strain until the oil stops dripping.
- When it stops dripping, you can see that the oil is cloudy because there is still water mixed in it. Put the container in the fridge to speed up the process of solidifying the oil. You can leave it on the counter (if the room is cold). It doesn’t take long for the pure oil to solidify.
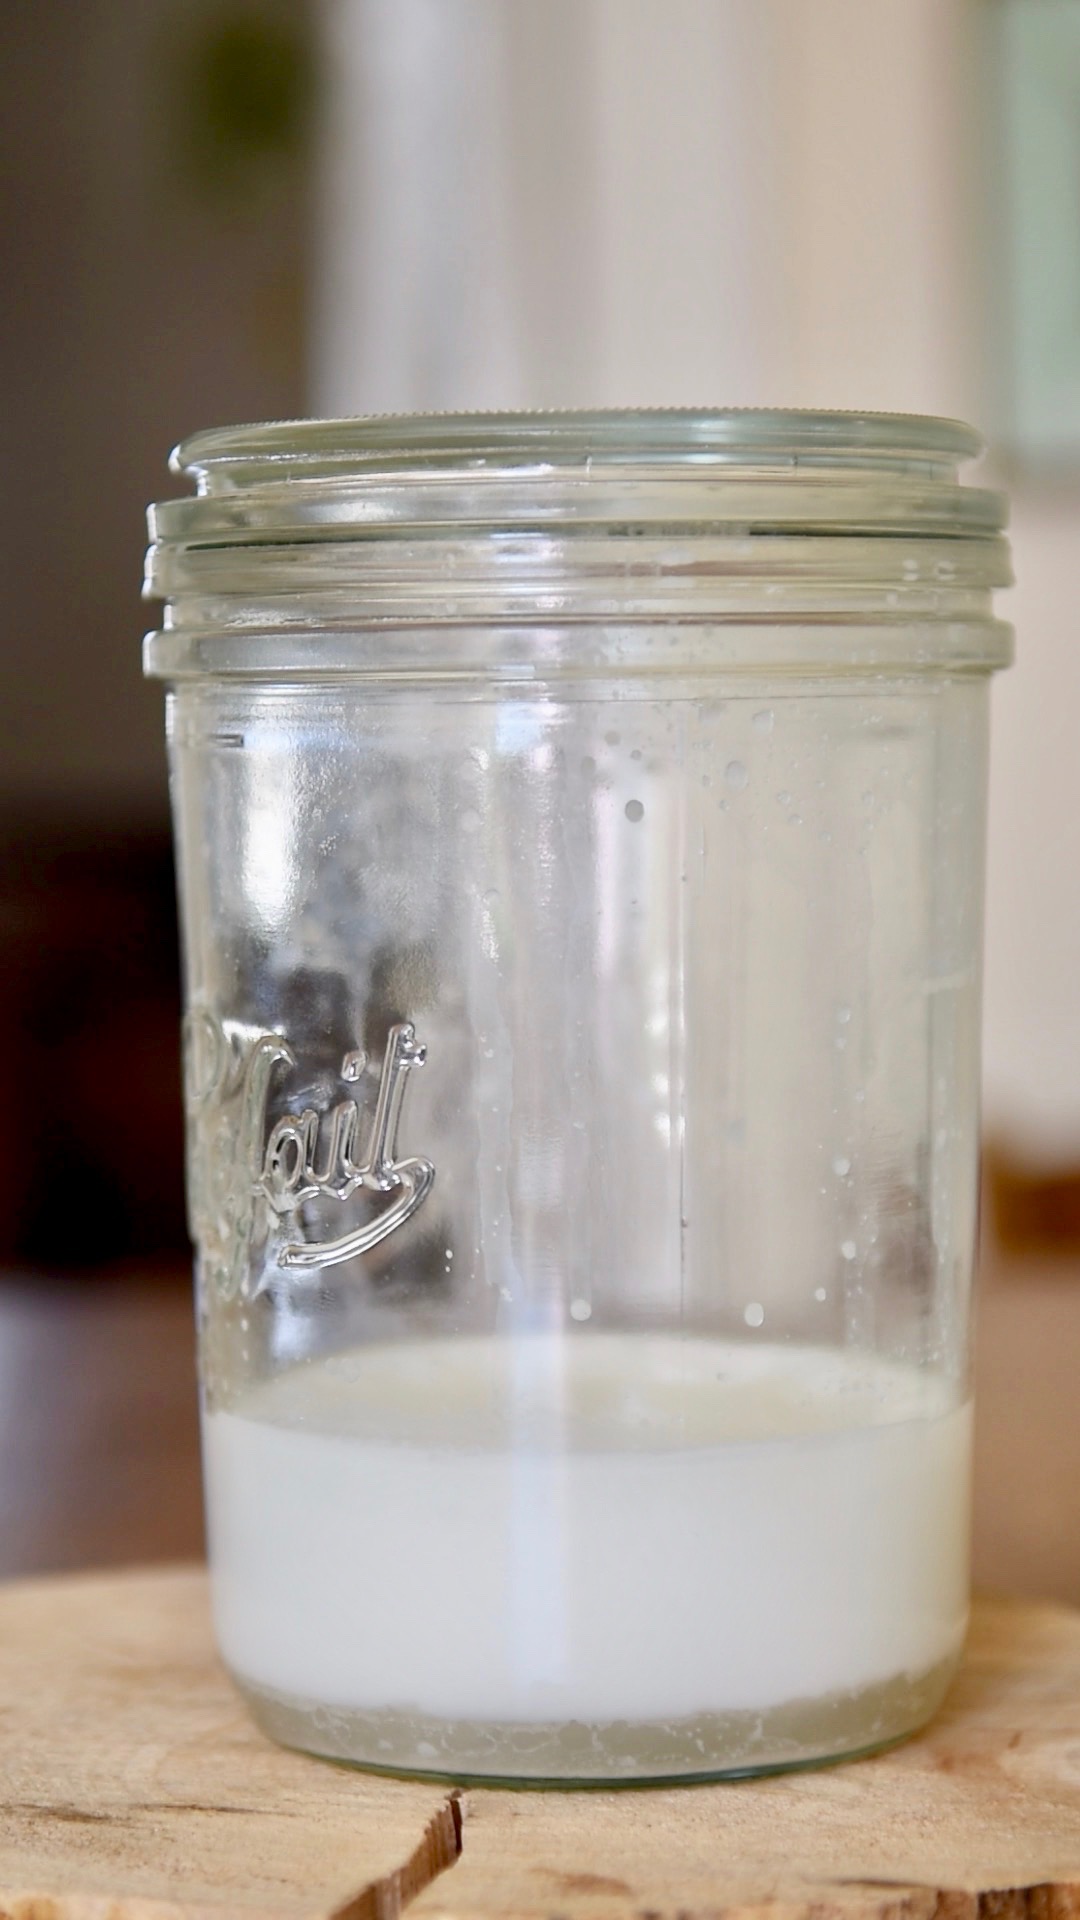
- When the oil is solid (it’s pure white). There is still water in the bottom, gently break it and scoop it into a storage container–now it’s done!.
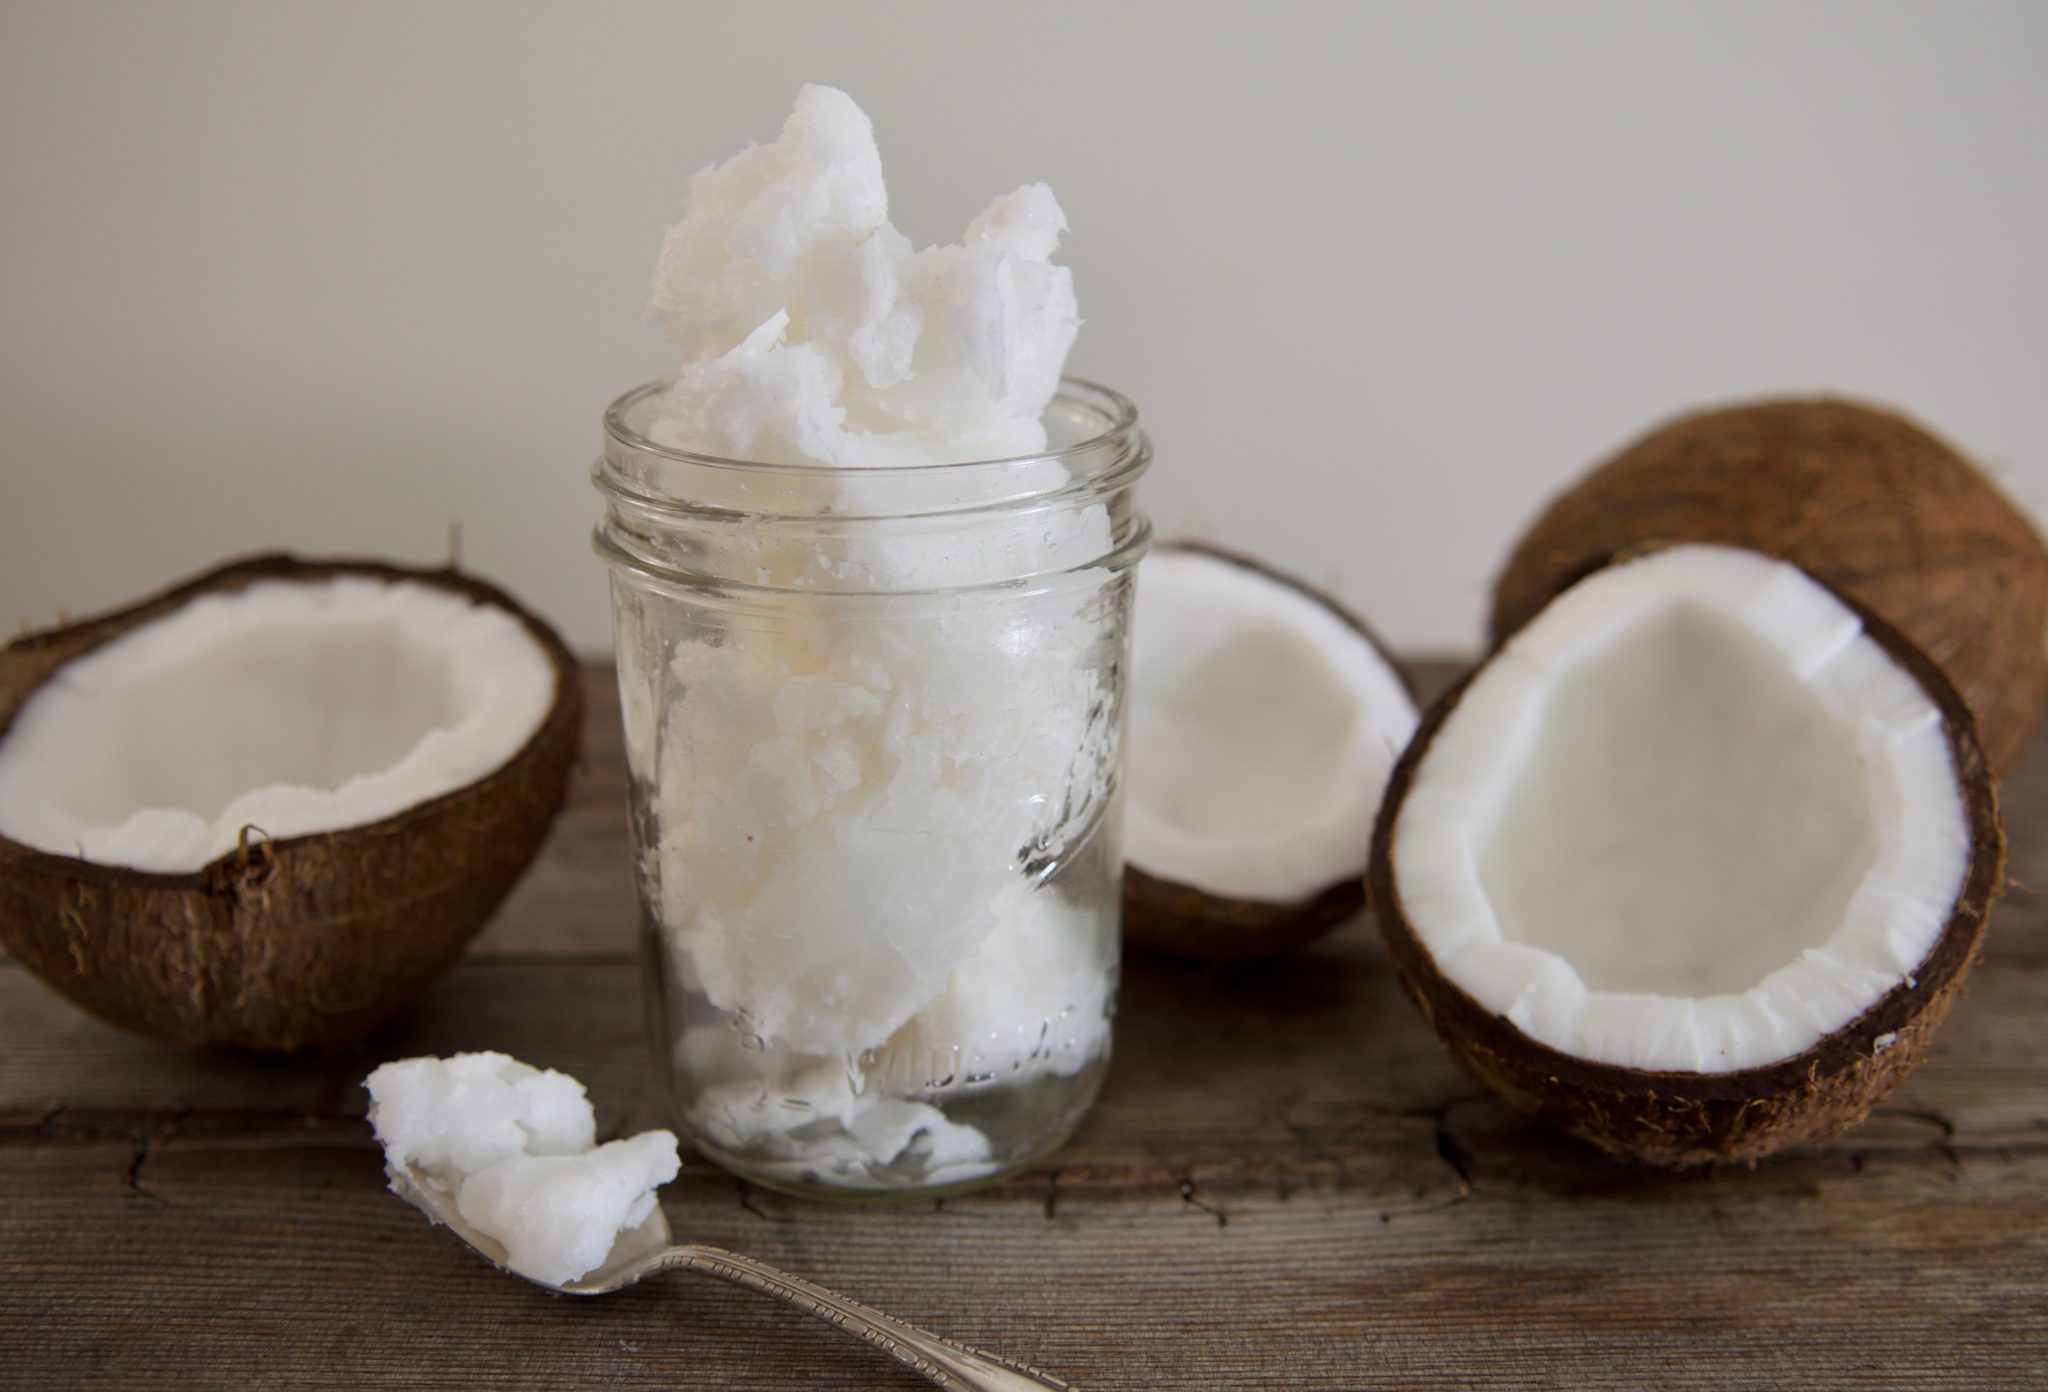
- You can leave Cold Pressed Virgin Coconut Oil on the counter or pantry. There is no refrigeration necessary. Note: The oil melts as the temperature increases, and solidifies when the temperature drops– and that is totally normal.When it melts, you can see the oil is clear. If it looks cloudy, there must be some water in it. Let it solidify and separate the water.
- Enjoy.
Have you made Cold Press Virgin Coconut oil before? Share it with me if you have—I’d like to hear about it!
Hello, why is itimportant to start this process early in the morning? can I start it afternoon, for example?
It’s not necessary. I find it easier to start it in the morning. If I start late in the day, I always end up finishing it the next day–but it’s totally ok!
Thank you very much for this receipe. I have been trying to make coco virgin oil, at times it suceed at times it don’t. Going through your instructions I understood why. I will follow your instructions and i will come back next time to testify. Very greatful!!!
Thank you very much for this receipe. I have been trying to make coco virgin oil, at times it suceed at times it don’t. going through your instructions I understant why. I will follow your instructions an d i will come back to testify. Very greatful!!!
How long should the coconut last. I cut and left my coconut pieces in water in frig since September 2, 2019.
I have never left it be in the fridge that long. I thinks as long as it looks normal without mold or a funny smell. However, if you are not certain, I don’t recommend risking using it. It is best to freeze it if you can’t use it soon.
Thank you for sharing this video! I’m now a big fan of yours.
Thank you so much, I’m so glad you enjoyed it!
first time i know a fermenting method, thank you . I am also from a coconut country ie Kerala, India.
Please let me know how it turns out when you do!
Thank u ..I got the oil.but what could I do with its oder…and for preservation.
Well there should not be an odor, so I’m not sure what may be going on there. There is no need to preserve the oil in any special way. I keep mine by the stove most of the time.
There should not be a lot of odor really, but there may be ways to refine it further. The finish product really doesn’t have any smell just like store-bought cold-pressed virgin coconut oil.
Do I have to wrap up the bottle with hot bags and cloth? I’m in India. Here I have climate of 31 degree celcius at least
I live in Venezuela and also high temperatures. What would be the difference in the making? Thank you!
Hola in Venezuela! The only difference you should have in making this in a hot climate is that you will not need to keep the milk warm, and this should make it easier with less work.
If your climate you can just use the warm air and it will work fine:) In my climate, in the wintertime the coconut oil will be solid and prevent the fermentation so the warm water bags are my trick to mimic a warm environment.
To separate the coconut shell from the pulp, keep the coconut, before cracking it open, in the freezer for 12 hours. This will freeze both the coconut water+pulp. When you break open the shell the pulp with the frozen water gets separated from the shell easily eliminating one chore of grating.
Thank you for the idea!
Thank you for the procedure again. I have tried doing it before but didn’t get it like this. Will try it again. I am a lupus survivor and likes to eat healthy. I like trying a lot of Diys.
What abot the pulp you put aside?
I have too much of coconut pulp from making coconut milk, so I just put in my compost bin.
Hi Jeen! I’m Brazilian and I wanted to say thank you for giving us this video, where you explain exactly the cold press. The most other videos add a hot step in the process.., so thank you then! As the coconut pulp, have you thought about making coconut folur?
Thank you so much for your kind comment, I’m so glad you find the video helpful. I have tried using the pulp to make flour before, but I have too much from making coconut milk and can’t keep up with it. If I use coconut flour often enough, I might do it again.
Hi, I read through your post. I was hoping you could help me with something. I was wondering, What about making your own organic dish soap? Have you ever tried that? I’m looking for something that cleans really well but isn’t expensive to make. I think this is something you can answer. 🙂
Hi, I only got 150 ml from 3 coconuts, why is that?
Every coconut will be different, so there is no same consistency when making it. 🙂
I think your video on food pressed virgin coconut oil is the best educational film on coconut use that I have ever seen! THANK YOU!!! 😊
hi this submit very cool
So glad you think so!
Thanks. Will try