This Artisan Green Pea Cheese is amazing. If you think vegan cheese can only be made with nuts, try this. It’s simple, tasty and beautiful.
The idea of making this Artisan Green Pea Cheese idea came to me while I was using the peas for dinner. I loved the color so much and was picturing how pretty it would be with the color of soft-white mold that grows on vegan brie.
Then, I thought of the request I got from my Youtube viewers. A few of them had asked me if they could make vegan cheese from something else besides cashews and almonds, and making cheese from green peas was my new challenge. Now, I was determined to make a beautiful cheese from green peas!
Green peas are very sweet and tasty to eat fresh, so I knew the cheese should taste good. The downside of using them to make cheese is that there is no fat in them, so I use coconut oil as its fat—and it worked amazing.
As I love eating raw peas so much, it came natural to me to use raw peas to make the cheese.
So, the first attempt was making it with raw peas. I went through the whole process, the mold grew on it nicely and I was so happy.
However, the result wasn’t good. It was bitter and did not at all taste good. None of us could eat it, and I ended up putting it in the compost.
A few days went by and I still couldn’t let go of the idea, so I gave it another try. This time I steamed the peas first, and the color was even prettier. Once the peas are cooked the color turns to a beautiful bright green.
I went through the process of making it again, and this time it worked. It was very tasty and creamy. It’s hard to believe that I could make cheese with legumes!
I didn’t stop there, I remade it 3 more times after the first one. I wanted to make sure that it really tasted good. Now, I’m confident to share it with you.
Ready to make Artisan Green Pea Cheese? Let me show you how!
Ingredients for making Artisan Green Pea Cheese
- 2 cups (480 ml) plus a little bit more of fresh green peas. Note: I have never tried making it with frozen peas, but I’m pretty sure it works.
- ½ tsp (2.5 ml) salt
- 2 TBSP ( 30 ml) rejuvelac (whey from plant yogurt should work)
- 2 capsule of 30 billion CFU plant-based probiotic
- 1 TBSP (15 ml) coconut oil. Note: if you are in the cold area and the coconut is solid, make sure to melt it first.
- 1/32 tsp (small dash) of Penicillium Candidum
- 1/32 tsp (small dash) of Penicillium Geotrichum
Instructions:
- Day 1: Shell the peas and steam them until soft. (once they are cooked, the color turns bright green.) let them cool to the touch.
- Put them in a food processor and pulse to roughly break. Add salt, rejuvelac and process until the texture is smooth.
- Add probiotic powder, Penicillium Candidum, Penicillium Geotrichum and process again.
- While processing, add coconut oil and continue to process until everything combines well and is smooth.
- Put the paste in a container, pack it down, loosely cover and let it ferment at room temperature for one night.
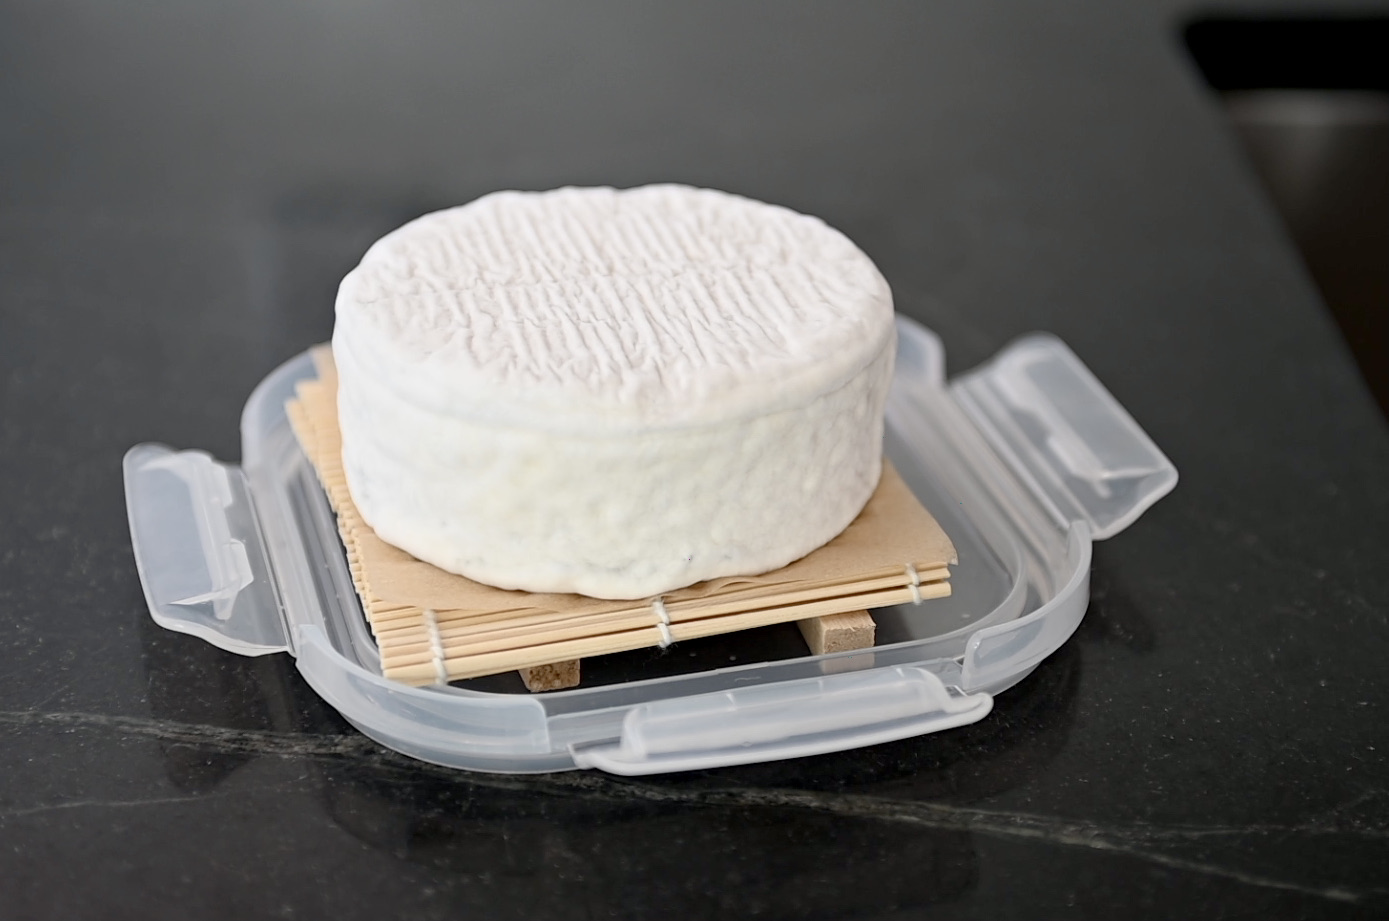
- The next morning, prepare the form. Lay 2 strips of wood, put a bamboo mat on the strips and and put a small springform dish on the mat. Note: you can create your own forming equipment, just to make sure there’s a tray to catch excess water from the cheese—in case you have any.
- Line the form with a sterilized cheesecloth and fill it with the paste. Gently pack it down to get rid of air pockets as much as you can. Fold the cheesecloth over and press it down. Loosely cover it and put the cheese in a cool area at 53 degrees F° to form for one night.
- The next day, remove the form and unfold the cheesecloth. Note: be extra careful as the cheese is still very soft.
- Sprinkle salt on evenly and use a piece of parchment paper to cover the cheese. Use one hand to cover the paper and the other hand to lift the bamboo mat and flip it.
- Dry the tray if there is excess water in it. Change a new set of dry mat, put the cheese down and remove the mat and the cheesecloth. Sprinkle salt evenly on this side too. Dry the cover if it has any moisture on it then cover and put it back to the cool area to age.
- From now until the cheese is covered with white mold, use a parchment paper and flip it everyday.
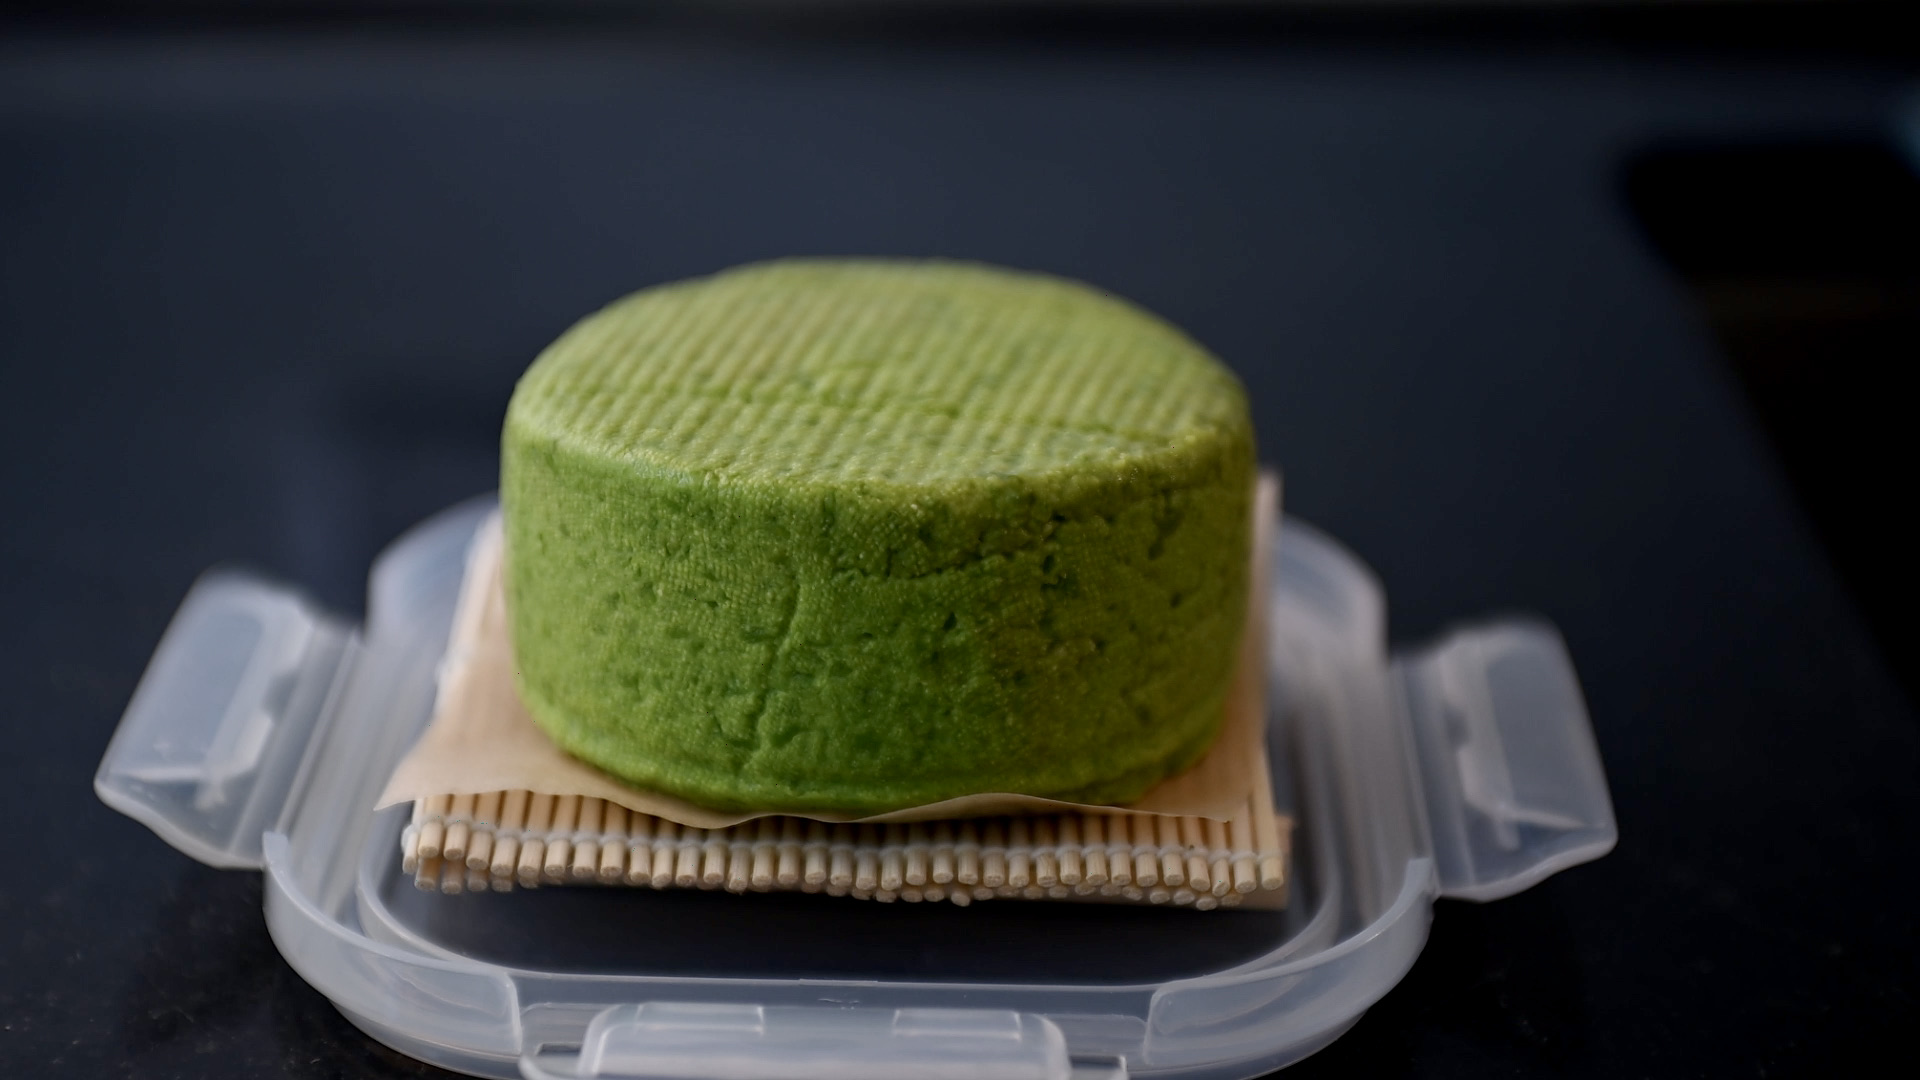
- By day 3 of aging, you should see a sign of the white mold growing, and it usually takes about 7 days for the mold to grow thick.
- When the cheese is covered with the thick white mold, it’s time for a slow aging. Wrap it with parchment paper and put it in a breathable container. Let it age in the fridge for at least 3 days then you can start eating it. You can definitely age it longer if you like to be more mature and drier. Note: don’t worry if you don’t have the same kind of aging box like mine, you can simply use a small cardboard box–it works fine.
- Enjoy!

fresh green peas
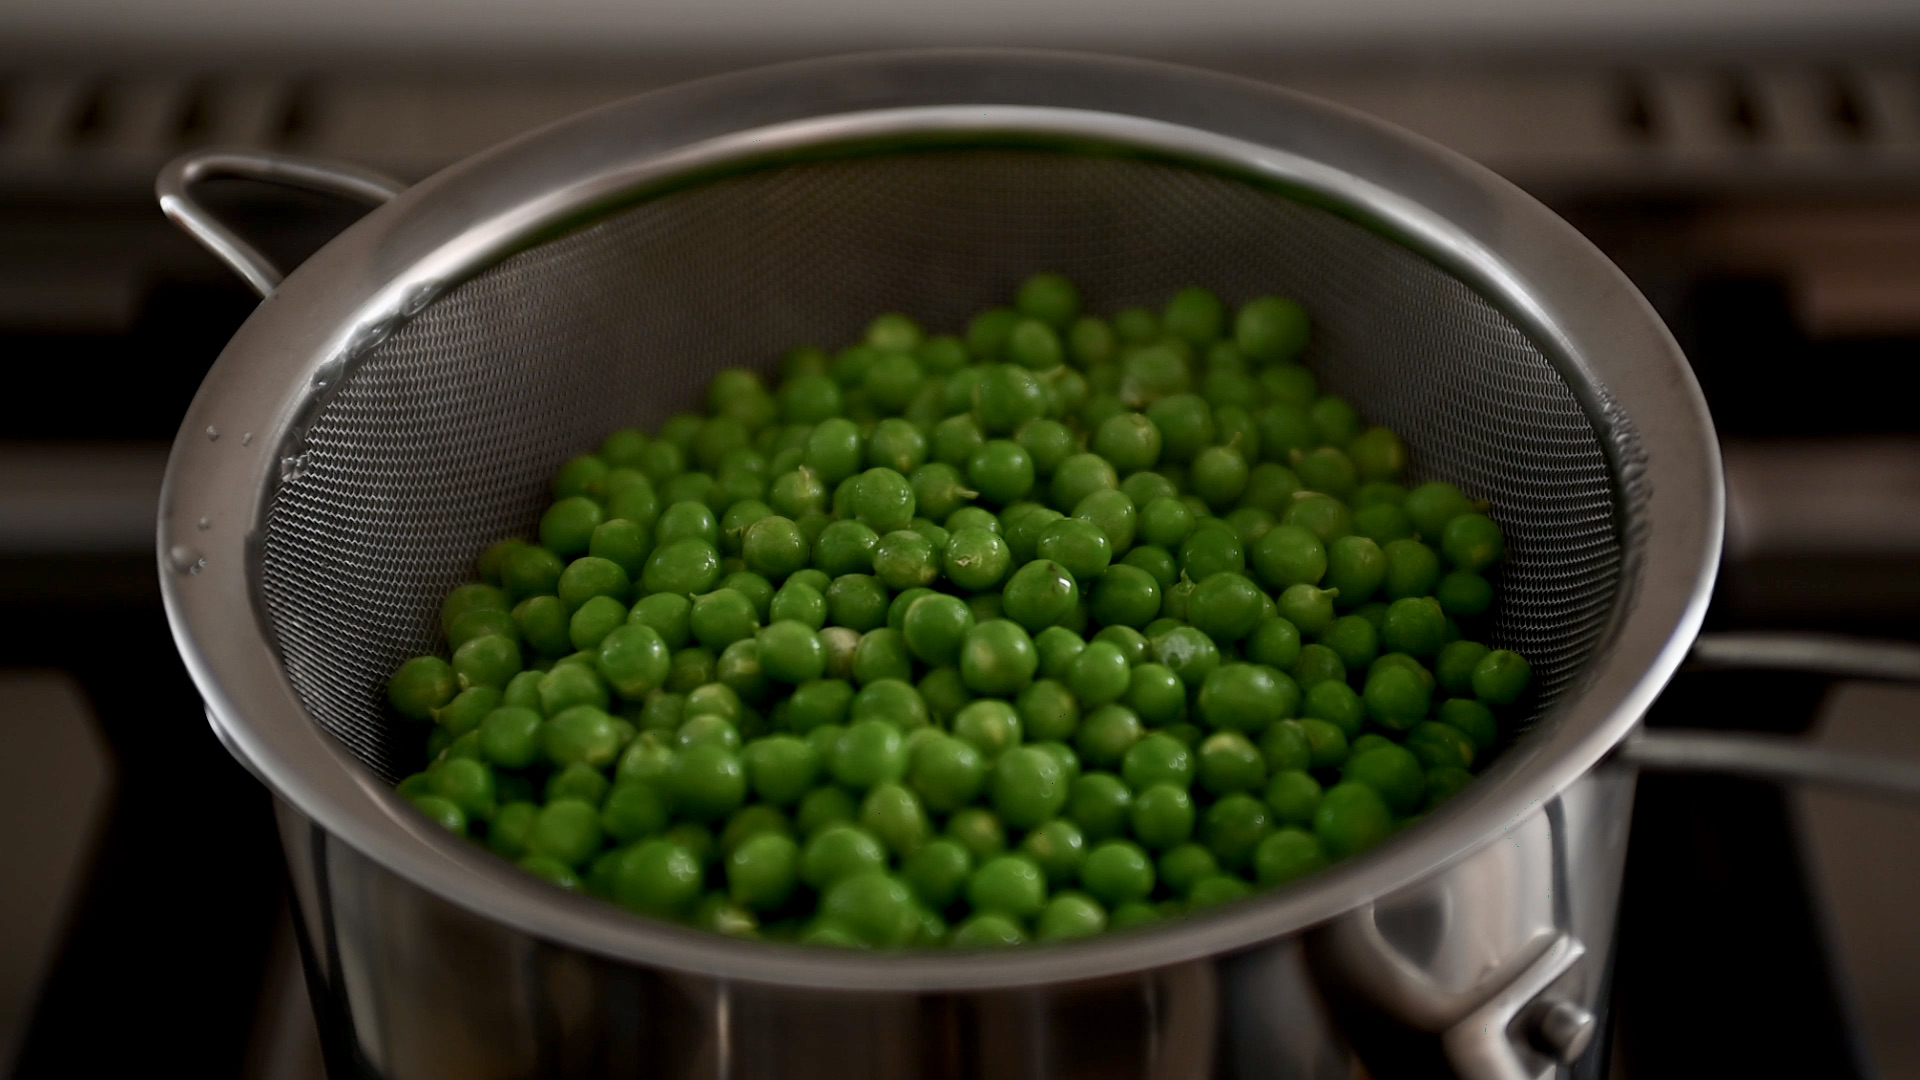
steamed green peas
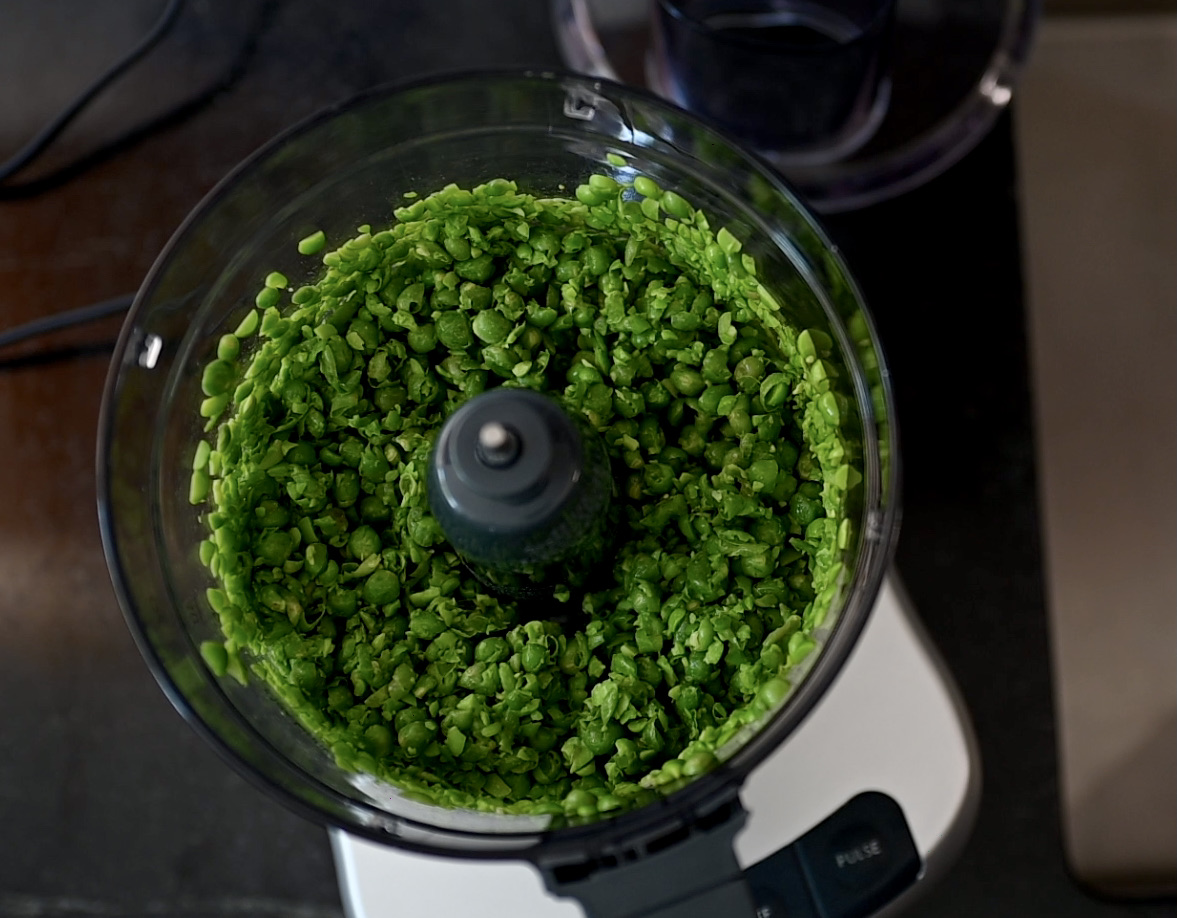
roughly smash them
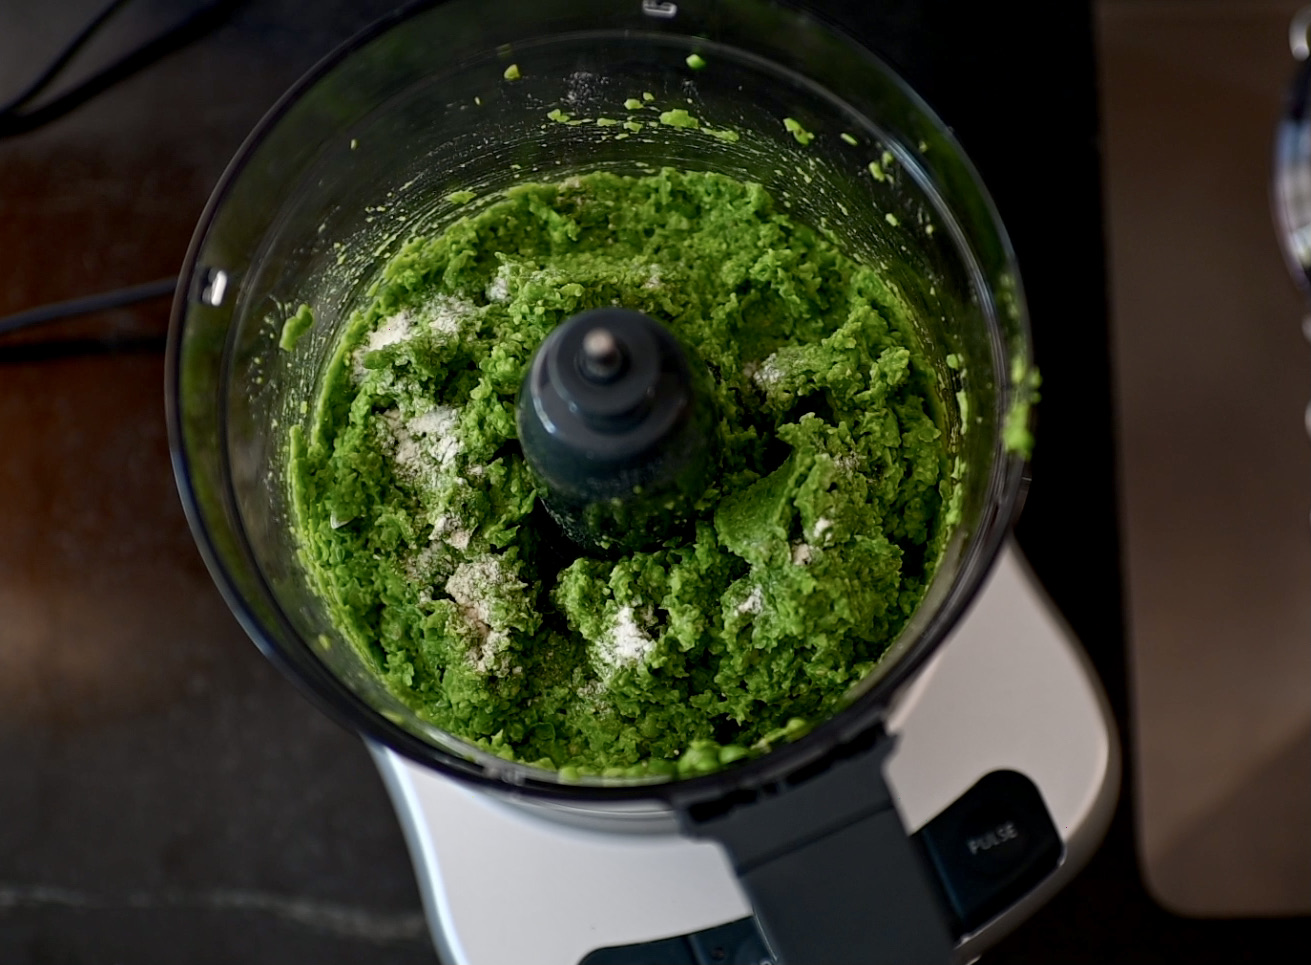
add probiotics, penicillium candid and penicillium geotrichum
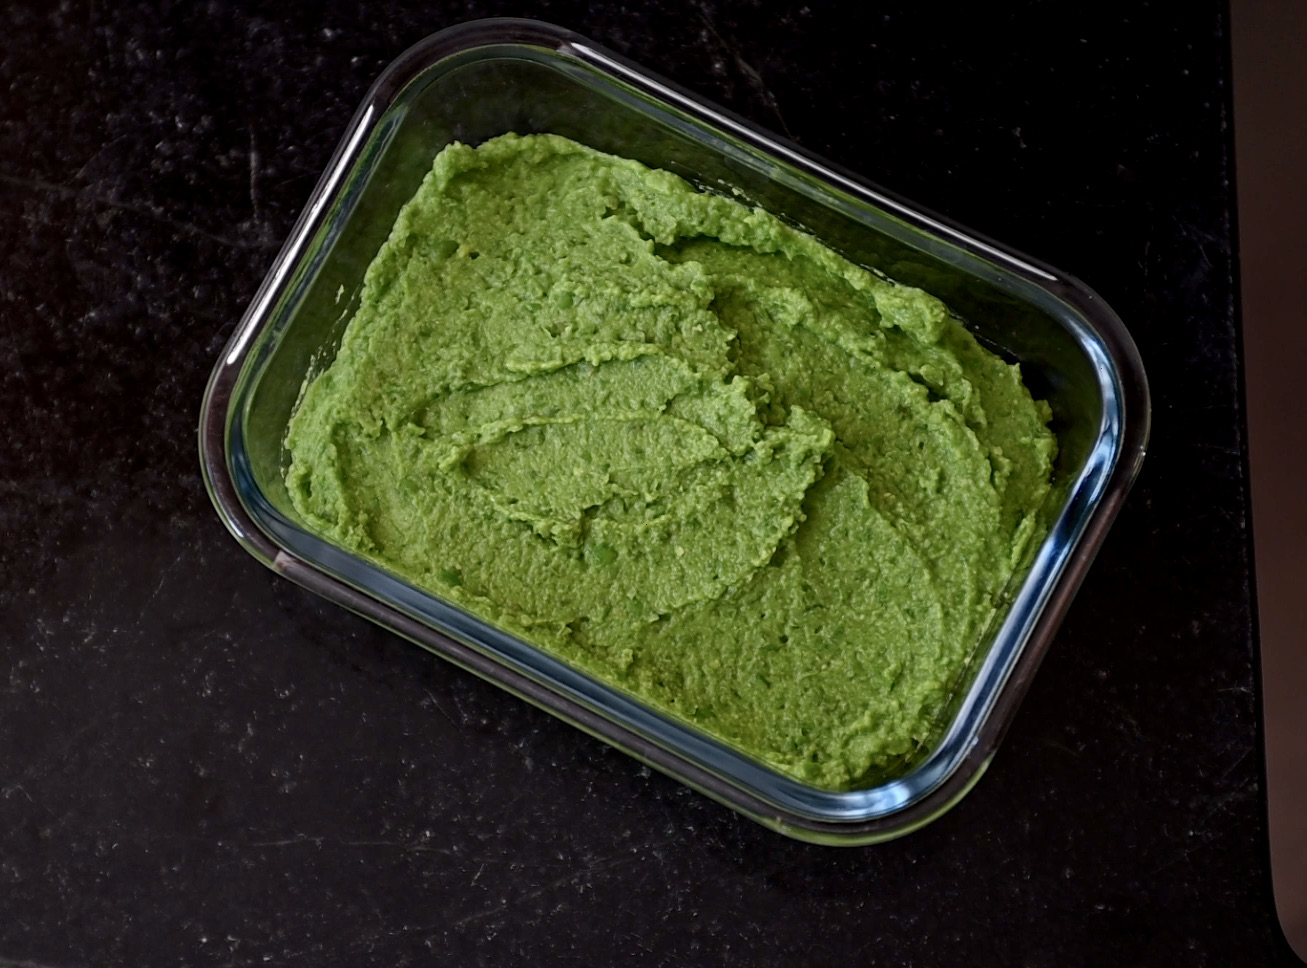
fermented green pea paste
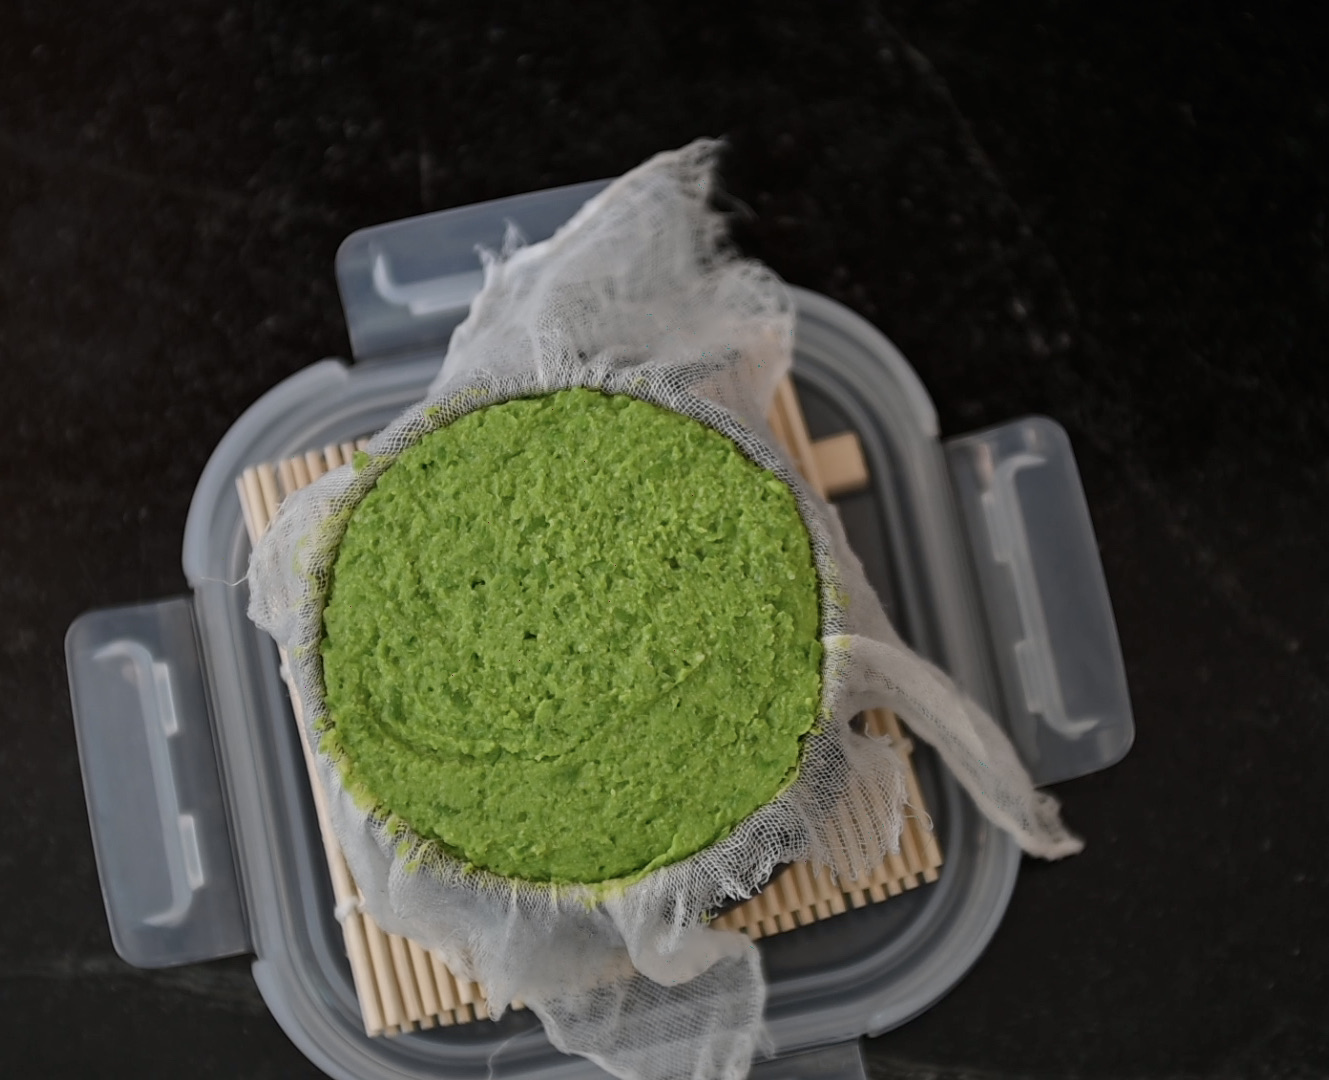
pack the form tightly
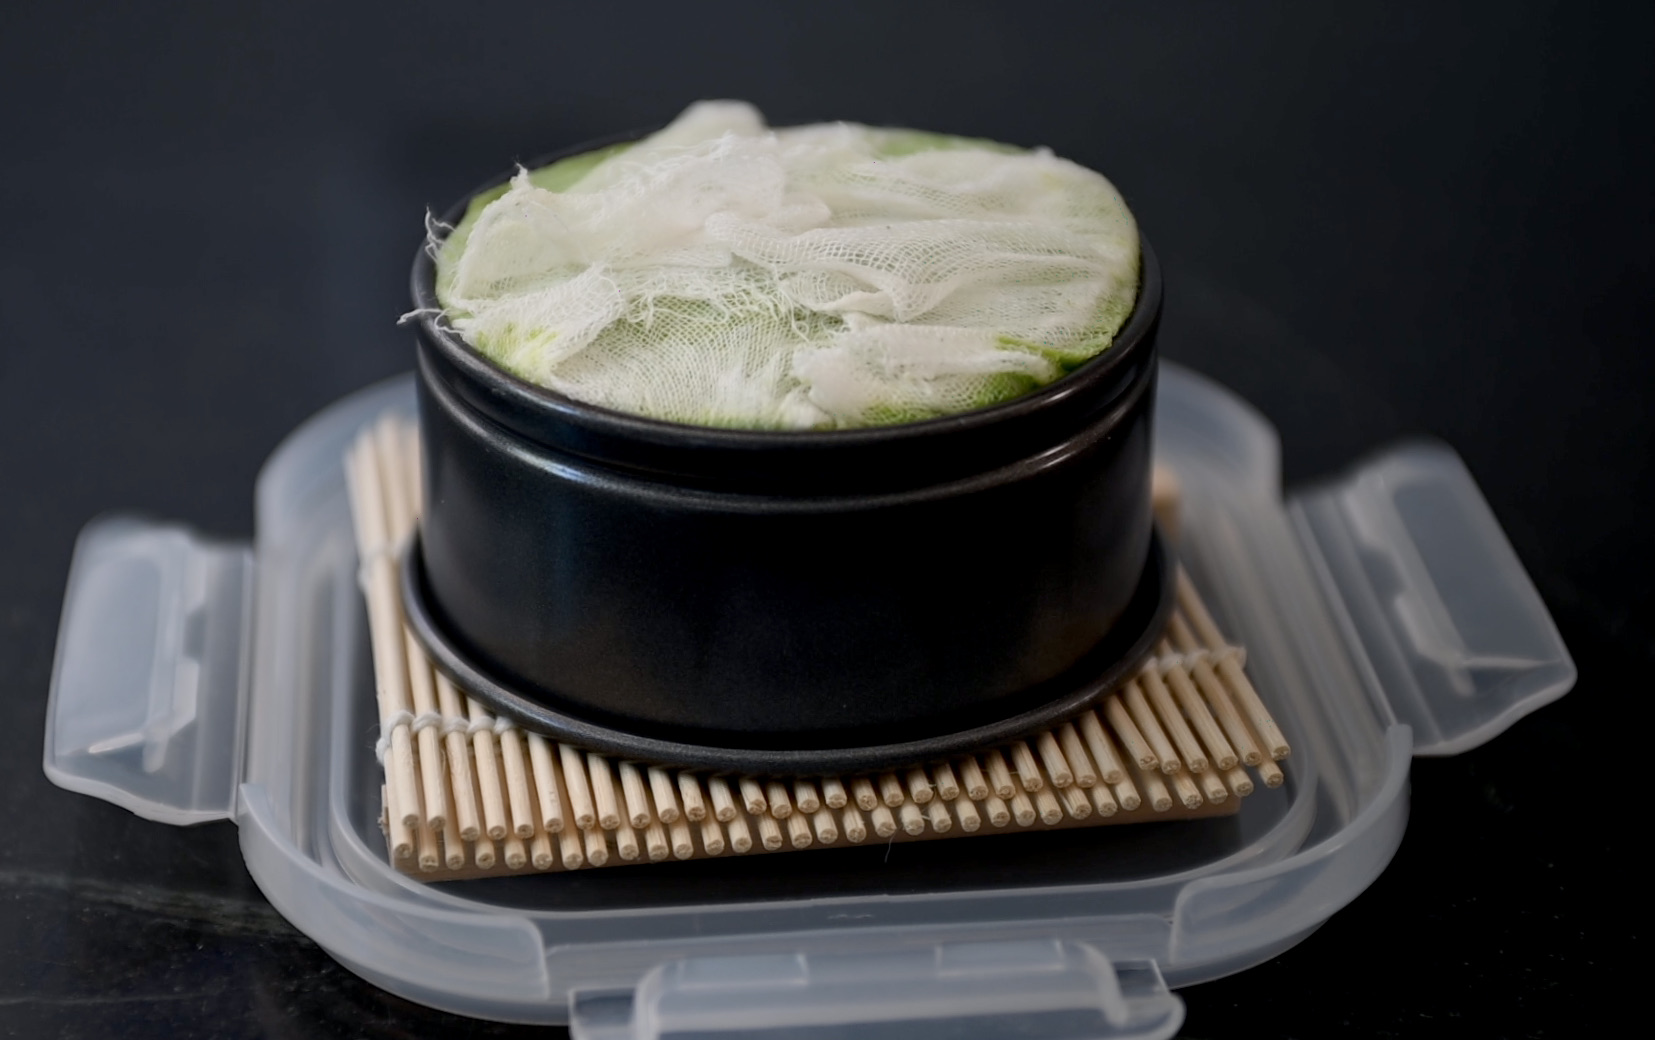
let it form for one night
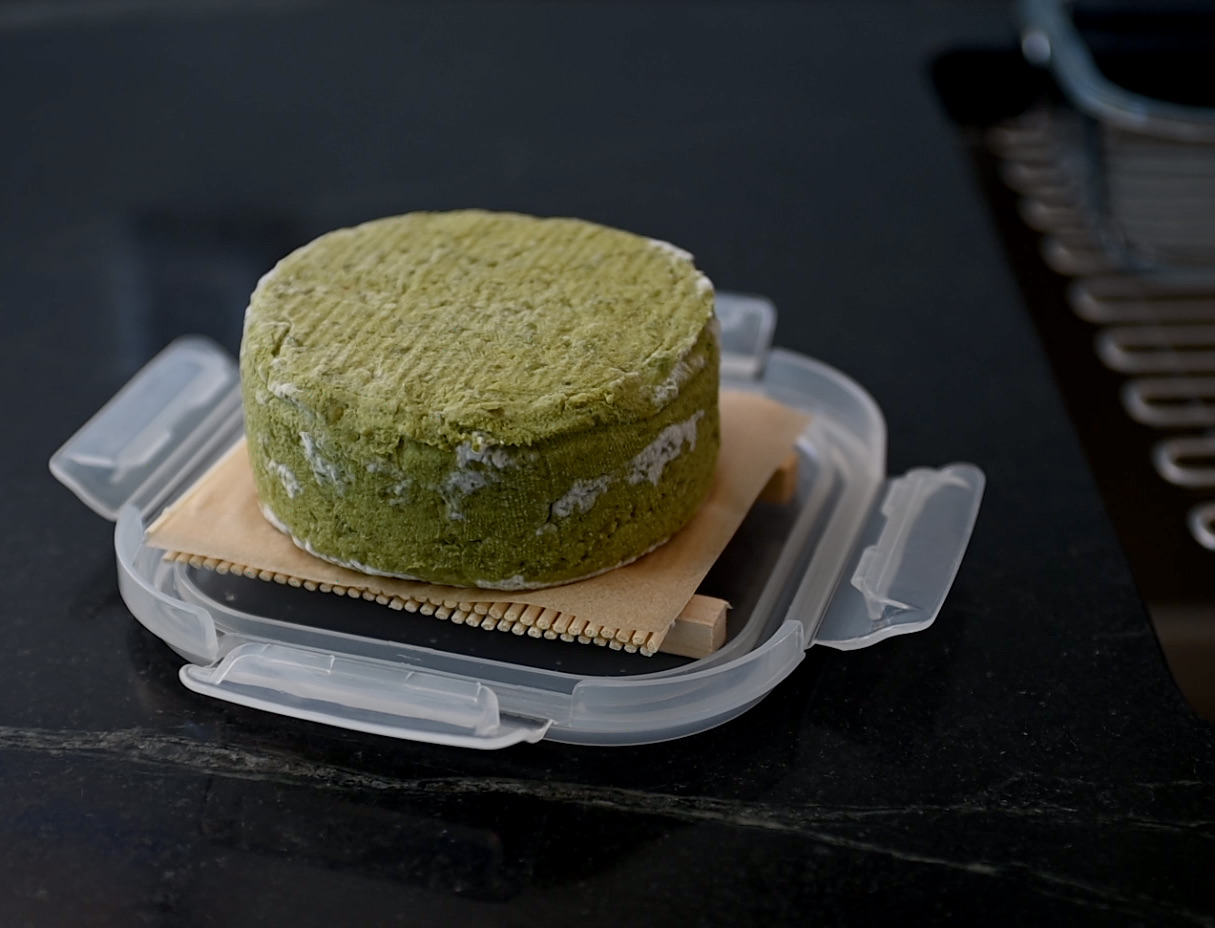
by day 3 of aging
ready for slow aging in the fridge
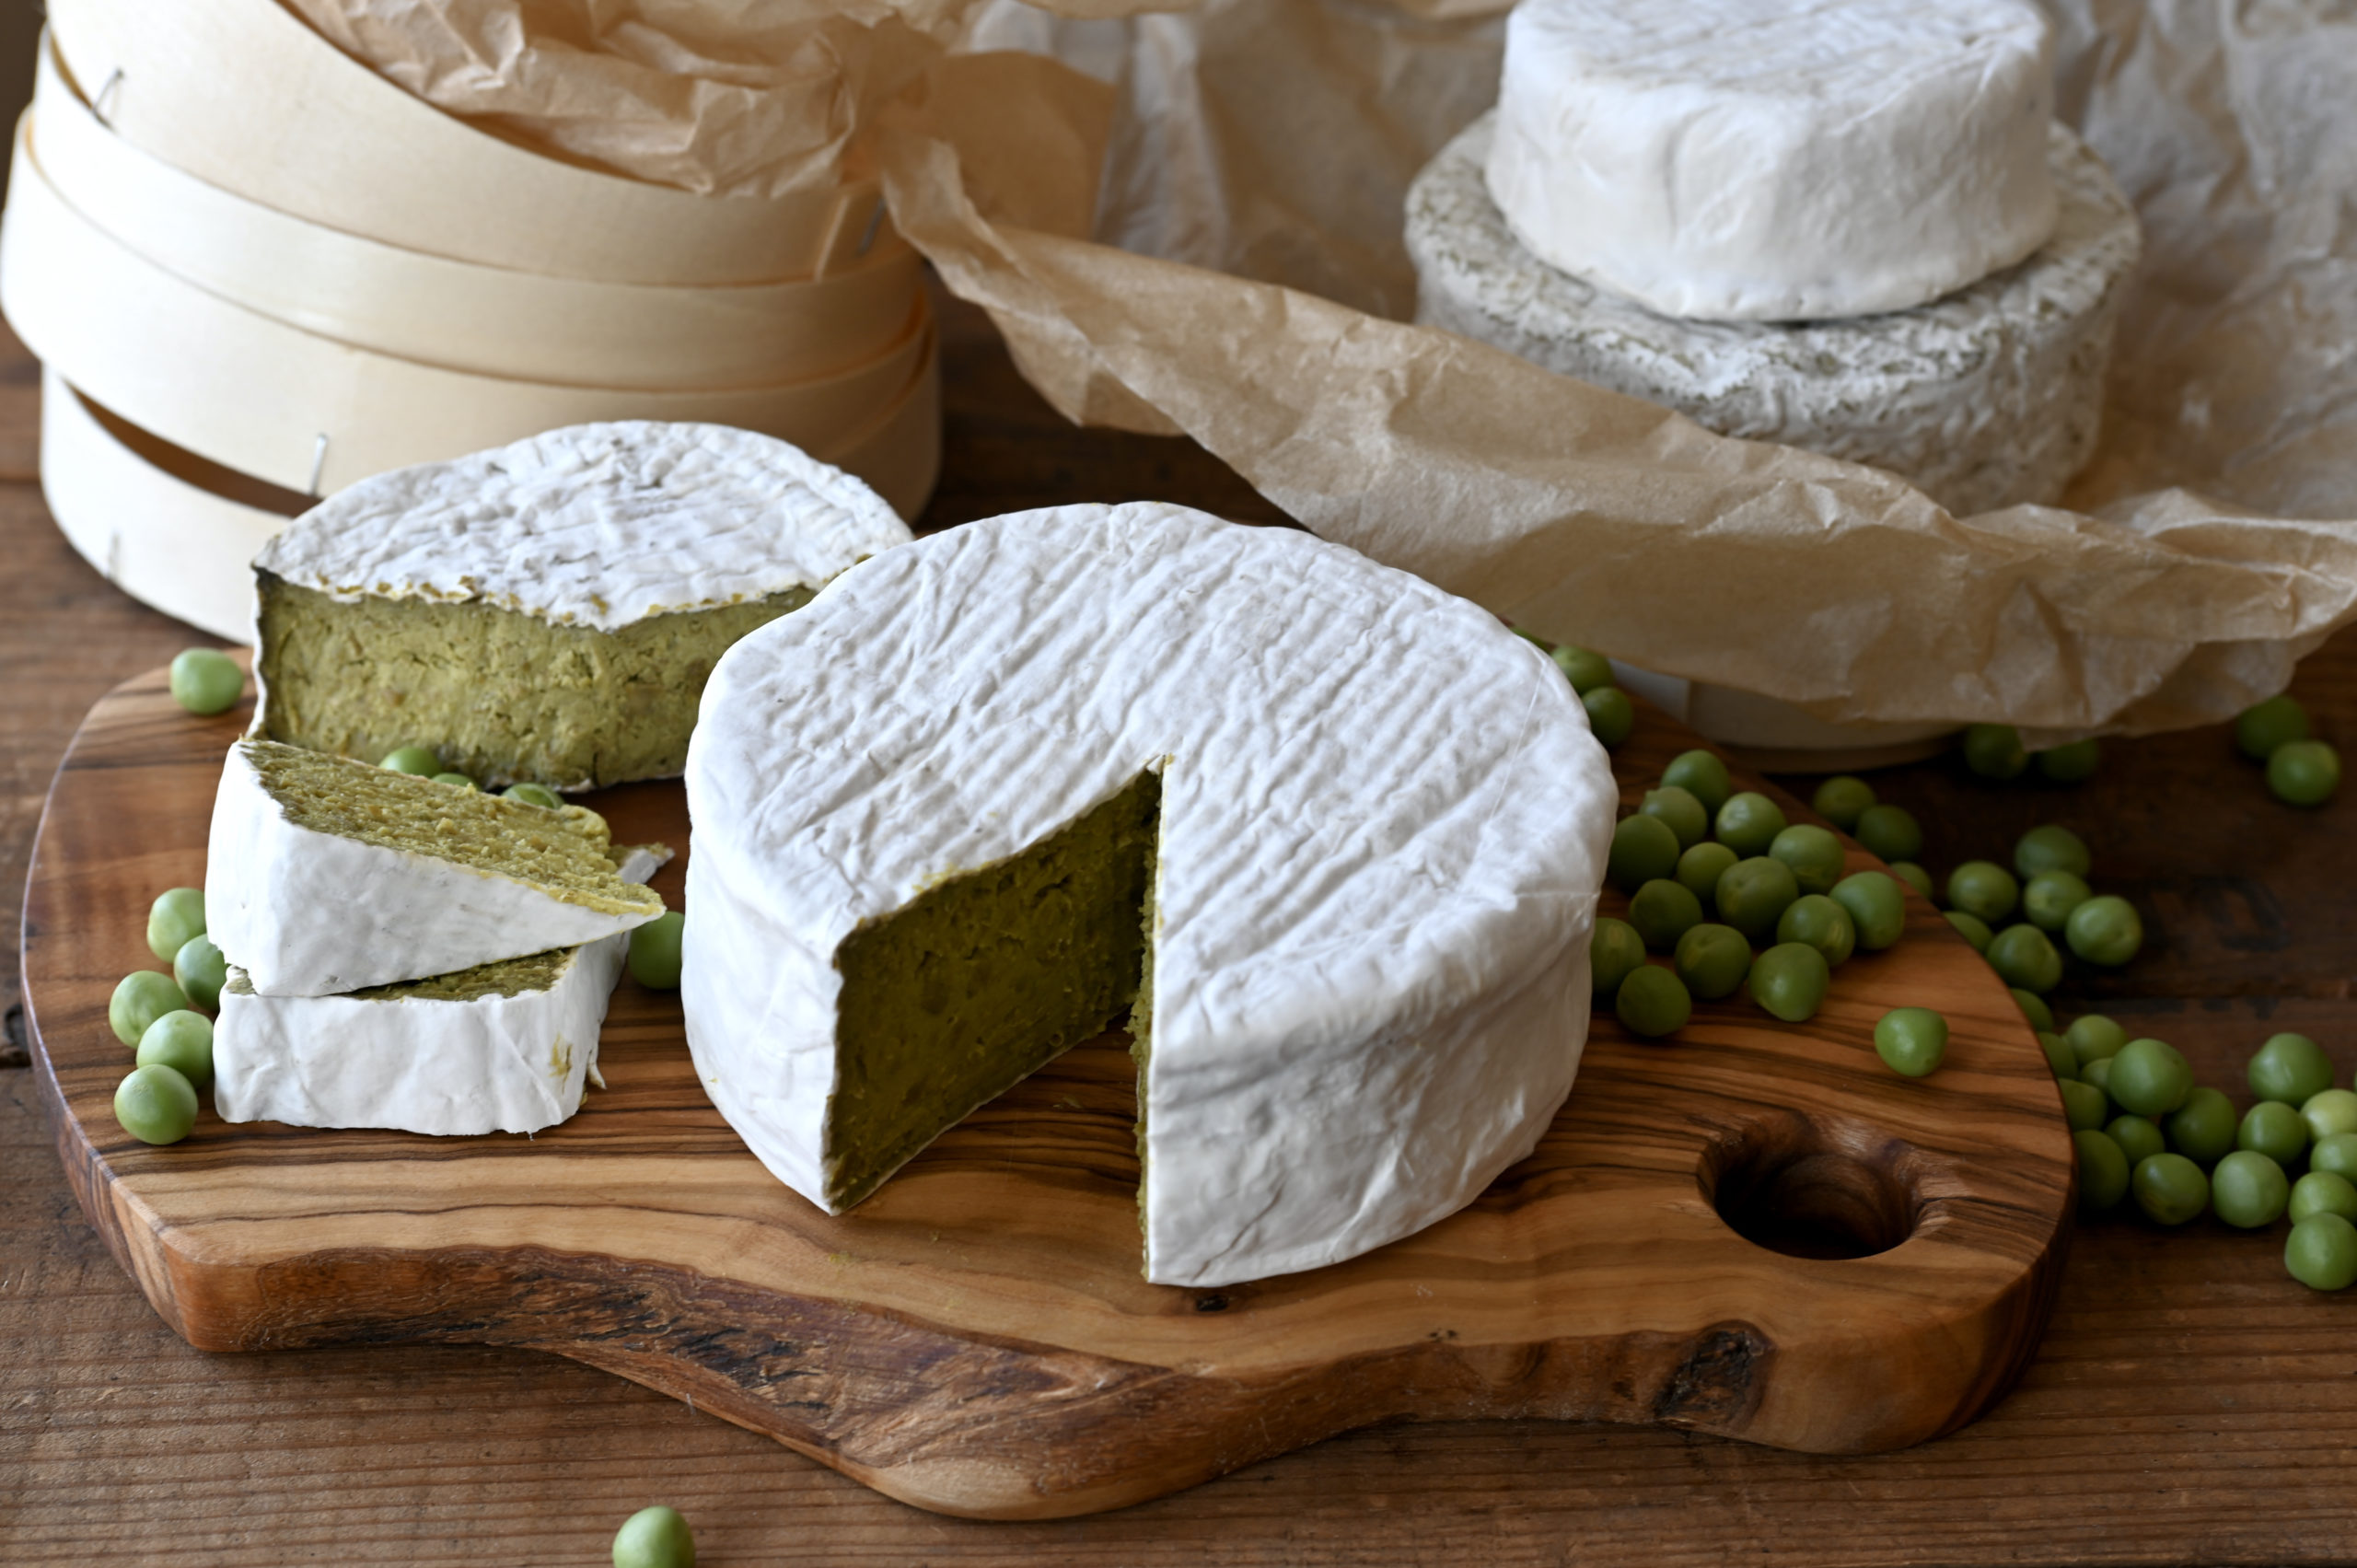
enjoy!