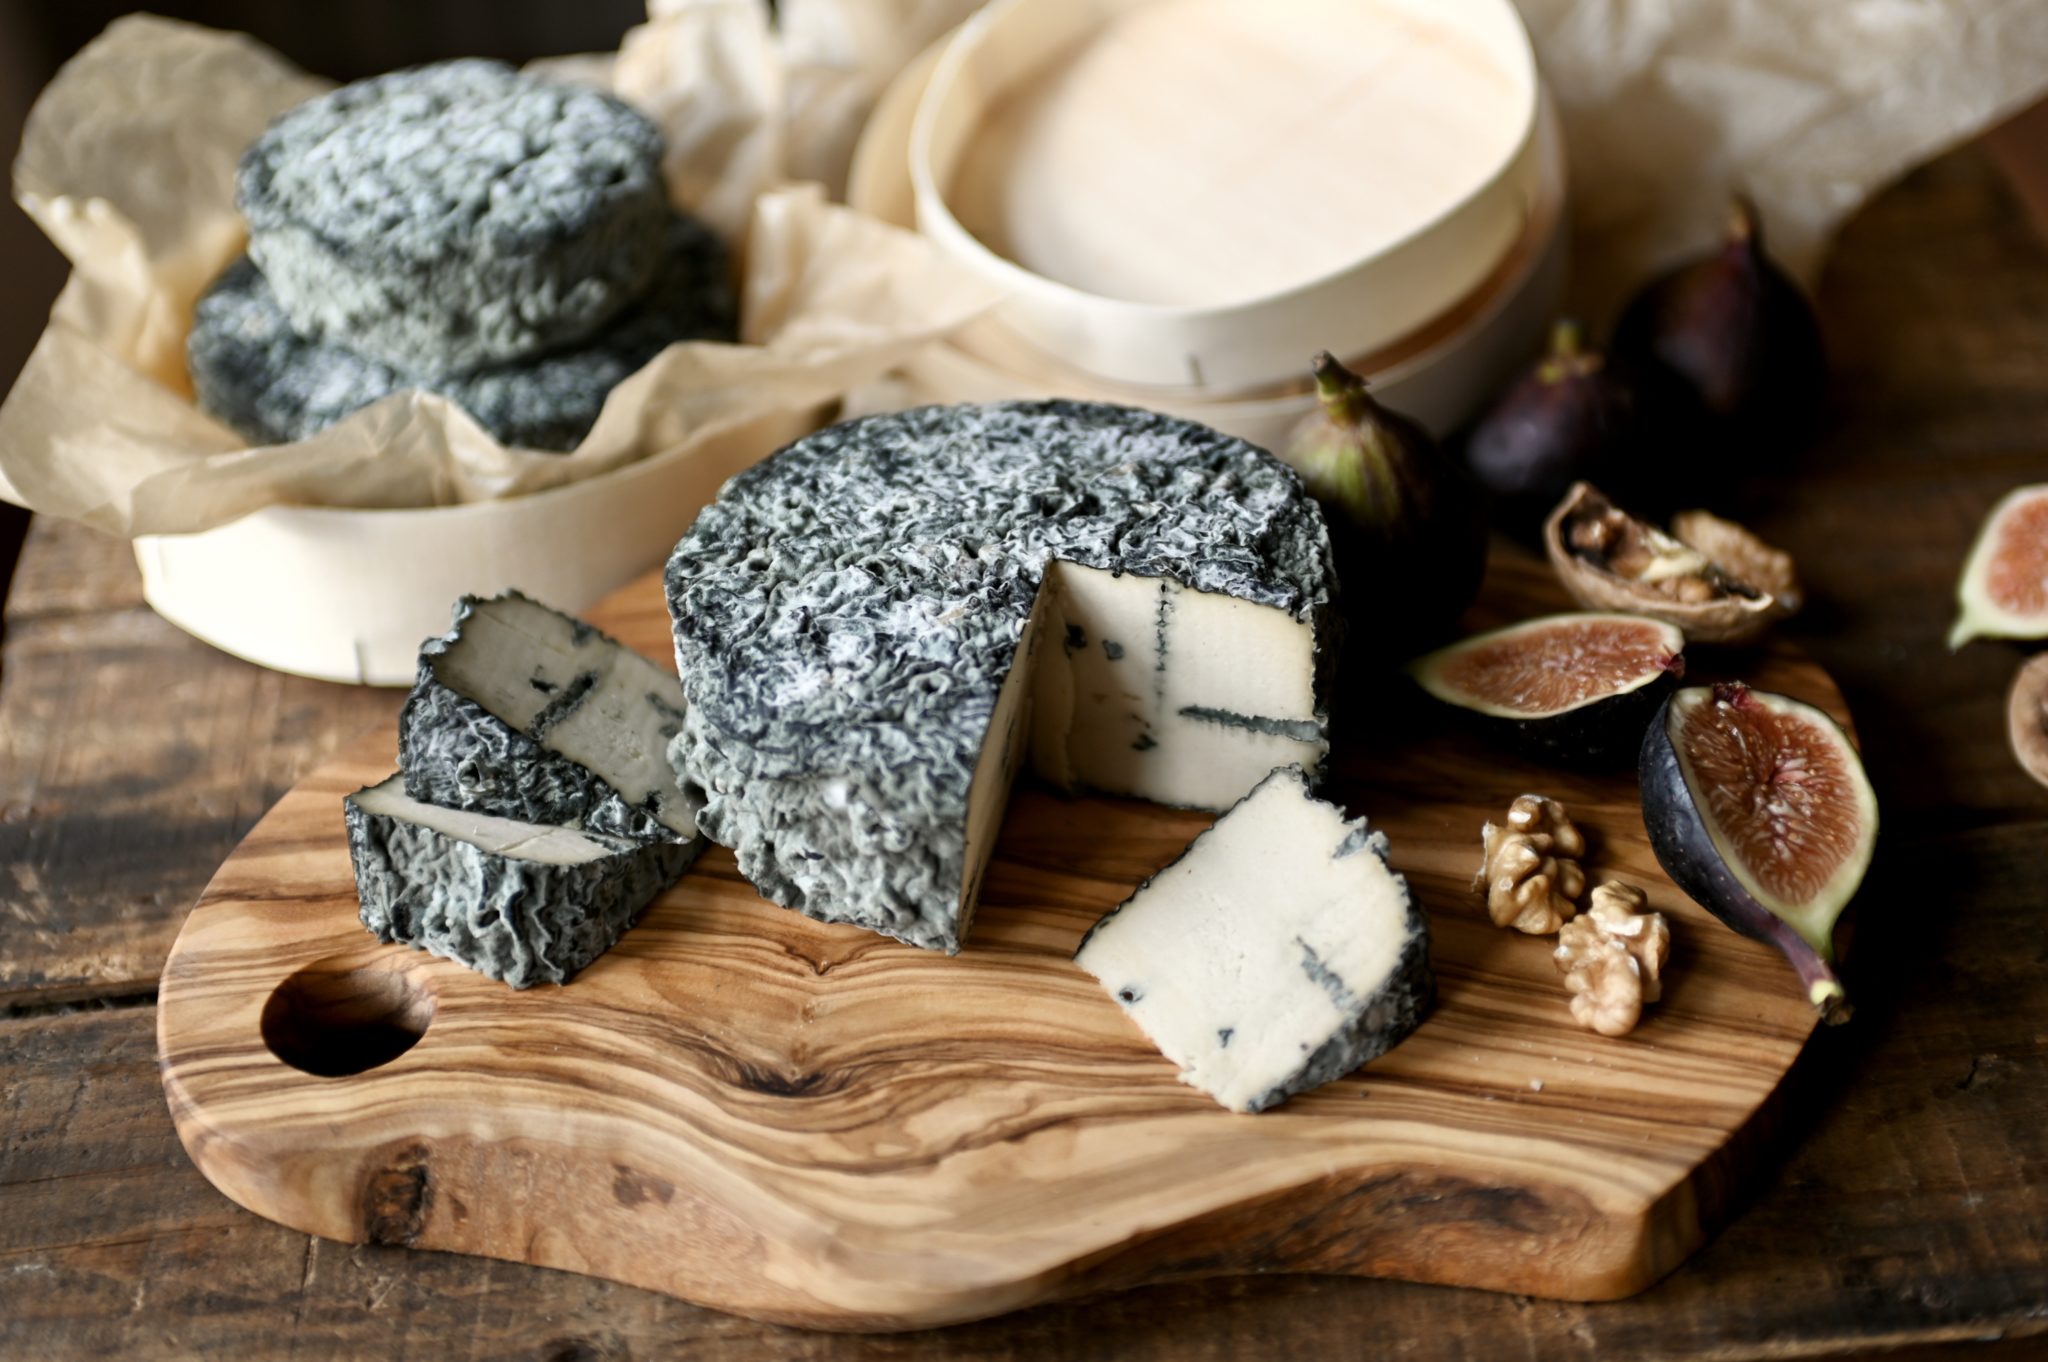
Simply ferment cashews with Penicillium Roqueforti and age it at least 4 weeks. It’s hard to believe this Vegan Blue Cheese is not made from dairy?
I stopped eating any kind of meat since 2004. It wasn’t too hard to make up my mind not to rely on other lives to live, although I still ate dairy cheese.
A few years later, as I learned more about the dairy industry, I tried to give up dairy products altogether as well.
However, giving up dairy wasn’t easy. There is dairy in almost everything, and the most difficult item to give up is cheese.
I have tried replacing my cheese cravings with commercial vegan cheeses on the market, but one I bought was so bad that I couldn’t finish it. It was highly processed with some unfamiliar additives in it–not what I wanted to put in my body.
I never thought I would be able to find anything to substitute my cheese craving until I stumbled on a website called Full of Plants and Cashewbert. I was so happy, and started to experiment and adapted the recipe and methods to make vegan camembert first.
While the camembert was in the aging process, I started to explore this Vegan Blue Cheese.
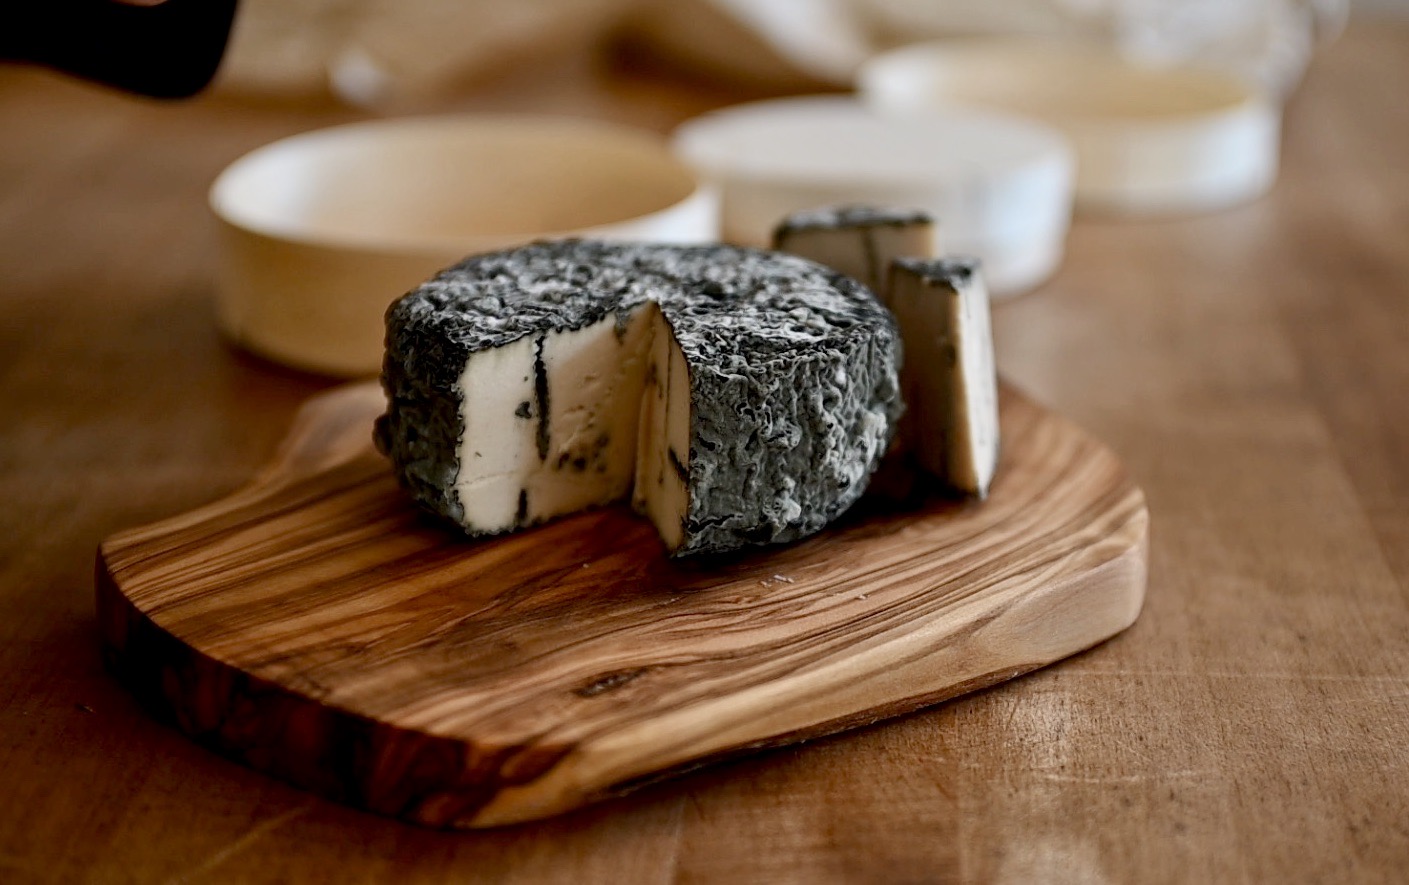
It came out delicious even though it didn’t look so appealing. Once I knew it tasted so good, I had the courage to try making it more to make sure it works and can be accessible to everyone.
The magic ingredient to make this Vegan Blue Cheese taste so good is Penicillium Roqueforti, the same kind they discovered in France a long time ago.
some mold grows inside the holes
I love good blue cheese, but never before had I wanted to know how it’s made. This time, I did some research to find out about Penicillium Roqueforti, and I was amazed–not that it’s tasty, but by fact the mold is very healthy too.
I’m very happy to know that to make this cheese taste so good, I don’t need any unfamiliar additives at all.
Besides Penicillium Roqueforti, you probably have all the ingredients for this Vegan Blue Cheese!
The process takes anywhere from 4 weeks and up. It depends on how strong you want your Vegan Blue Cheese to be. I like it not too strong, so aging at 6 weeks is perfect for me. My husband and teen daughter on the other hand like a stronger flavor, and aging it up to 2 months is what they like.
small blue veins inside
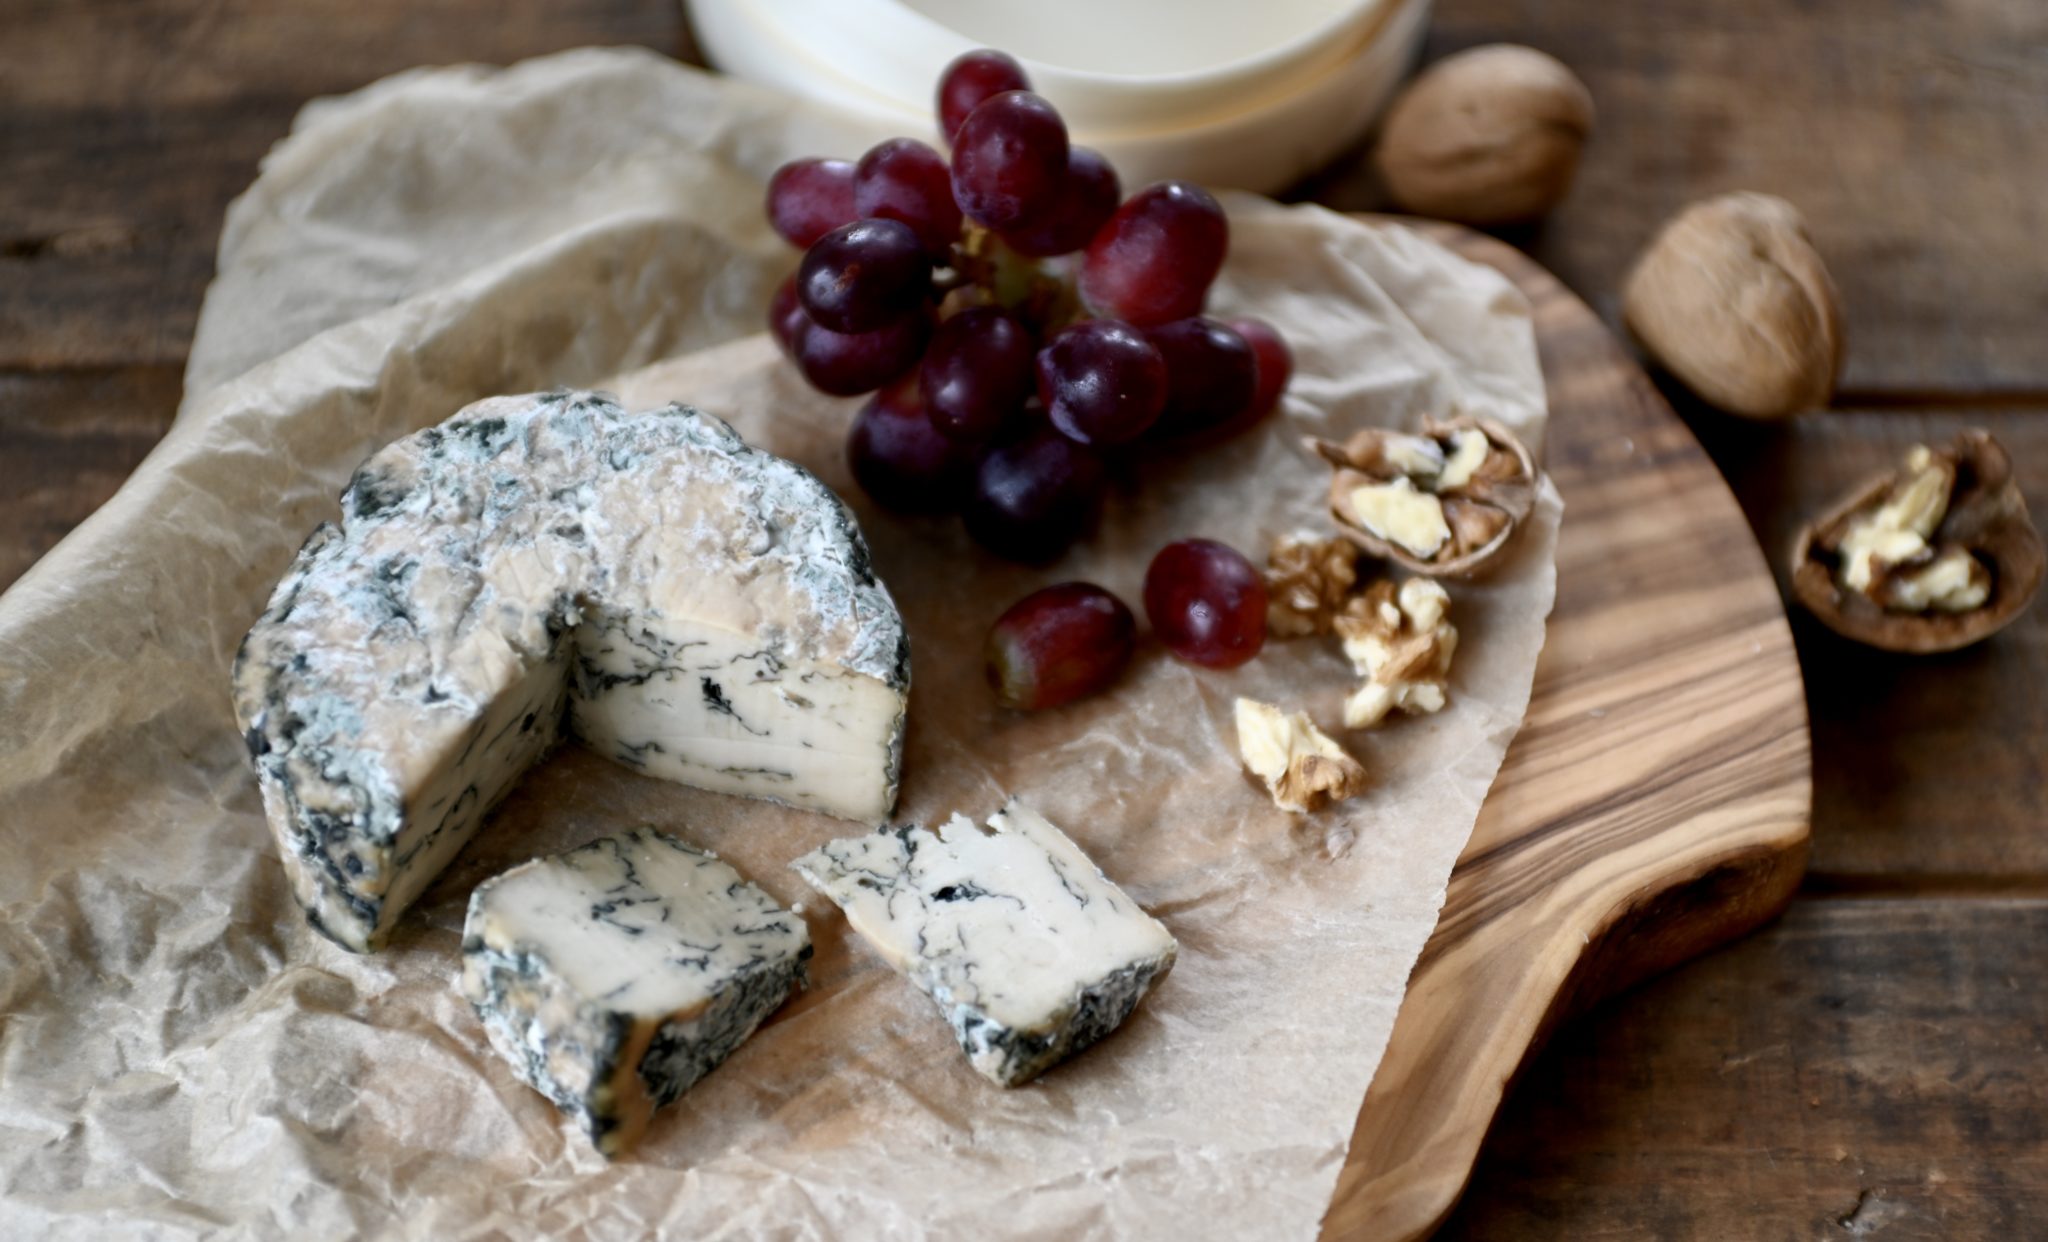
You might wonder what this Vegan Blue Cheese tastes like. Well, it’s not dairy cheese, so don’t expect the exact same taste, although my husband says the 8-week version is too good to tell the difference. However, both taste very good, and are creamy & salty.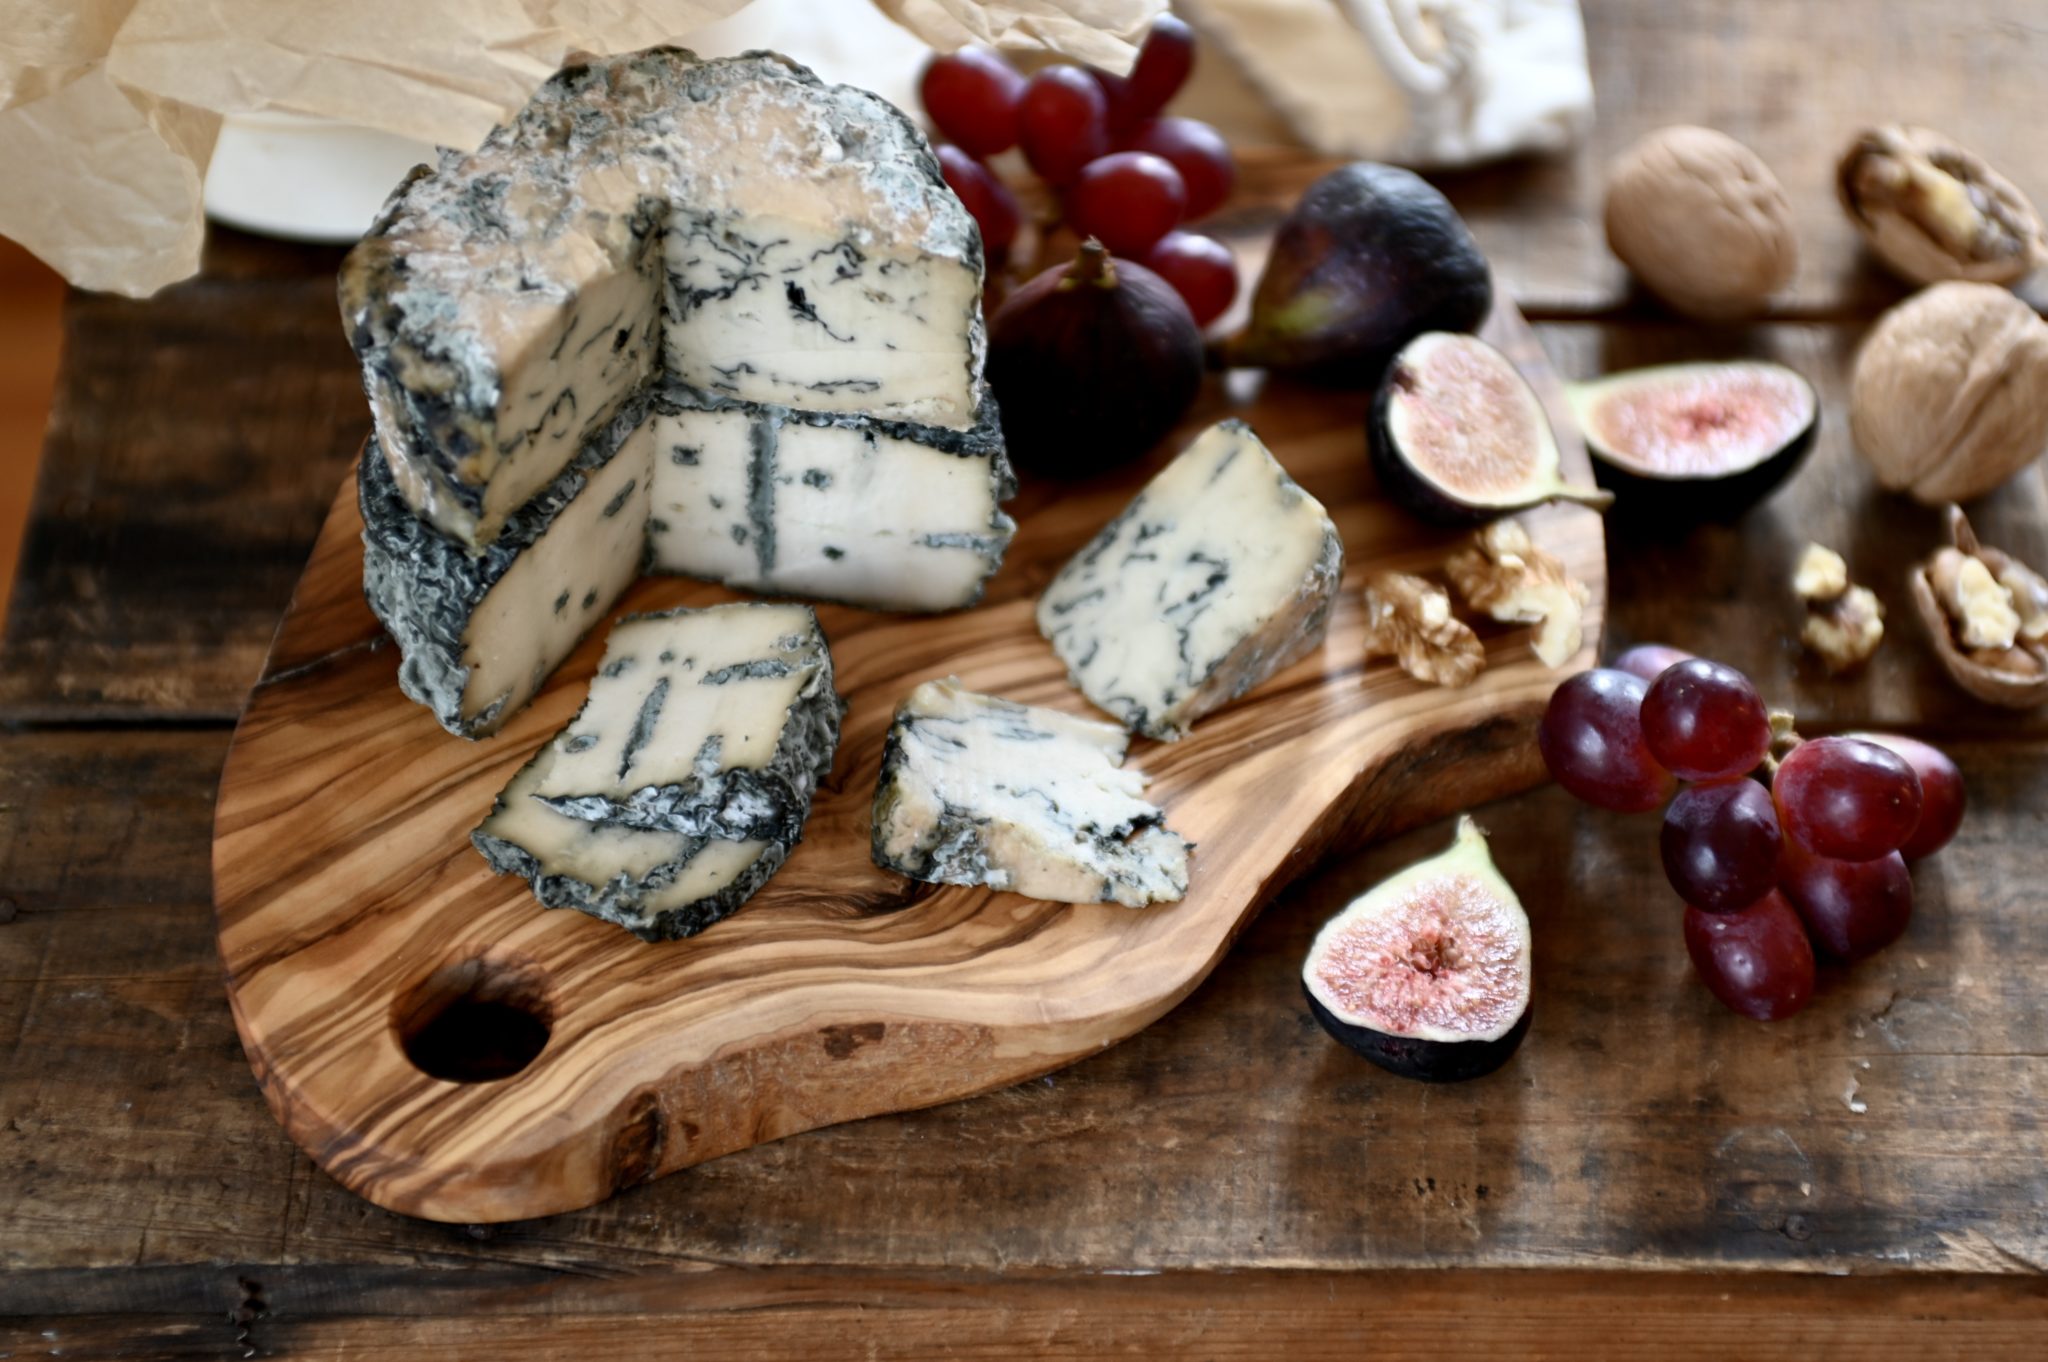
You can definitely get the real blue mold taste from the penicillium roqueforti, and best of all it’s plant based so you can eat it without guilt.
Ready to give Vegan Blue Cheese a try? Let me show you how.
Ingredients:
- 2 cups (474 ml) of raw cashews. Organic & fairtrade is preferable.
- 3 TBSP (45 ml) filtered water
- 3 TBSP (45 ml) water kefir. Other probiotic liquids such as liquid whey from plant-based yogurt should work fine. You can leave it out and use the same amount of filtered water too.
- 2 TBSP (30 ml) coconut oil
- 4 capsules of plant-based probiotic. (I use the 15 billion per capsule variety)
- About ½ TSP (5 ml) of Himalyan salt or cheese salt. The salt needs to be low in iodine.
- 1/16 TSP (dash) of penicillium roqueforti
Equipment:
Note: Use this for guidance, and feel free to use what you already have and be creative!
- A food processor or a high speed blender. Note: I tried using a high speed blender a few times and realized it was too difficult to scoop out the cashew paste. To make it easier for the blender to work properly and easy to scoop, I had to make the paste liquid enough. I ended up with another process to get rid of the liquid, and the cheese didn’t turn out the way I wanted. So, I’m happy using a food processor as it’s easier.
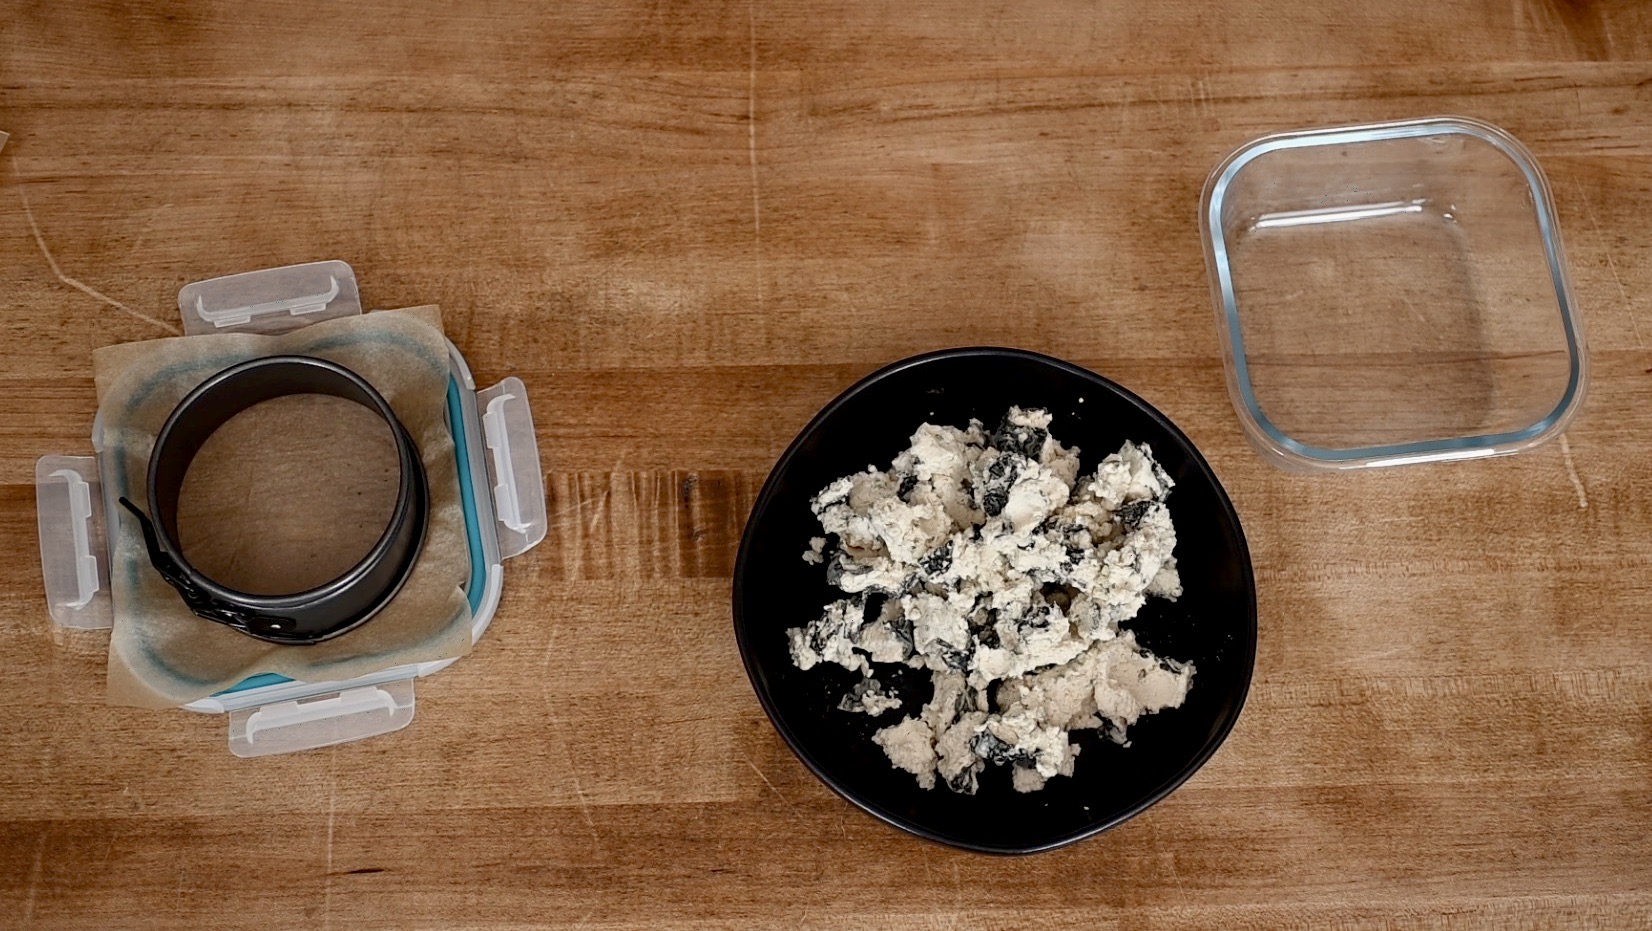
- Something to form the cheese. I use a small non-stick springform pan and a custard bowl.
- A container to use during the aging process.
- 2-3 bamboo mats or any non-metallic rack.
- Cheesecloth (washed) and parchment paper.
Instructions for making Vegan Blue Cheese:
- Prior to making it: soak the cashews in filtered water overnight.
- Day 1: dump the soaking water. Pour boiling water over the cashews and quickly drain it. Note: You can rinse with filtered water and drain it like I do sometimes.
- Put the cashews in a food processor (or a high-speed blender), add ¼ teaspoon salt, the water kefir and the filtered water. Process, scrape down, and keep processing until smooth to the texture you like.
- Open the probiotic capsules, sprinkle the powder in, and add the Penicillium Roqueforti. Process it again until everything is well combined.
- Put the mixture in a glass container, cover it lightly and let it ferment at room temperature for one night.
- Day 2: use a container’s lid, put a bottomless springform on it, then put a cheesecloth in. Scoop the mixture into it and lightly pack it down. Fold the cheesecloth over the edges and gently press it down to level the mixture. Use a container to lightly cover it, and let it sit in the coolest area of the house with the temperature is about 53-56 degrees fahrenheit (12-14° C) I leave mine in the attic and it works perfect. Let it form for one night.
- Day 3: take out the form and unwrap the cheesecloth. Sprinkle some salt on it evenly, then use a piece of parchment paper to cover it and carefully flip the cheese. Remove the cheesecloth and sprinkle salt on this side too. Cover it and put it back in the cool area. Note: the amount of salt used to sprinkle is about ¼ teaspoon (1.25 g), but don’t worry if it’s a little bit more or less.
- Day 4: You can see some blue mold starts to form, but mostly on the sides. Use another piece of parchment paper to flip it, dry the cover if there is moisture on it, and put it back to the cool area. Note: I wipe down the paper with a clean washcloth after each use and dry it. I reuse the same paper until it gets too weary.
- Day 5: There is more blue mold today. There are two methods at this point. The first one: use a clean stick to prick the cheese to make holes. Start from the top through the bottom, then from the side through the other side. Prick as many holes as you can, but make sure the cheese doesn’t collapse. Then use a piece of paper to cover and flip. Prick this side through the bottom too. Dry the cover and put it back in the cool area. The second one: crumble the cheese into small chunks, then lightly pack it in the small springform ring. Remove the form, dry the cover and put it back in the cool area. Note: this step is essential to allow air to circulate and create air pockets inside the cheese for the mold to grow. The mold is the key to making the cheese tasty..
- Day 6: There is more mold and also more moisture. Use a piece of parchment paper to cover it and flip. This time put a bamboo mat underneath to help ventilate the bottom. Dry the cover and put it back to the cool area. You can put the cheese directly on the mat, but the mold might stain it and it’s hard to clean.
- Day 7 to until the mold covers the entire cheese: repeat the flipping everyday, change the mat to a dry one if it gets too wet.
- Day 12 or so: the cheese now should be covered with the blue mold. It’s time for slow aging. Transfer the cheese to a piece of parchment paper and wrap it. Put it in a breathable container and keep it in the fridge to age for another 2 to 3 weeks. No need to flip it at this point. Note: the mold didn’t grow and cover the entire cheese with the one that crumbled. I didn’t like how it looked that much, but I covered it and let it age in the fridge anyway.
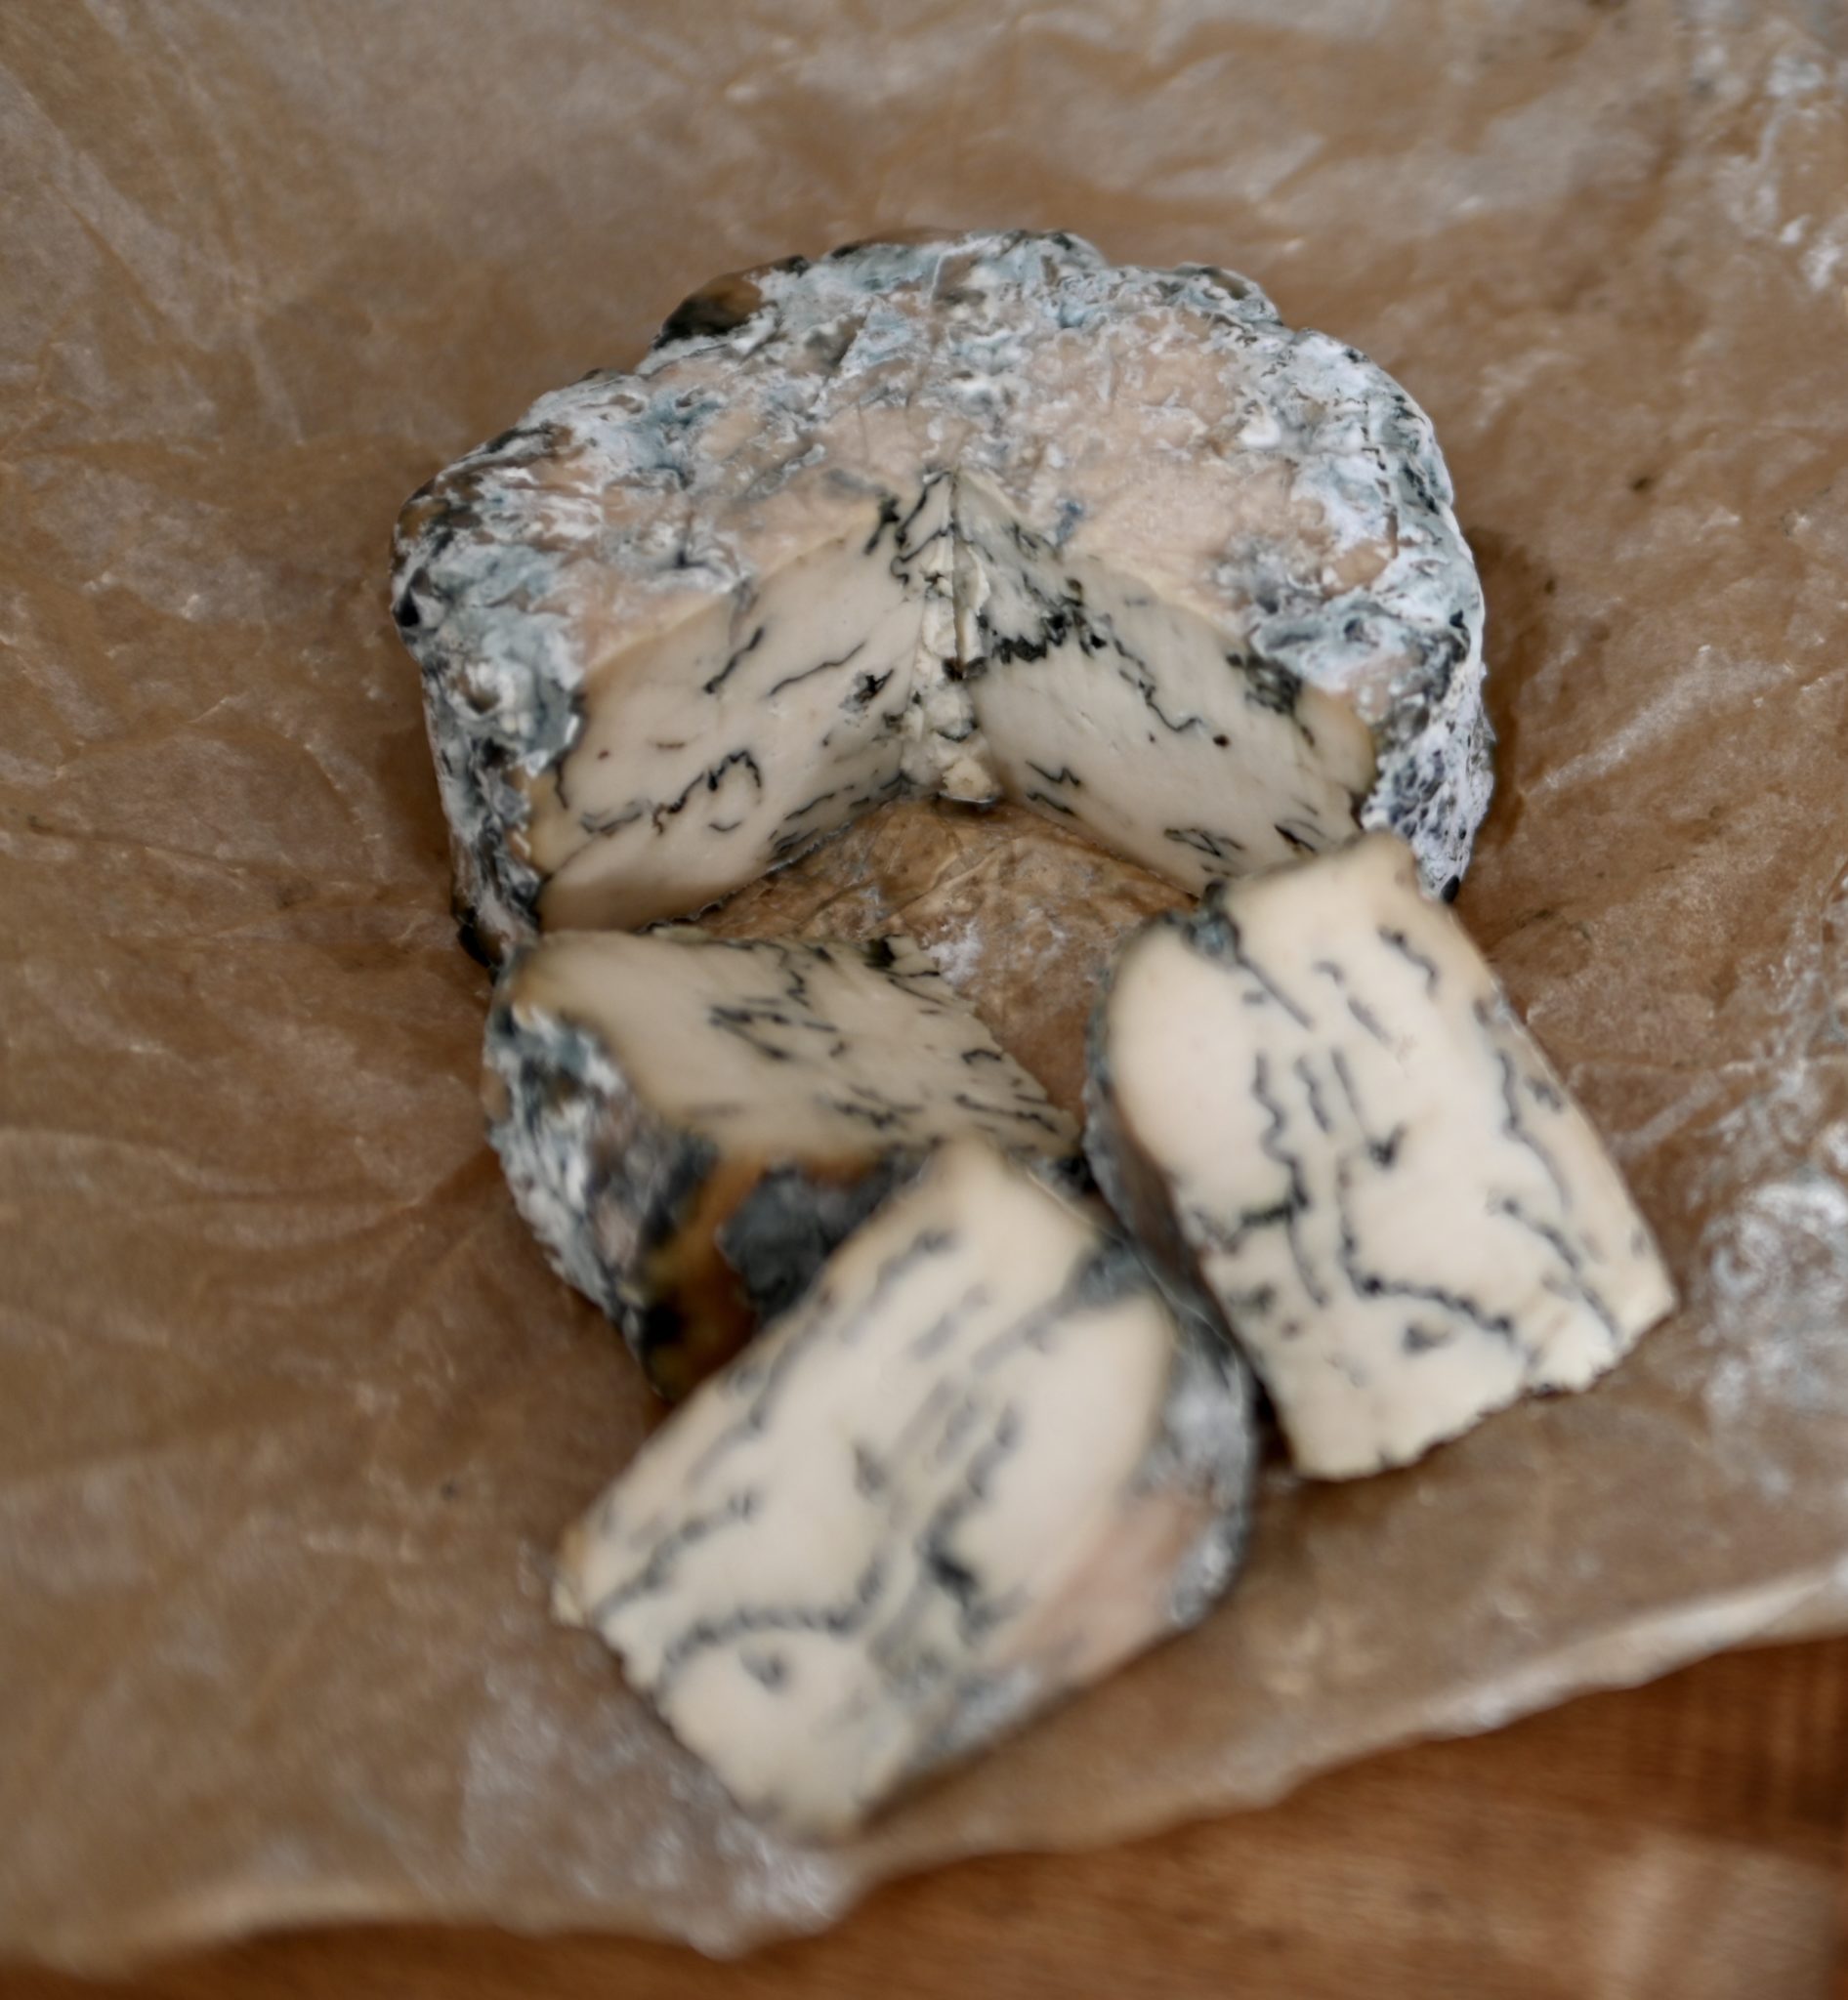
- After 2 weeks or so in the fridge: It should be ready to eat. The one with the hole pricking has mold growth inside where it got pricked. It tasted very good, and it definitely can satisfy my blue cheese craving. You can leave it longer if you like a stronger flavor. I let the crumbled one age for 4 weeks. It isn’t as appealing at first on the outside, but the smell and texture is really close to dairy blue cheese. There are also more small blue veins inside that distribute the flavor. The crumbling does a very good job creating small air pockets for the mold to grow. With a lot more mold distributed, the taste is amazing. Being aged longer with more mold inside, this one is the winner!
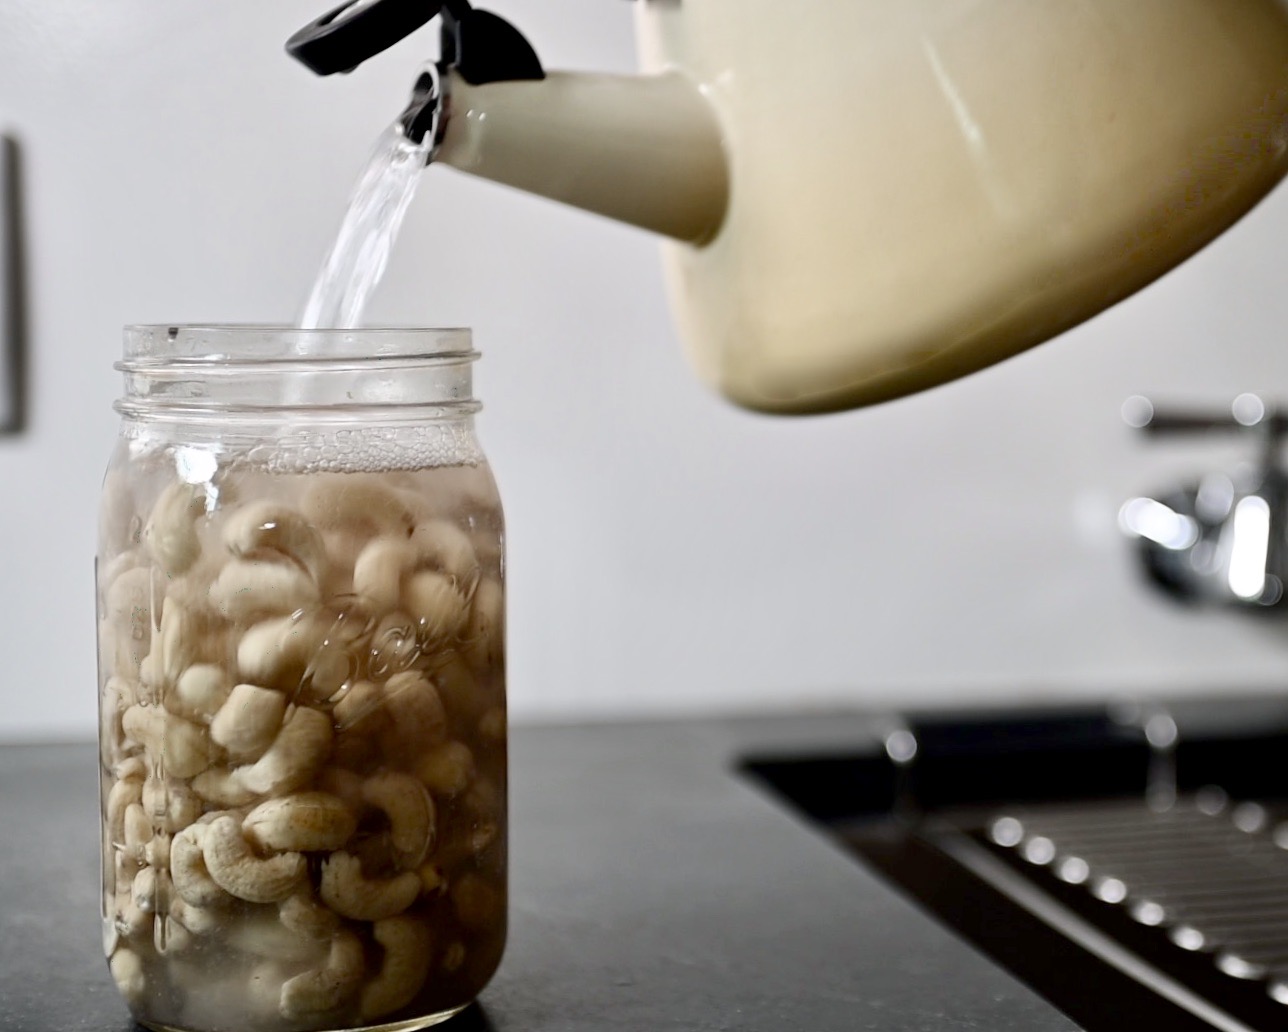
pour boiling water in and drain right away
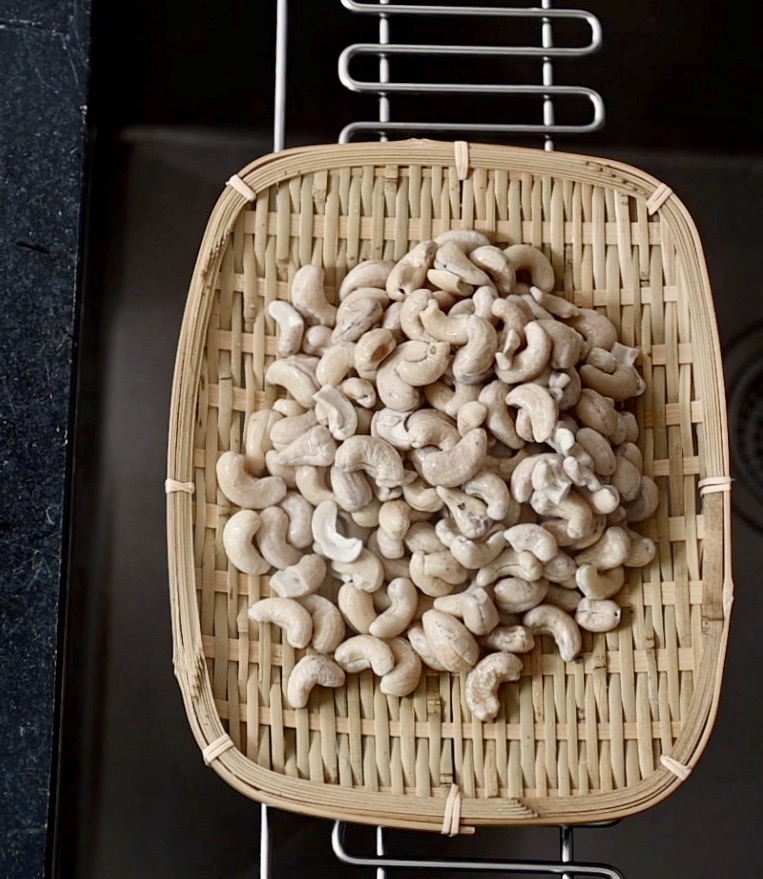
draining the cashews
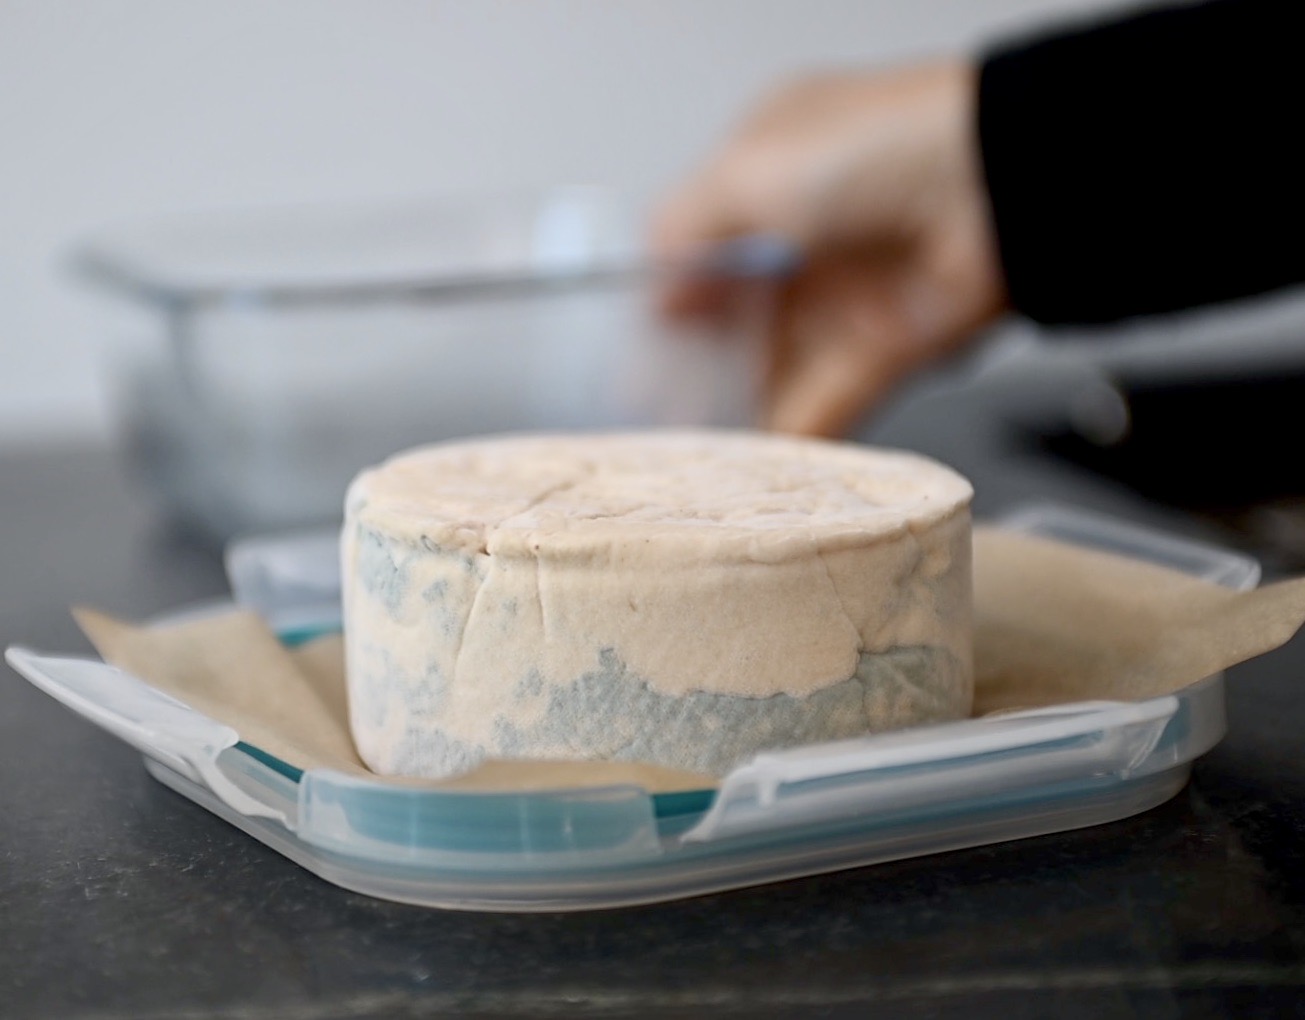
blue mold starts to grow
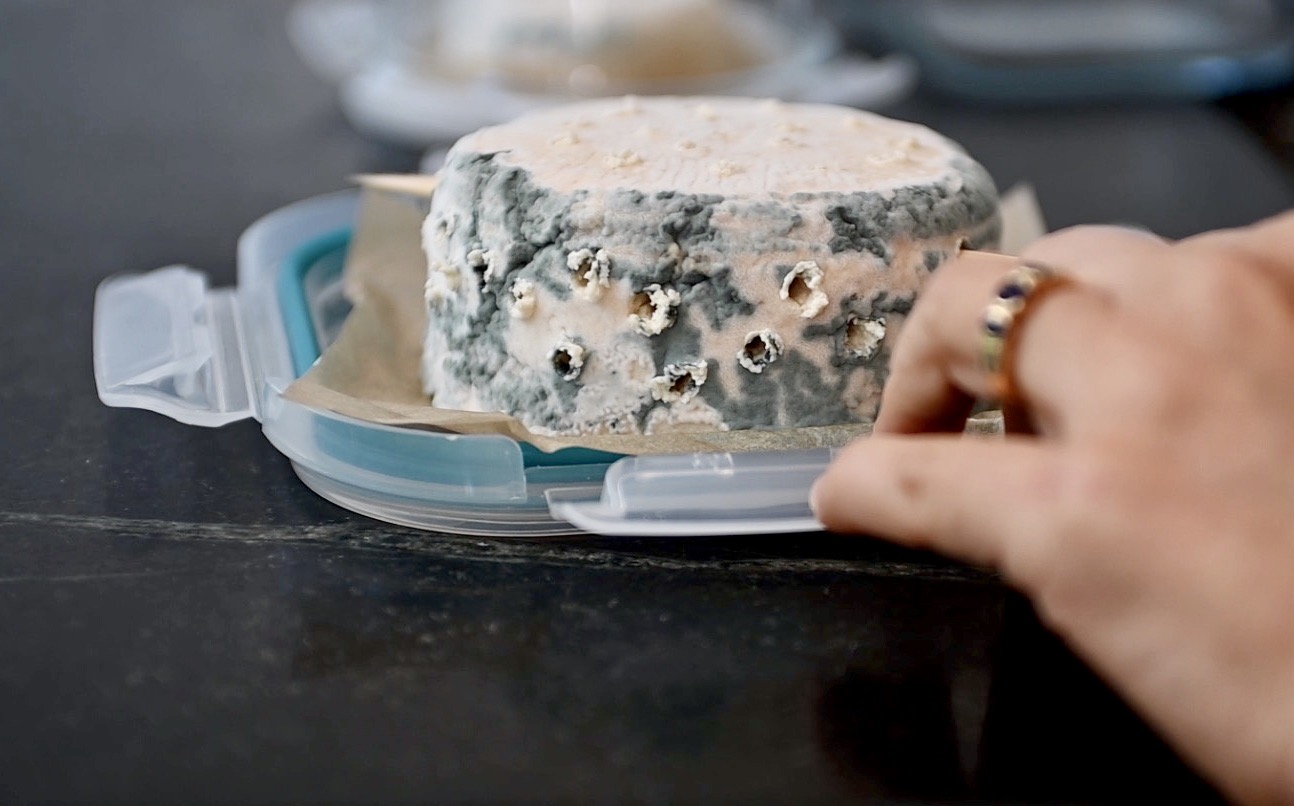
poke some holes in the cheese
crumble the cheese to make air pockets
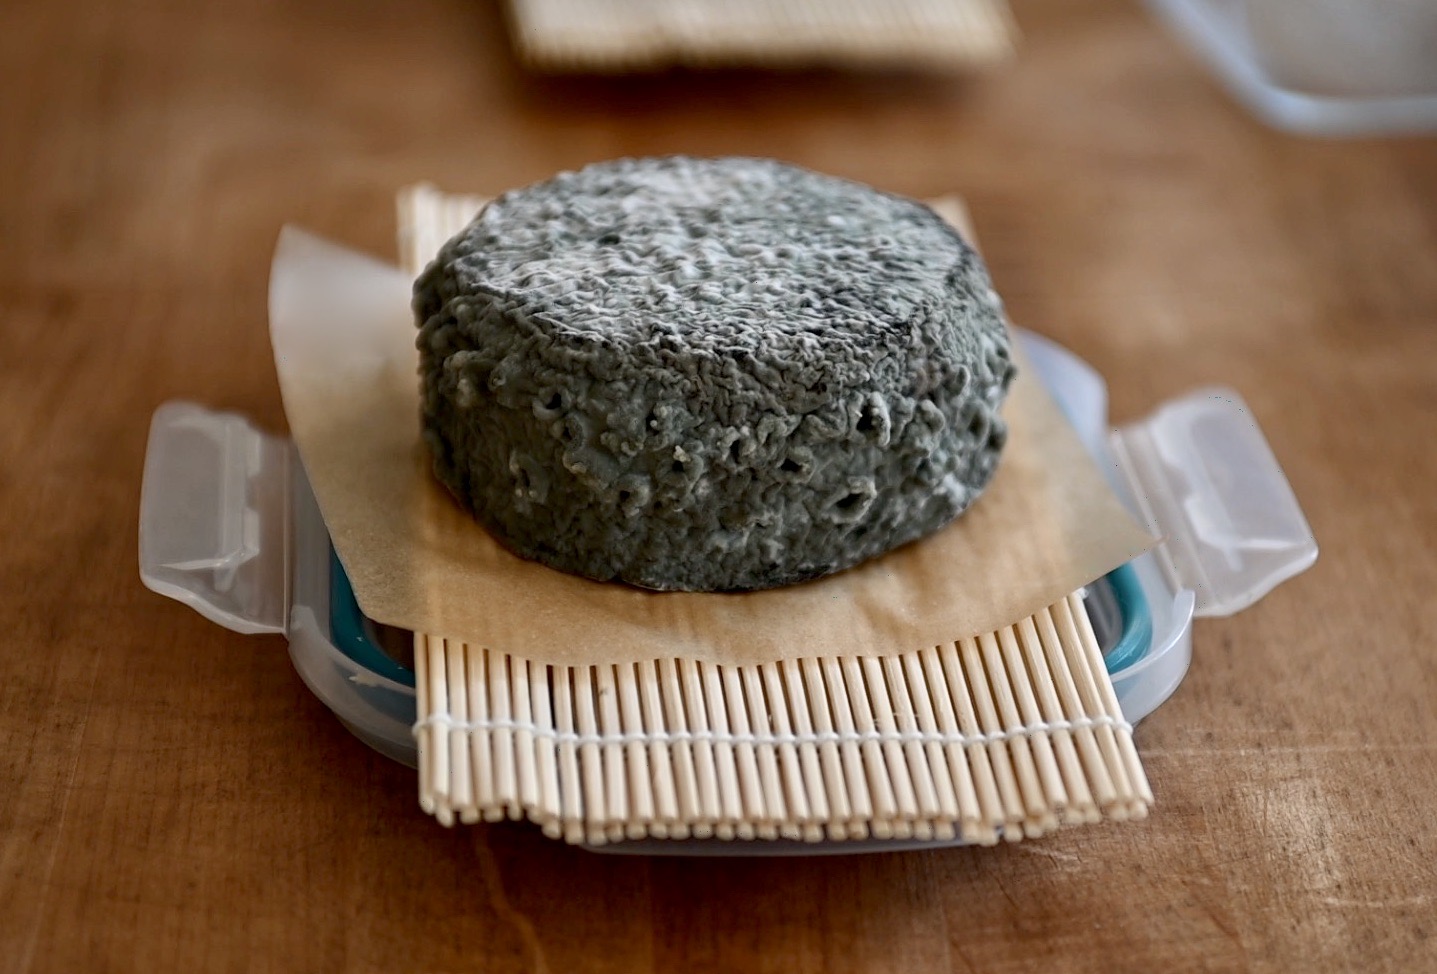
the cheese is covered with blue mold
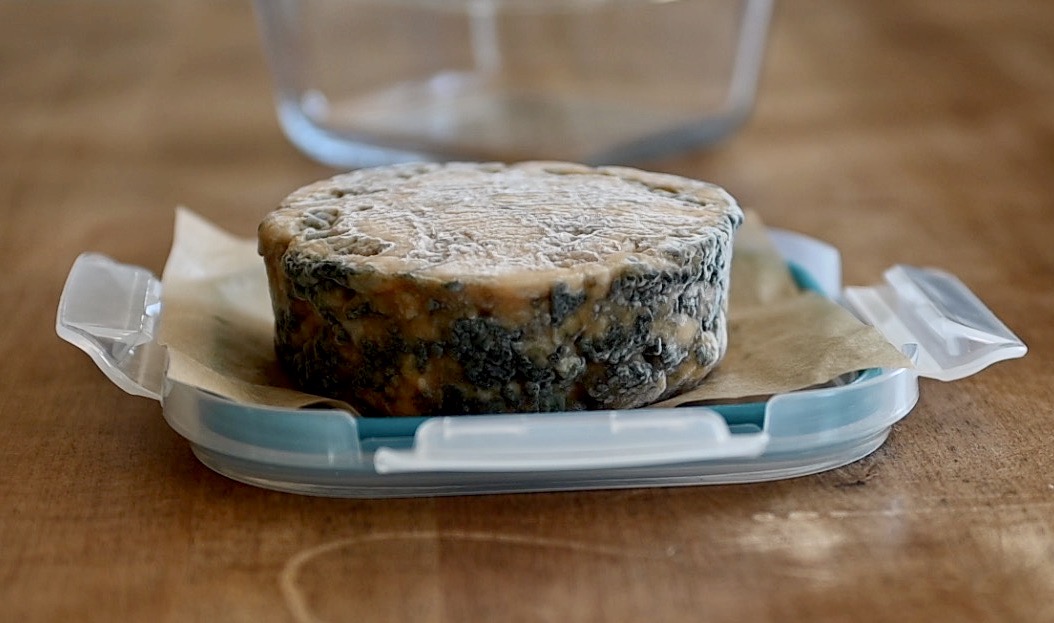
mold doesn’t cover all the crumbled one
the crumbled one has more blue mold veins
enjoy!
Have you made Vegan Blue Cheese? Please share it with me–I’d like to hear about it!
Hello Jeem!
Thank you so much for the great video and step-by-step making-of this delicious-looking vegan blue cheese!
I would like to know where did you get the penicillium roqueforti for this vegan cheese? I’m from Hong Kong and the suppliers I found online are from overseas countries that don’t ship internationally.
Much appreciated 🙂
You’re welcome, and thank you so much for your kind comment. I know it’s hard to find a vendor that is willing to ship world wide. Have you checked cultured for health? (not affiliated) shorturl.at/bcxBO
Hi Jeem. Thankyou for sharing your art of making vegan cheese, i love it! Your videos are beautiful.
I have a question: are the probiotics necessary for the recipe or are they just healthy?
Hi Julie,
Thank you so much for your compliment, Im so glad you like my videos. Yes, probiotics are essential for fermenting the paste. However, you should be able to substitute it with other kinds of probiotics too. If you can’t get probiotics, try Rejuvelac, or liquid whey from vegan yogurt. They should work well as they do with my other fermented food.
Is the taste of coconut oil noticable? I am not a huge fan of coconut oil. Can you replace it with another oil?