Like most people, I considered yogurt a healthy part of my diet for a long time. Even though I always saw Kefir on the same shelf as yogurt, I didn’t know its real benefits until a few years ago when I was learning about fermentation. It surprised me to find out it has many more beneficial bacteria strains (probiotics) than yogurt. Before long, I tried it and quickly switched from yogurt to kefir almost entirely, as it actually tastes great, and is easier to drink too.
Whenever I hear fellow parents complain about their children’s upset stomachs, that they can’t go to the bathroom on a regular basis, or being lactose intolerant, I try to introduce kefir to them. Most of the time I end up answering this question: “What is kefir?” Well, from all my research, I can easily explain that kefir is one of the most probiotic rich foods, and it has been used in European countries for many centuries.
Similar to yogurt, it can be made from either cow’s or goat’s milk. The magical 24-hour fermentation process transforms the regular milk into a slightly sour and thick milk when it becomes kefir. During the process, yeast and good bacteria eat most lactose, also known as “milk sugar,” from the milk. It has been proven that many people who are lactose intolerant can safely drink kefir. It’s also rich in vitamin B, calcium, magnesium, folic acid, and has a lot of good bacteria known as probiotics that help with digestion.
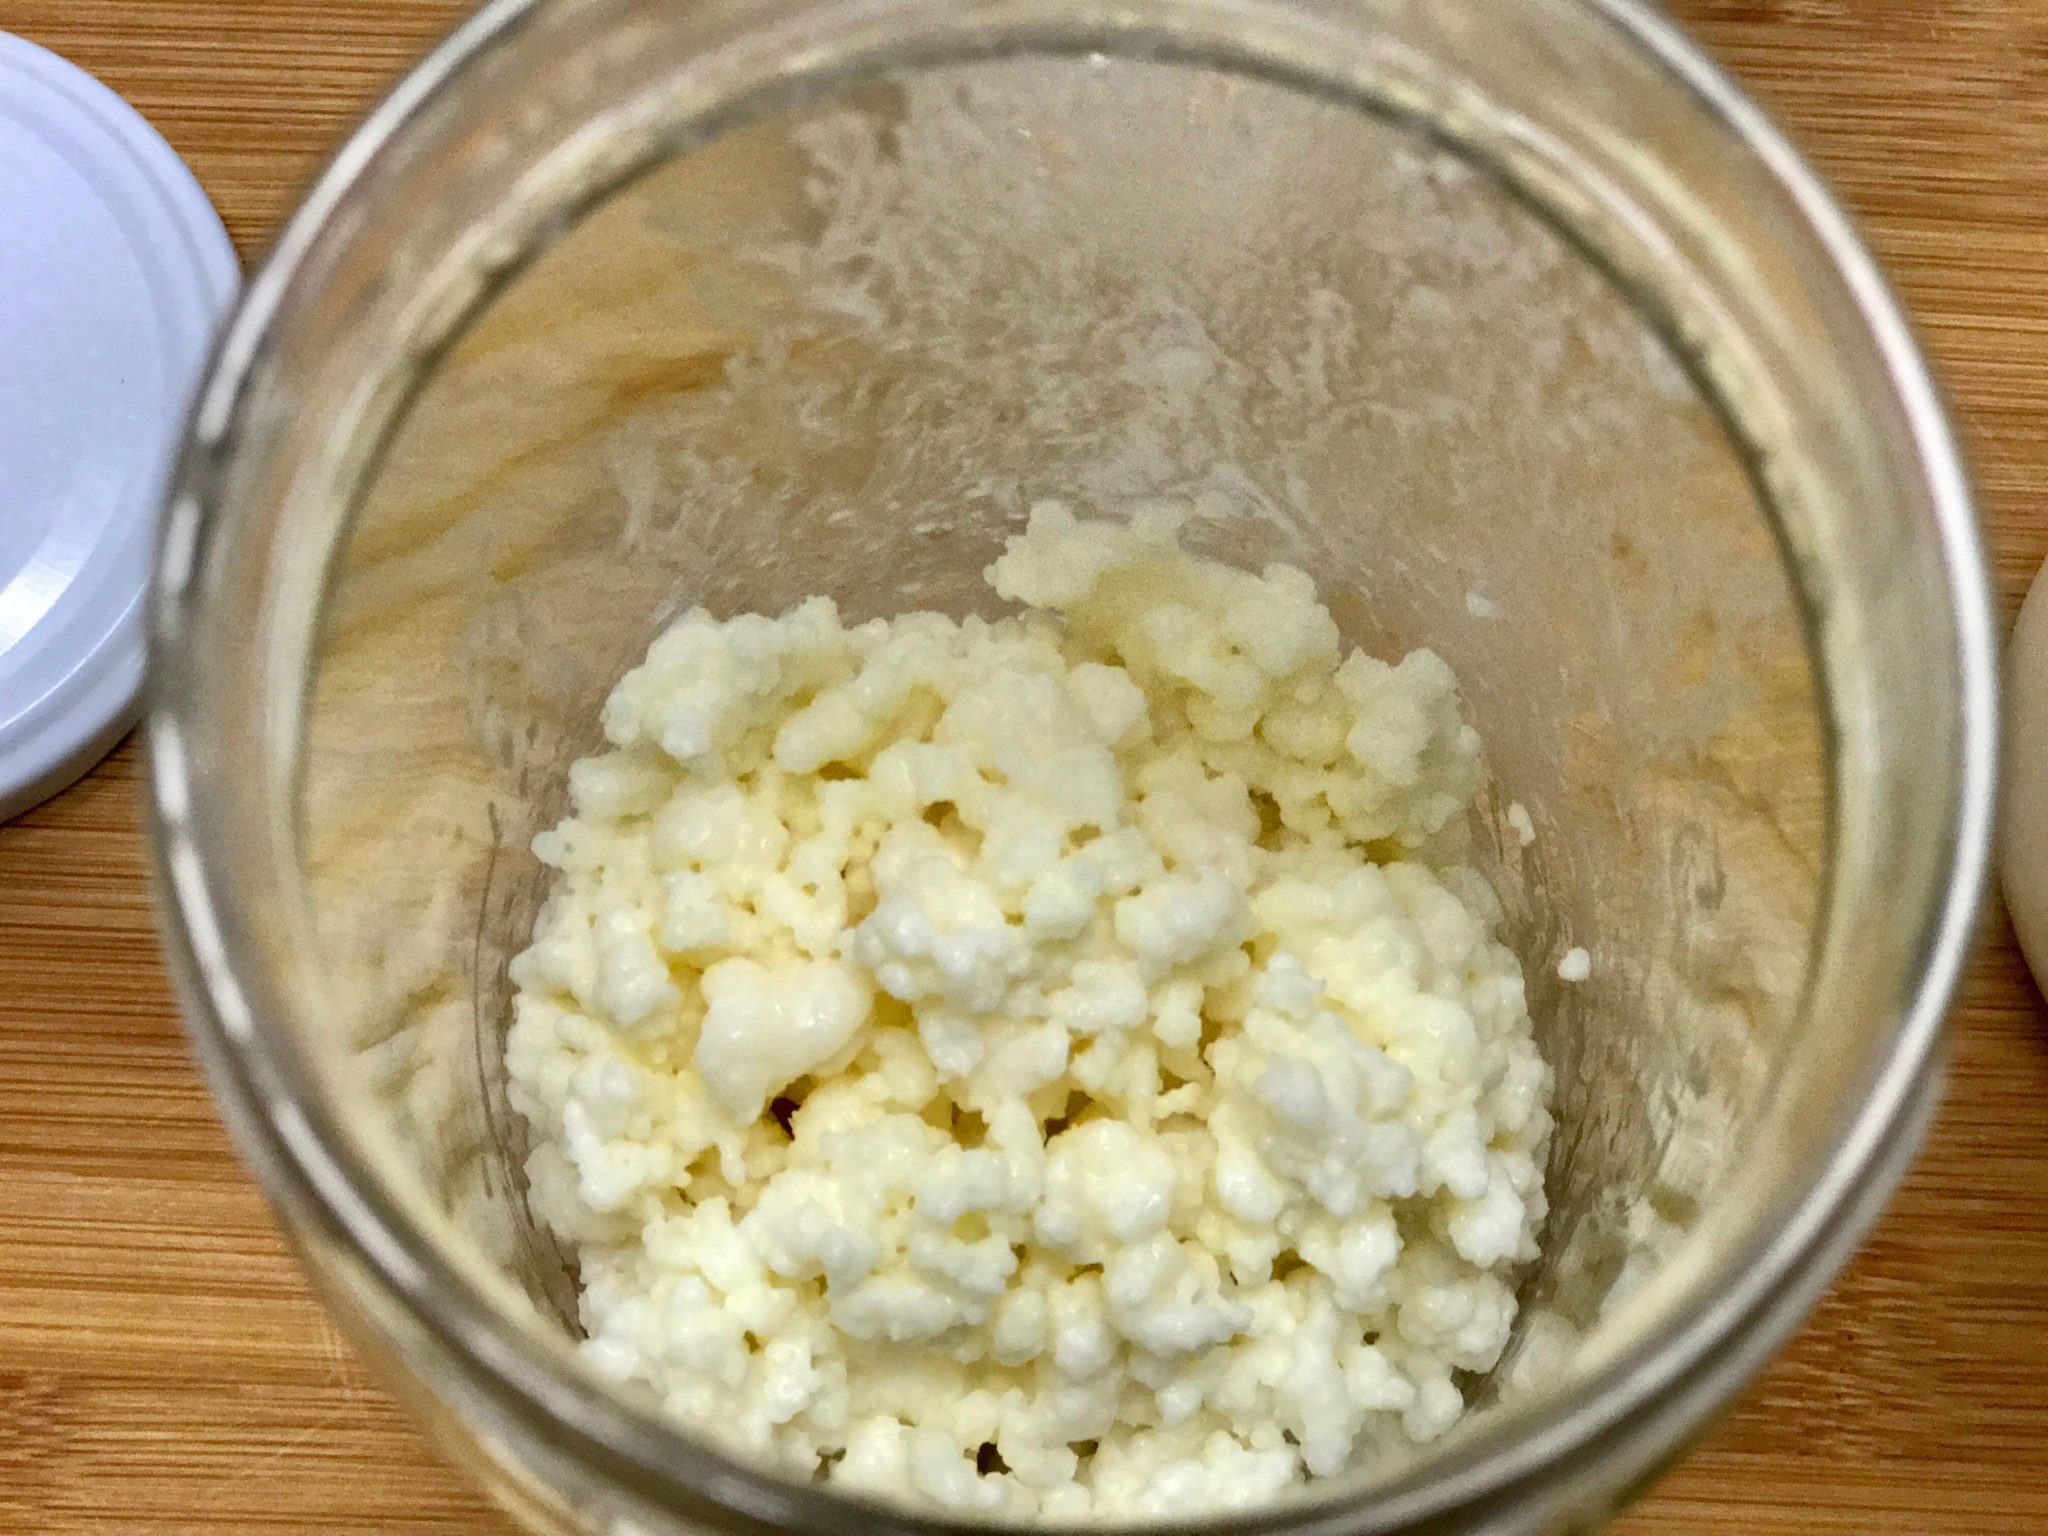
I used to buy kefir from a local company in my hometown all the time, but not much since I started to make my own in 2014. I learned that in order to make kefir, you need kefir grains. Kefir grains are not grains like rice or wheat, they are a balanced mix of yeast and bacteria that look like tiny bits of cauliflower.
When I first started, I bought kefir grains from a well-known website. They came in a nice box with a tiny packet of a few dried grains. They didn’t look at all like what I saw in pictures, but I started to work with them, following the instructions accordingly. After one week, I still didn’t see any changes. It was tempting to give up, but I researched more and found another smaller supplier. I decided to give it another chance, and bought one packet of new kefir grains..
The new order came in a very simple package with about 2 tablespoons of fresh, white, and soft grains that looked exactly like what I saw in pictures. I followed the instructions that came with the new package even more carefully, and within 24 hours, I had my first batch of kefir to drink. I decided to stop working with the original dried grains and just combined those together with the new ones. That was the beginning of my kefir journey!
Making kefir is much easier than yogurt. If you have the right healthy grains to start with, you can be guaranteed to have kefir to drink every day as long as you can keep feeding them. From two tablespoons of fresh kefir grains, my grains grew bigger and bigger. I started to introduce and offer extra grains to my family, both in the U.S. and Thailand first, and then to friends, some of whom have continued to pass them along. It’s very easy, and so much cheaper making my own. Also, I know exactly what kind of milk it’s made from, and can help the environment by not using so many disposable containers.
Things you need to get started:
- (2) glass jars: one to batch the kefir in, and the other one for the finished product. 1-quart (1L) mason jars work really well.
- A plastic mesh strainer (it is important that the mesh be plastic as opposed to any metal including stainless steel).
- A wooden spoon (don’t use stainless steel or any kind of metal spoon).
- A container to strain the finished kefir with.
- About 2 tablespoons of kefir grains. I got my fresh grains from a small company called kefir lady.com (not afiliated with GVK).
- Fresh milk: either skim or whole. I use raw, organic, whole goat’s milk when I’m home, as I can get it locally–lucky me!
To make it: See the video
- Put the grains in the jar
- Cover them with milk. (I would put about 1 cup (250ml) or so of milk in when you first start)
- Put the jar in a dark quiet place and leave it undisturbed for 24 hours. I put mine in the cupboard.

Put healthy kefir grains in a jar

cover the grains with milk and leave about 1 inch to the top
I recommend planning your best straining time. For example, if you have time after breakfast around 9:00 am, you should start your process at 9:00 am. because it usually takes 24 hours. You have to treat the grains like a pet! They need food, which is fresh milk, every 24 hours, but don’t be too stressed if you have to miss the exact 24-hour mark here and there. It’s totally fine. I have missed my 24 hour mark many times and the grains were are still always fine, even after a couple days.

After 24 hours your jar full of milk and grains should look like this

strain the grains in a plastic strainer with a wooden spoon

now you can drink the finished kefir
Voila!
Now, enjoy your fresh homemade kefir the way you want: Be creative! This is how I drink mine, I like to squeeze two oranges and mix the juice into the three glasses (for 3 of us). We enjoy it at home every day.
Do you drink kefir ? Have you tried making your own yet? Please share with me how yours turned out!