My crispy Kale Chips creation started when I planted too much kale 10 years ago. Kale is the easiest vegetable to plant, and you are guaranteed to have leafy green kale all year round, including winter–really! Since I had too much, I wanted to find new ways to eat it, and came across the crispy kale idea. I used my oven to bake it and failed by burning it so many times before I finally got the right temperature and technique to make perfect kale chips.
I’m proud to say, I have turned quite a few grown-ups and kids who don’t like green vegetables onto eating Kale Chips, and some have even asked me to show them how its made.
Crispy kale chips have been a lifesaver for when I don’t have much time to cook, or when my daughter needs some healthy snacks right after school. With kale chips in the pantry, she can prepare a few things and grab a jar of kale too. It’s also a great way to have green vegetables for the road, and on camping trips.
In the past, I could rely on having an oven, or sometimes a dehydrator, to do this, and it was a bit inconvenient when we lived in places without an oven. However, this time in a house without an oven, I figured out how to make the same kale chips. It’s actually easier and faster than using the oven, and that is another thing you gain when you live with less: creativity!
Sometimes, when I’m away from home, and it’s not easy to find kale in the market on a regular basis. I use green savoy cabbage instead, and it works well too (it’s a little more chewy though). When I’m in Thailand, I use “pak- ka-na” (aka Chinese Kale) which is almost the same as collard greens, and it also works wonderfully.
Things you need:
- Leafy green kale–any kind, but my favorite is the dinosaur or italian type, although it’s not always available.
- Coconut oil, or olive oil. I use them both. Keep in mind that coconut oil gets hard (congeals) when the temperature drops, and the chips look a little bit cloudy then.
- Fried garlic–finely re-chop it (optional) see how.
- Salt (Himalayan salt or sea salt is preferable)
- A frying pan

wash the kale thoroughly
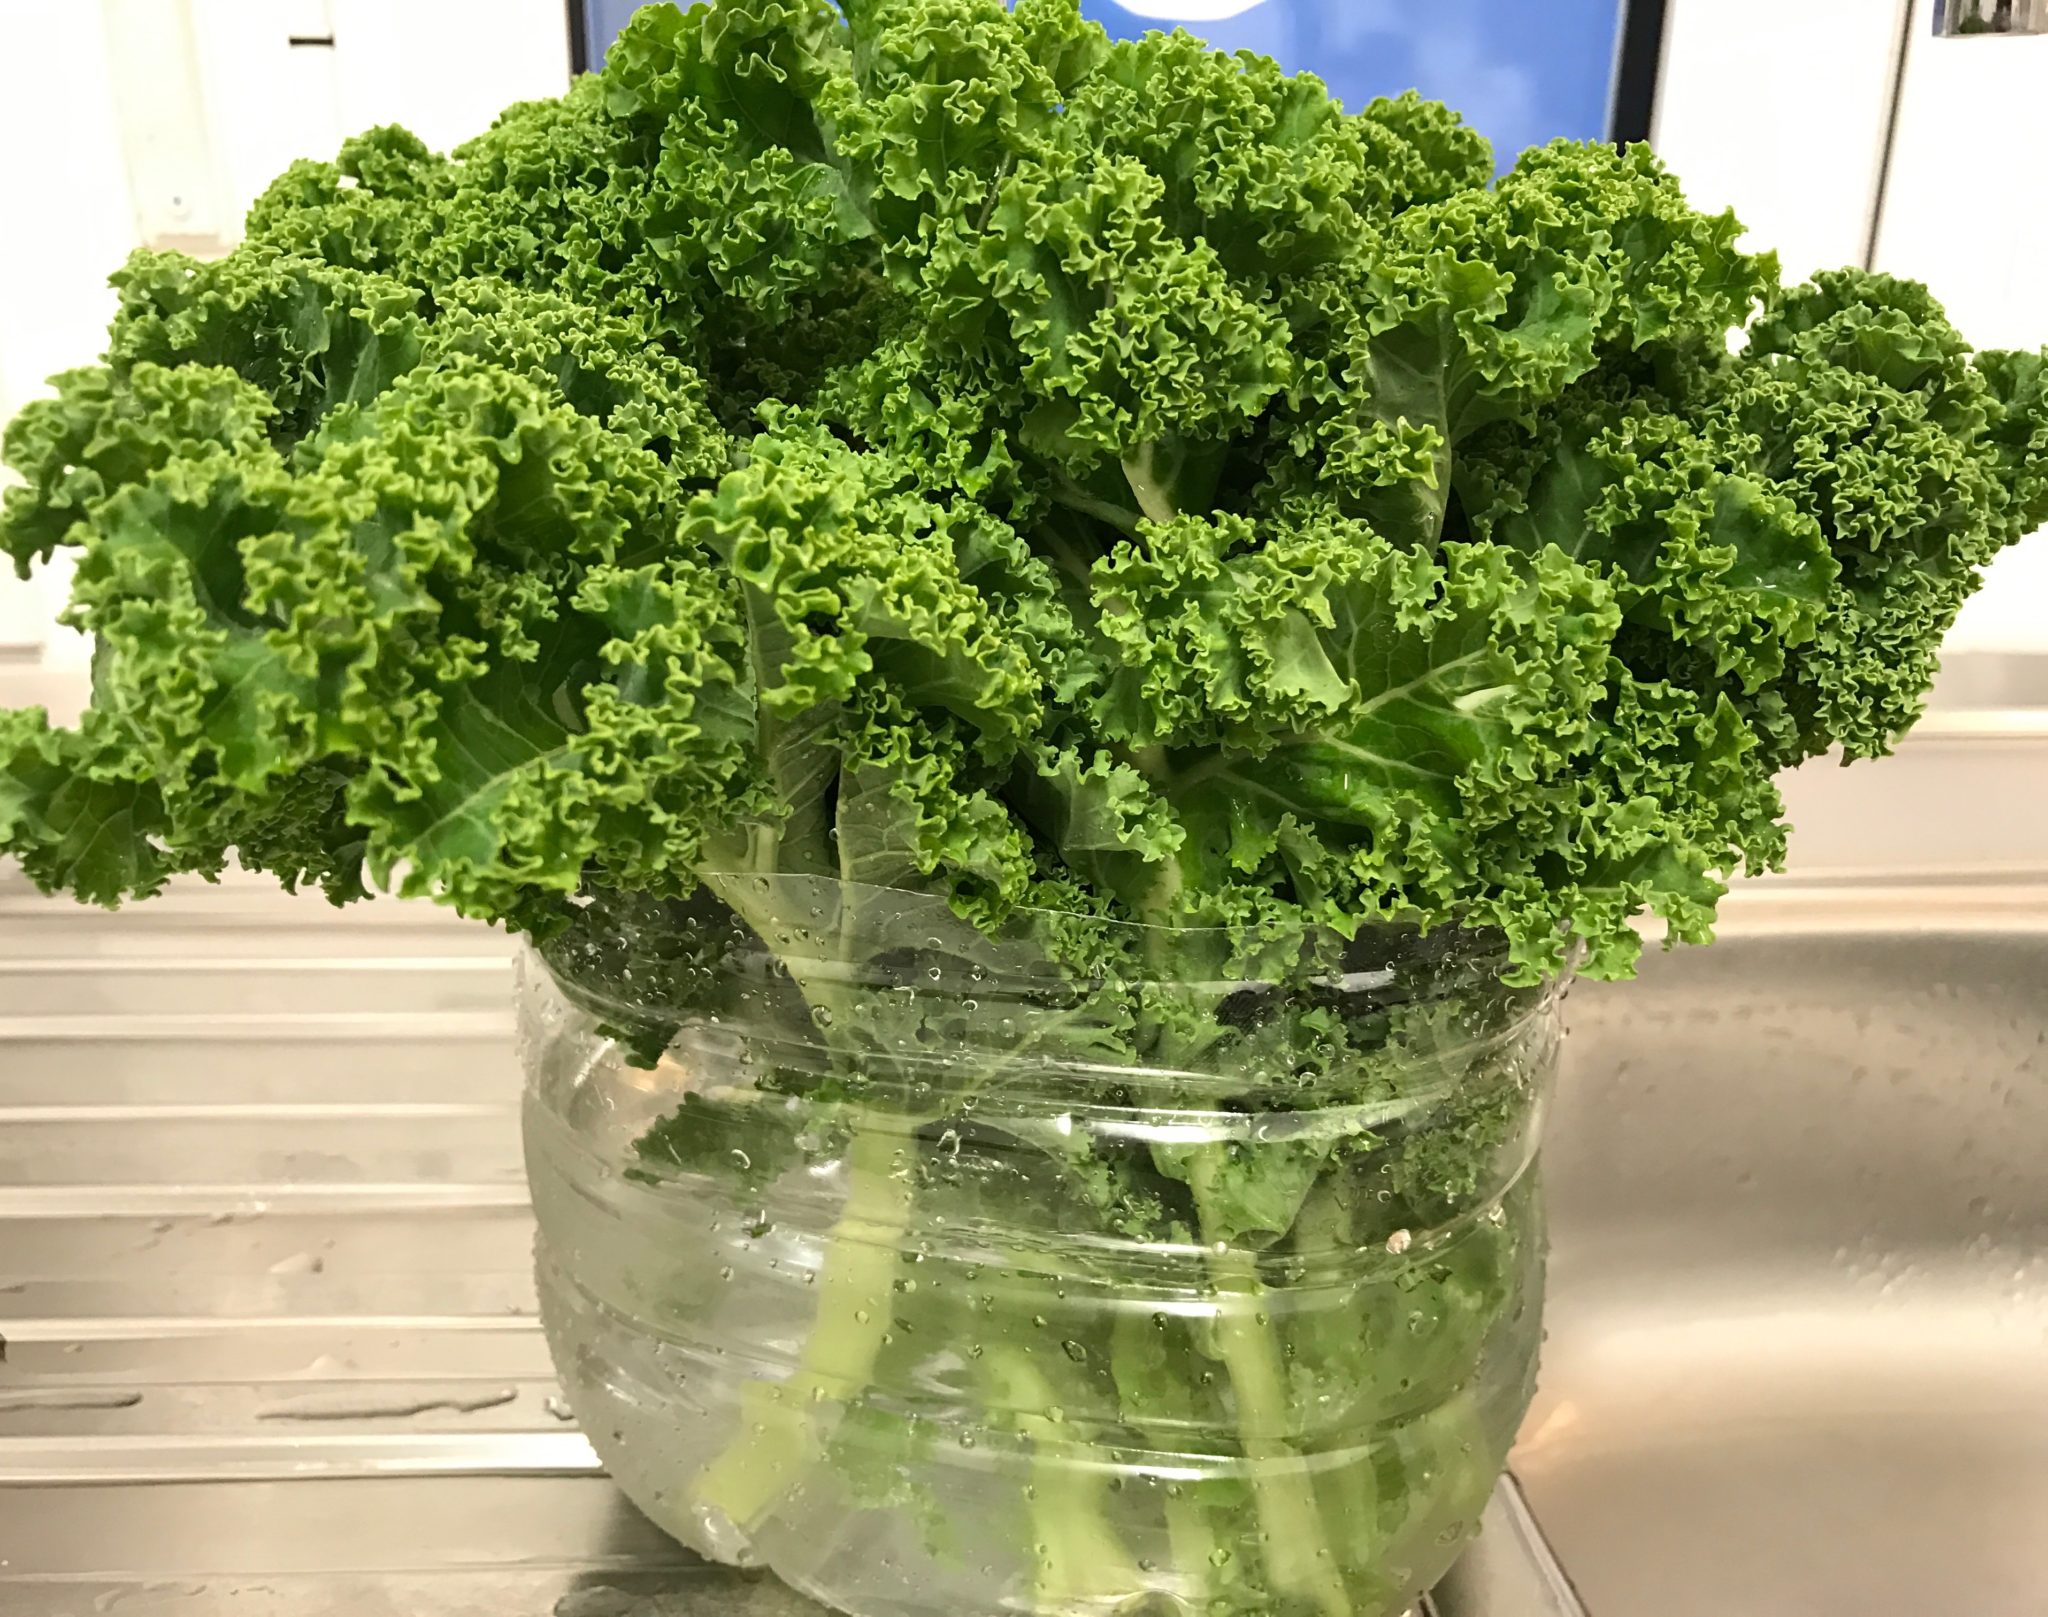
keep the stems soaked in water while letting the leaves dry
How: see the video
- Wash the kale leaves. I wash them thoroughly first, then put them in a container with some water (like flowers in a vase) to keep them fresh while waiting for the wash water to dry off.
- Discard the stems and cut the leaves into bite-size pieces.
- Heat a little of the oil on very low temperature.
- Put the kale in, followed by the garlic that has been re-chopped to make it extra fine. (it can stick to the leaves better this way).
- Mix them well in the pan, and sprinkle a little bit of salt in when the leaves are covered with the oil.
- Spread every piece out in one layer.
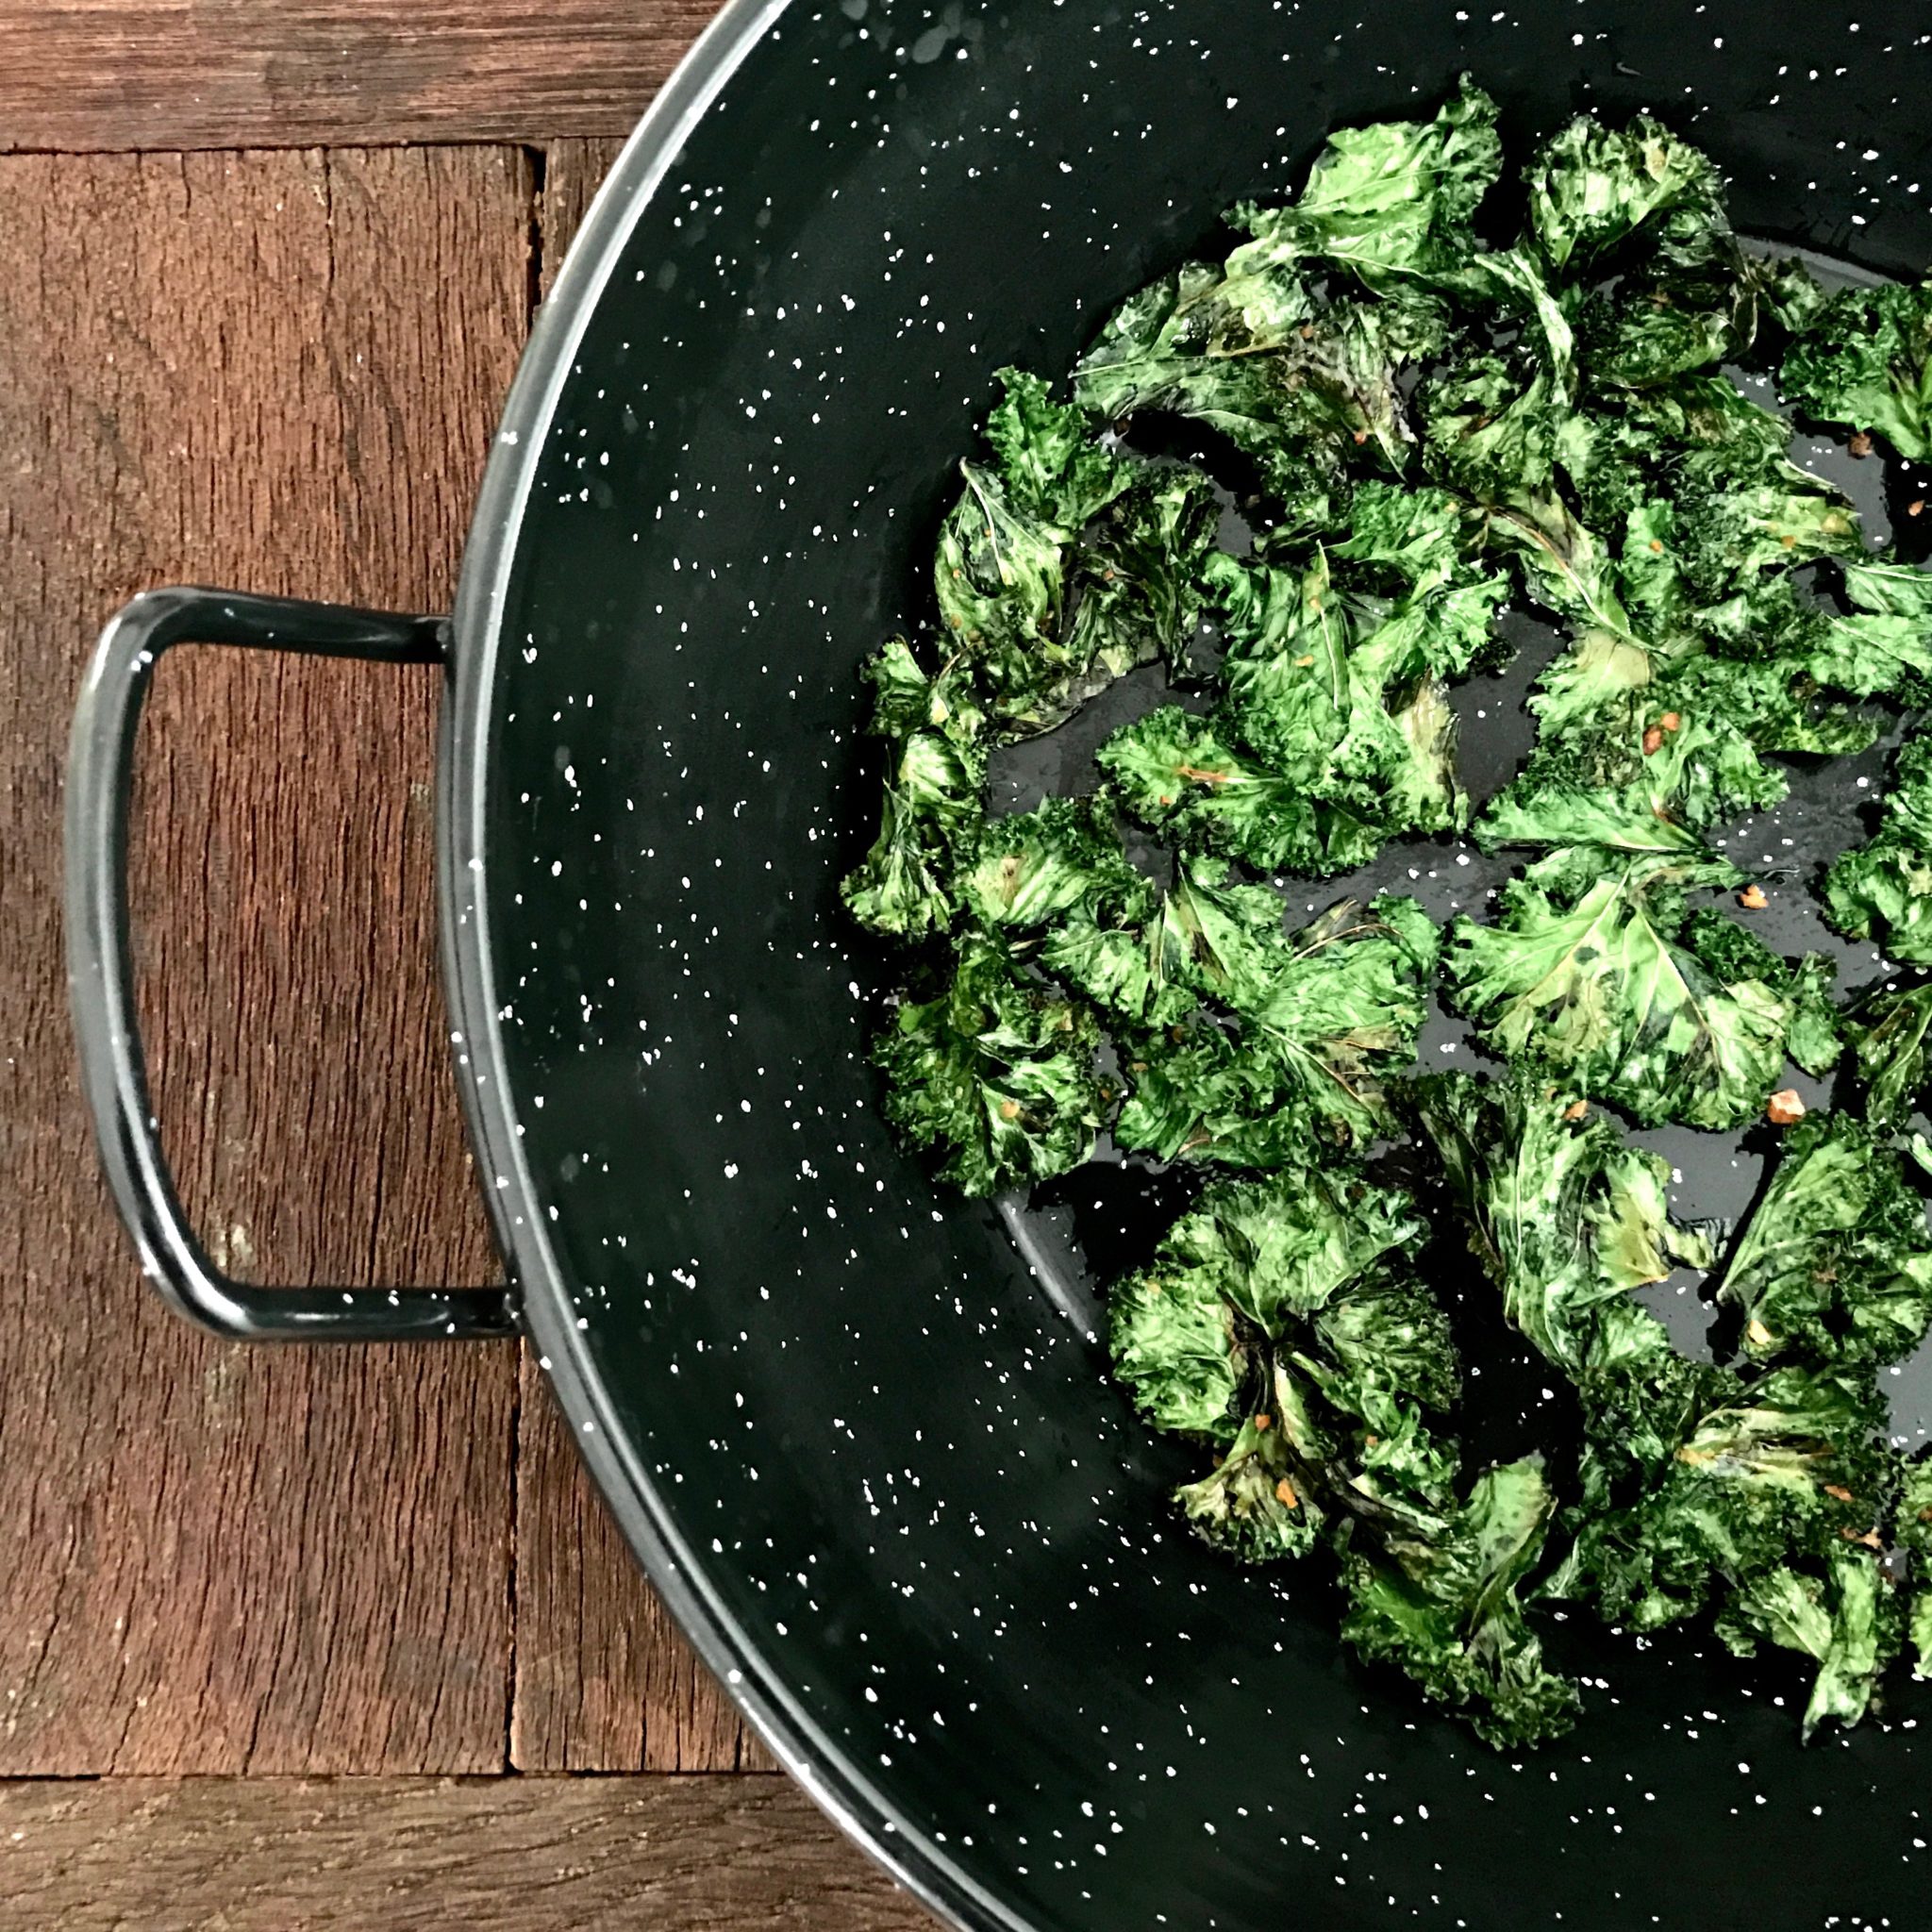
- When you see it turning golden brown in about 5 minutes, keep an eye on it because it can get burnt very easily at this point.
- Take the pieces that look crispy out and keep frying the rest. Most pieces are thin and get crispy very easily without being turned over, but some of them might need the other side exposed to get crispy faster.
- Repeat the process ’til you have the amount you want. When it’s all done and cooled, put them in a jar–they get crispier when cooled.
- Enjoy often!

after a few hours the leaves are dry but stay fresh
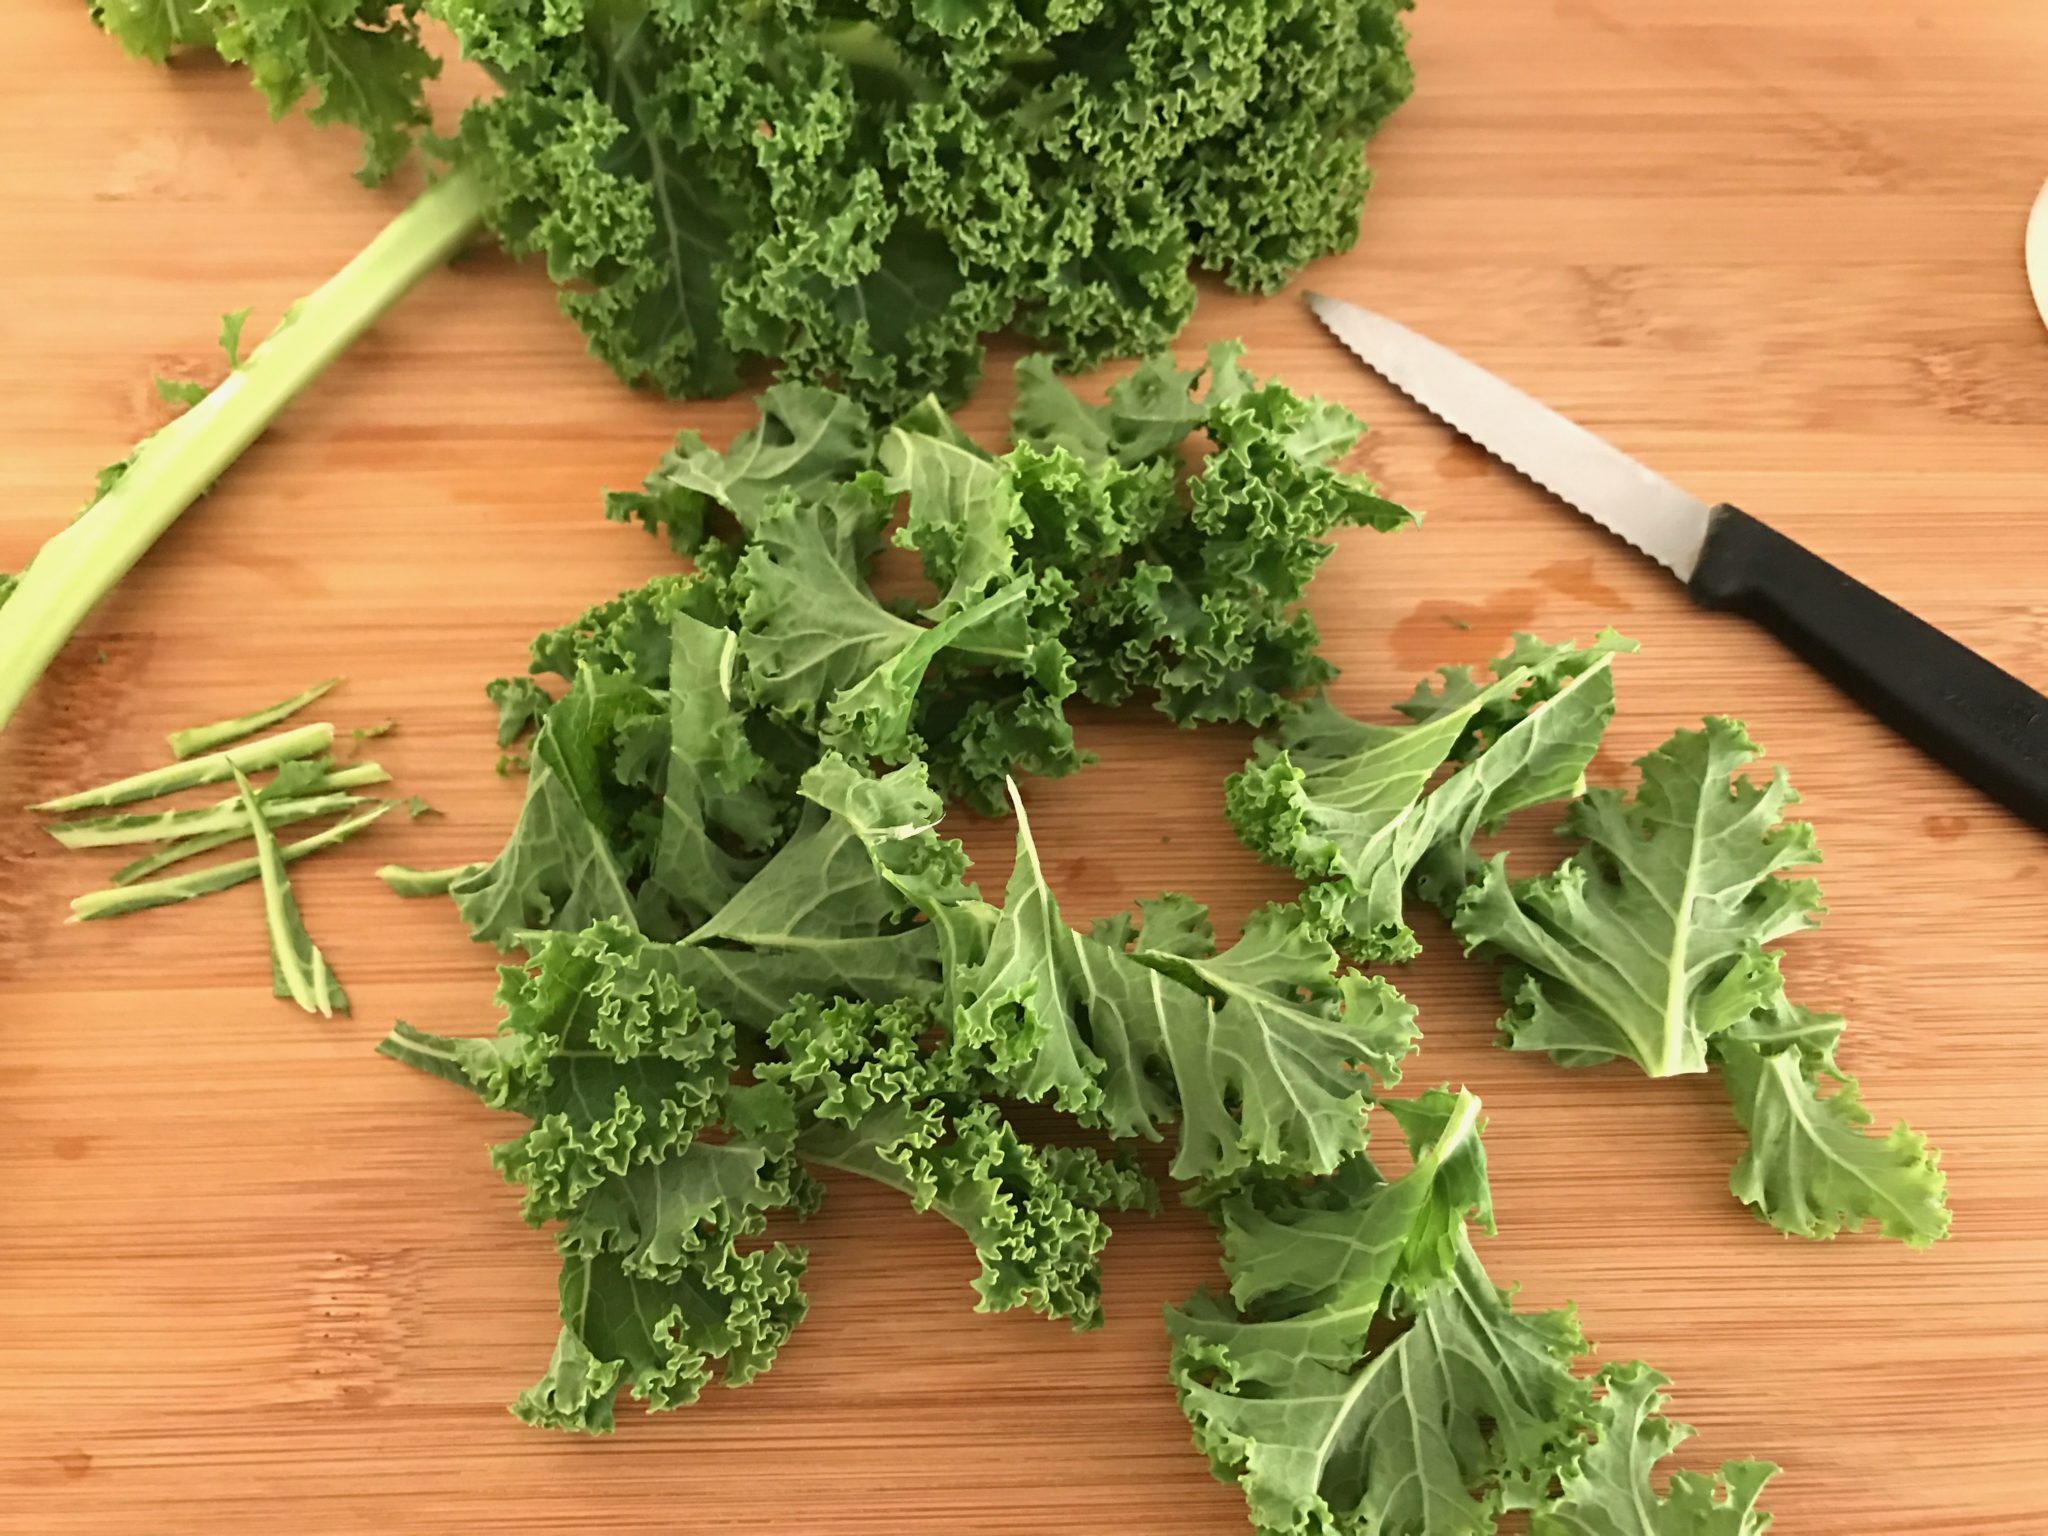
cut the kale into bite-size pieces and remove the stems
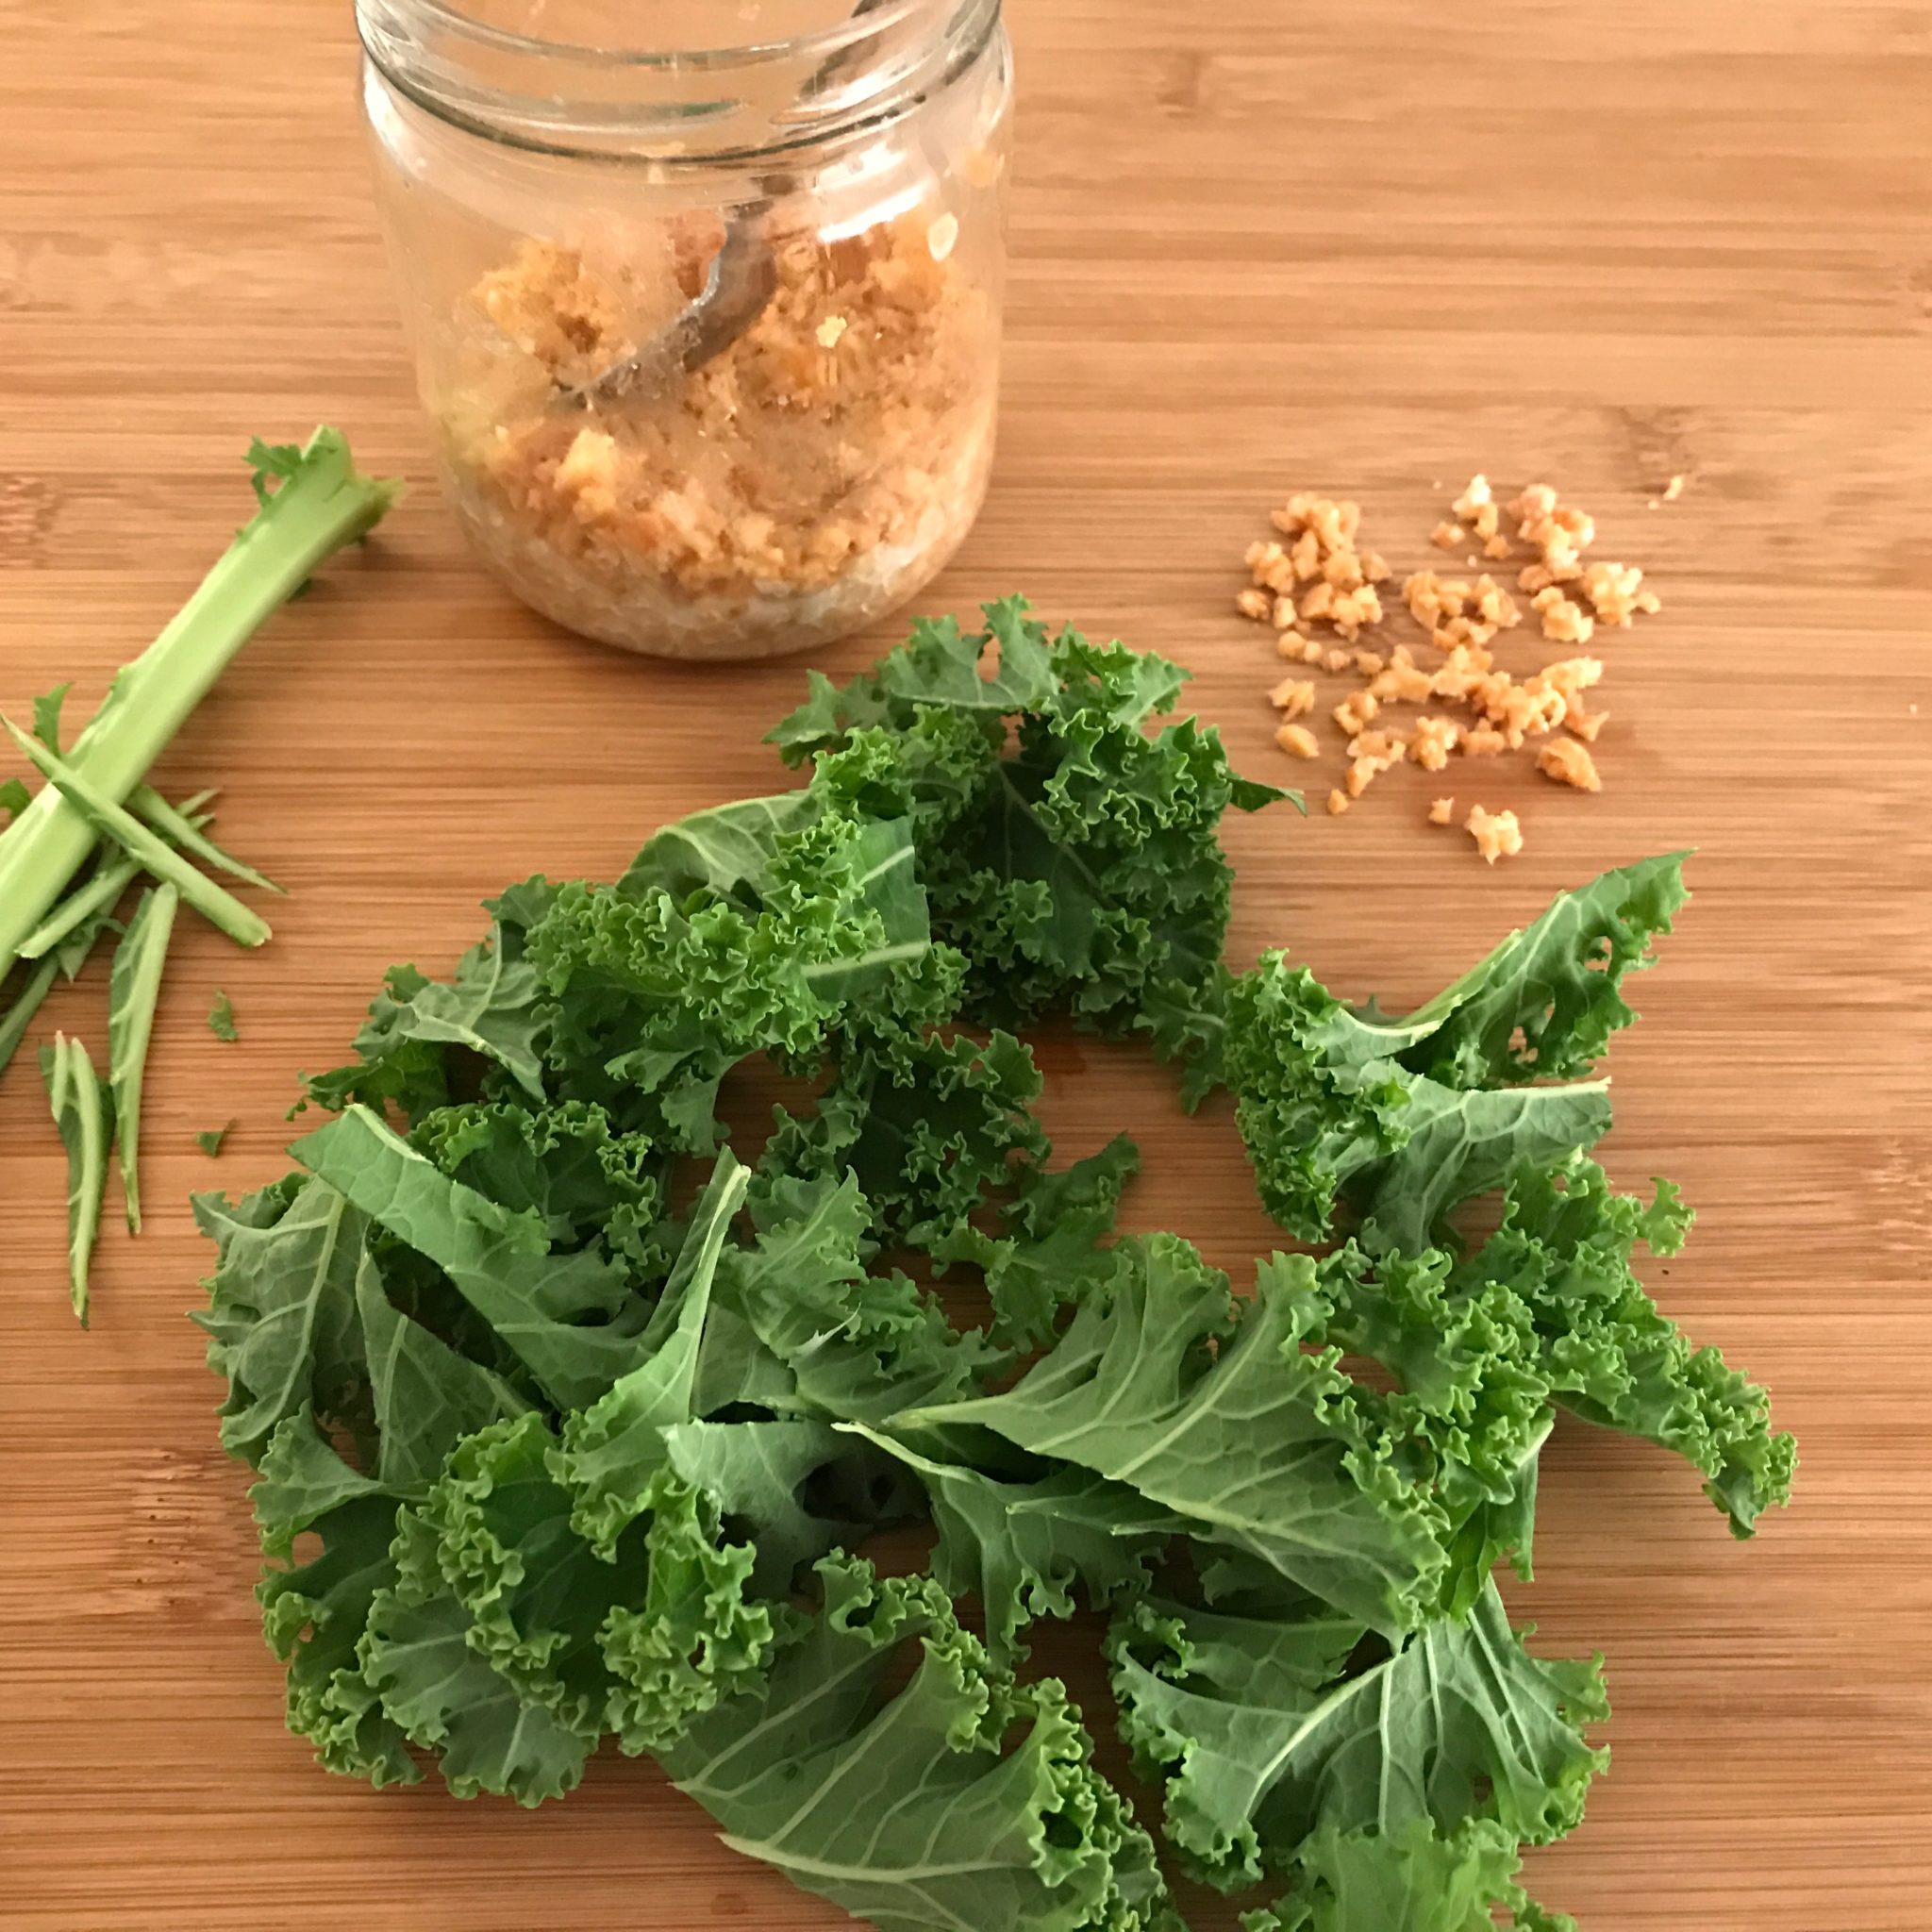
re-chop fried garlic for extra fine pieces
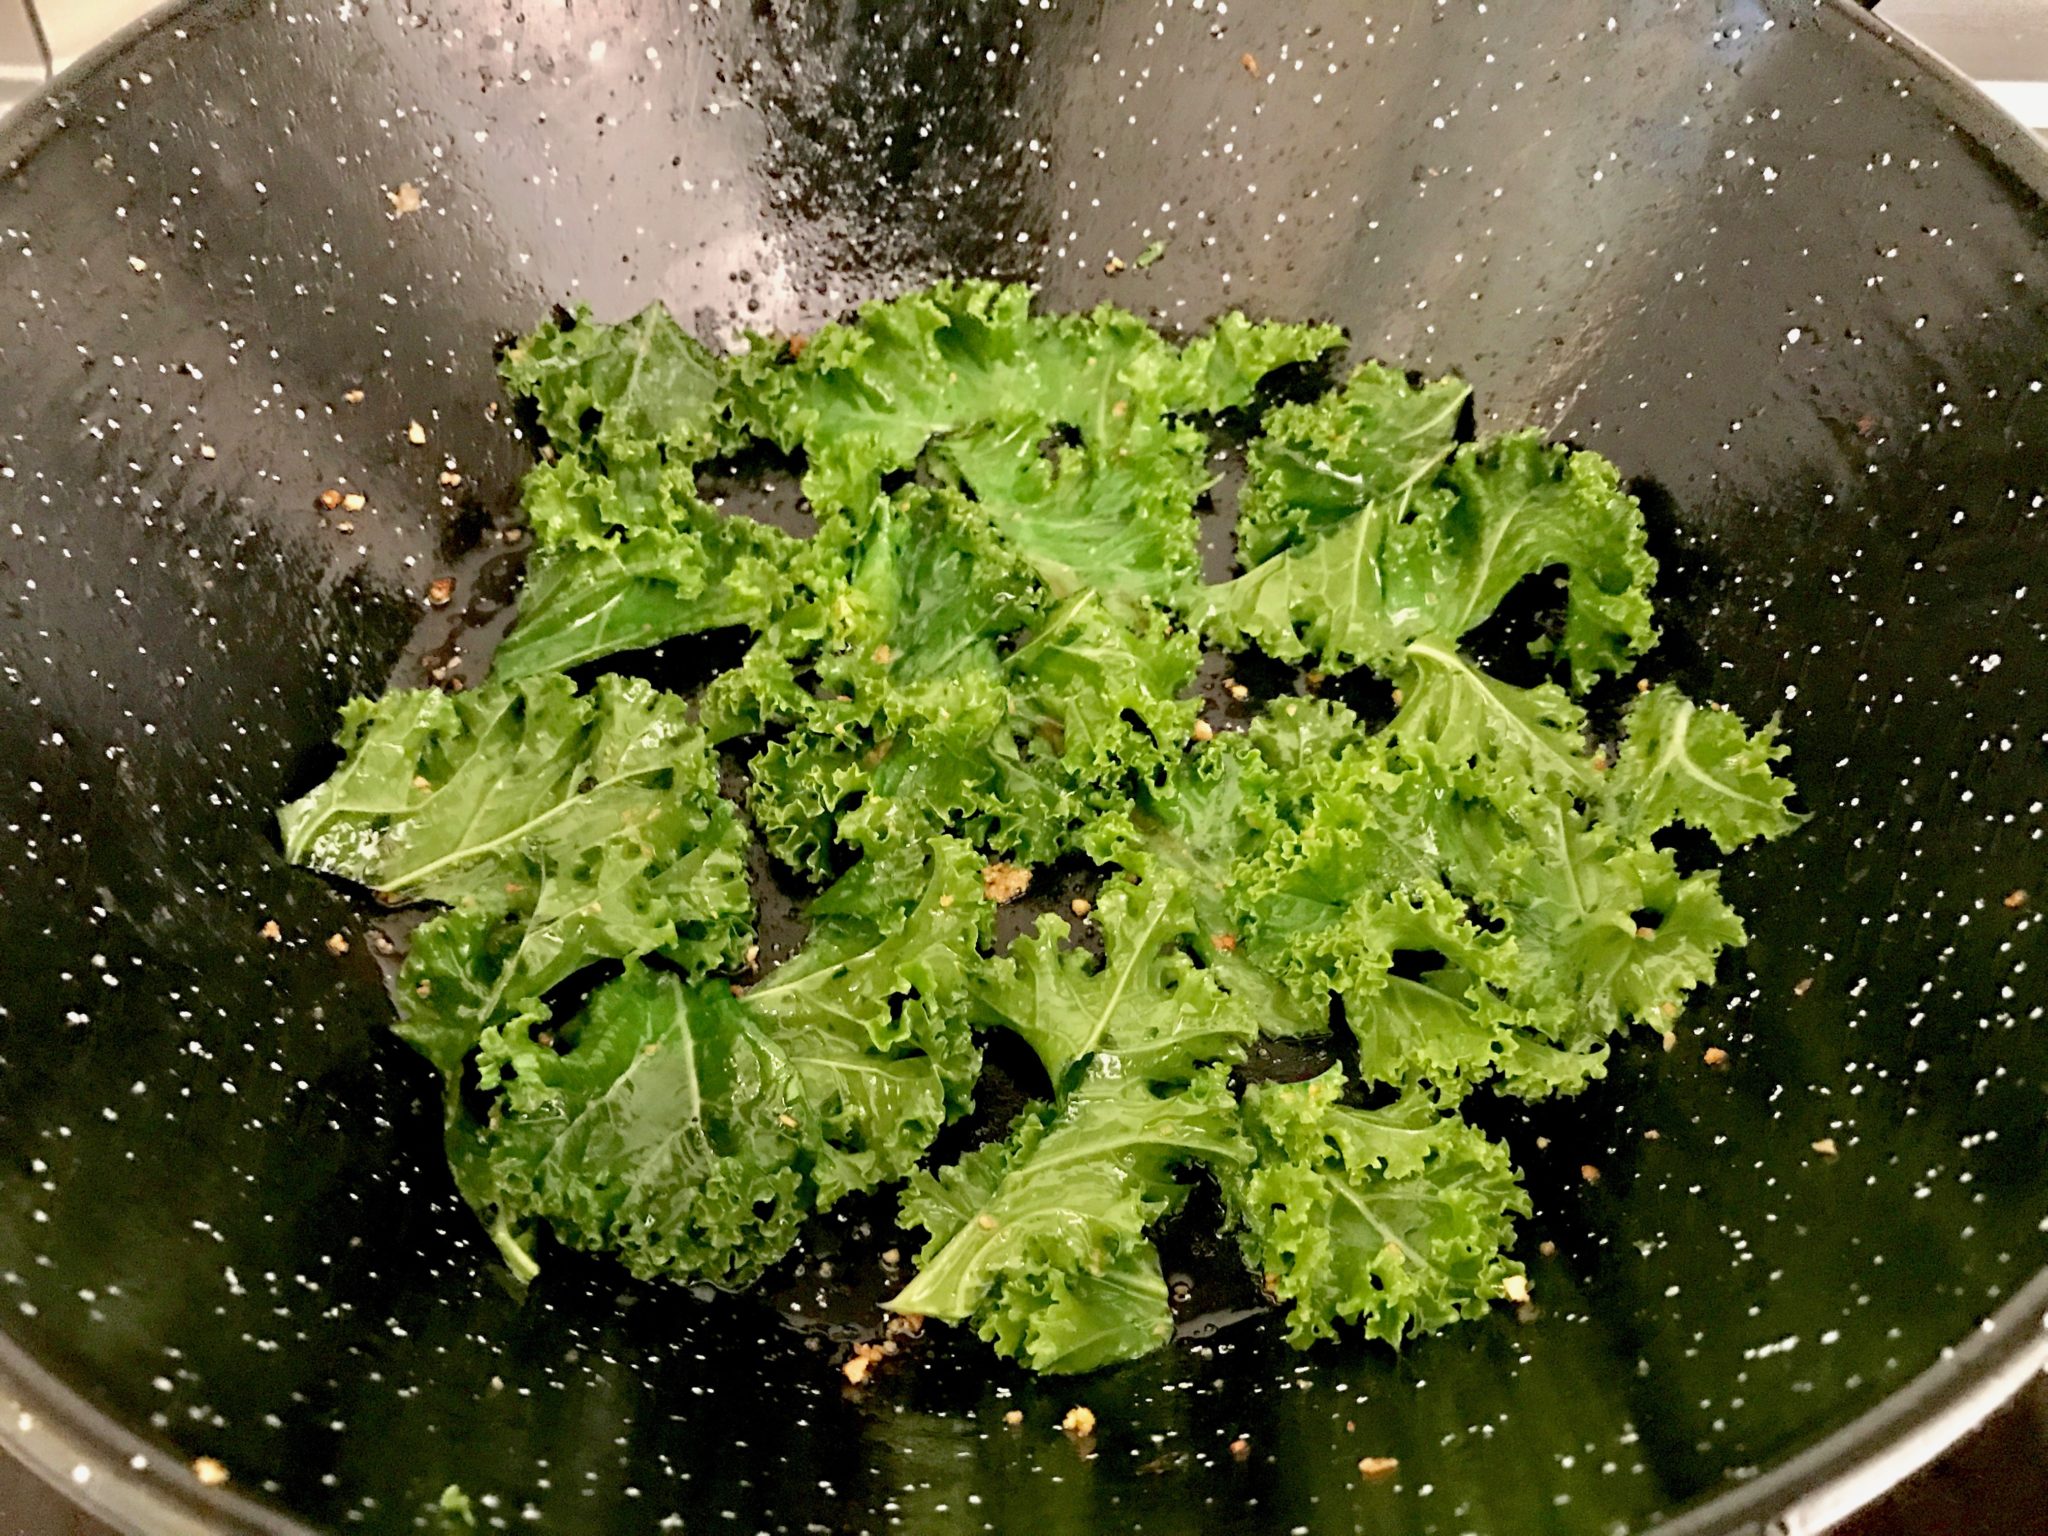
kale mixed with garlic, coconut oil and salt
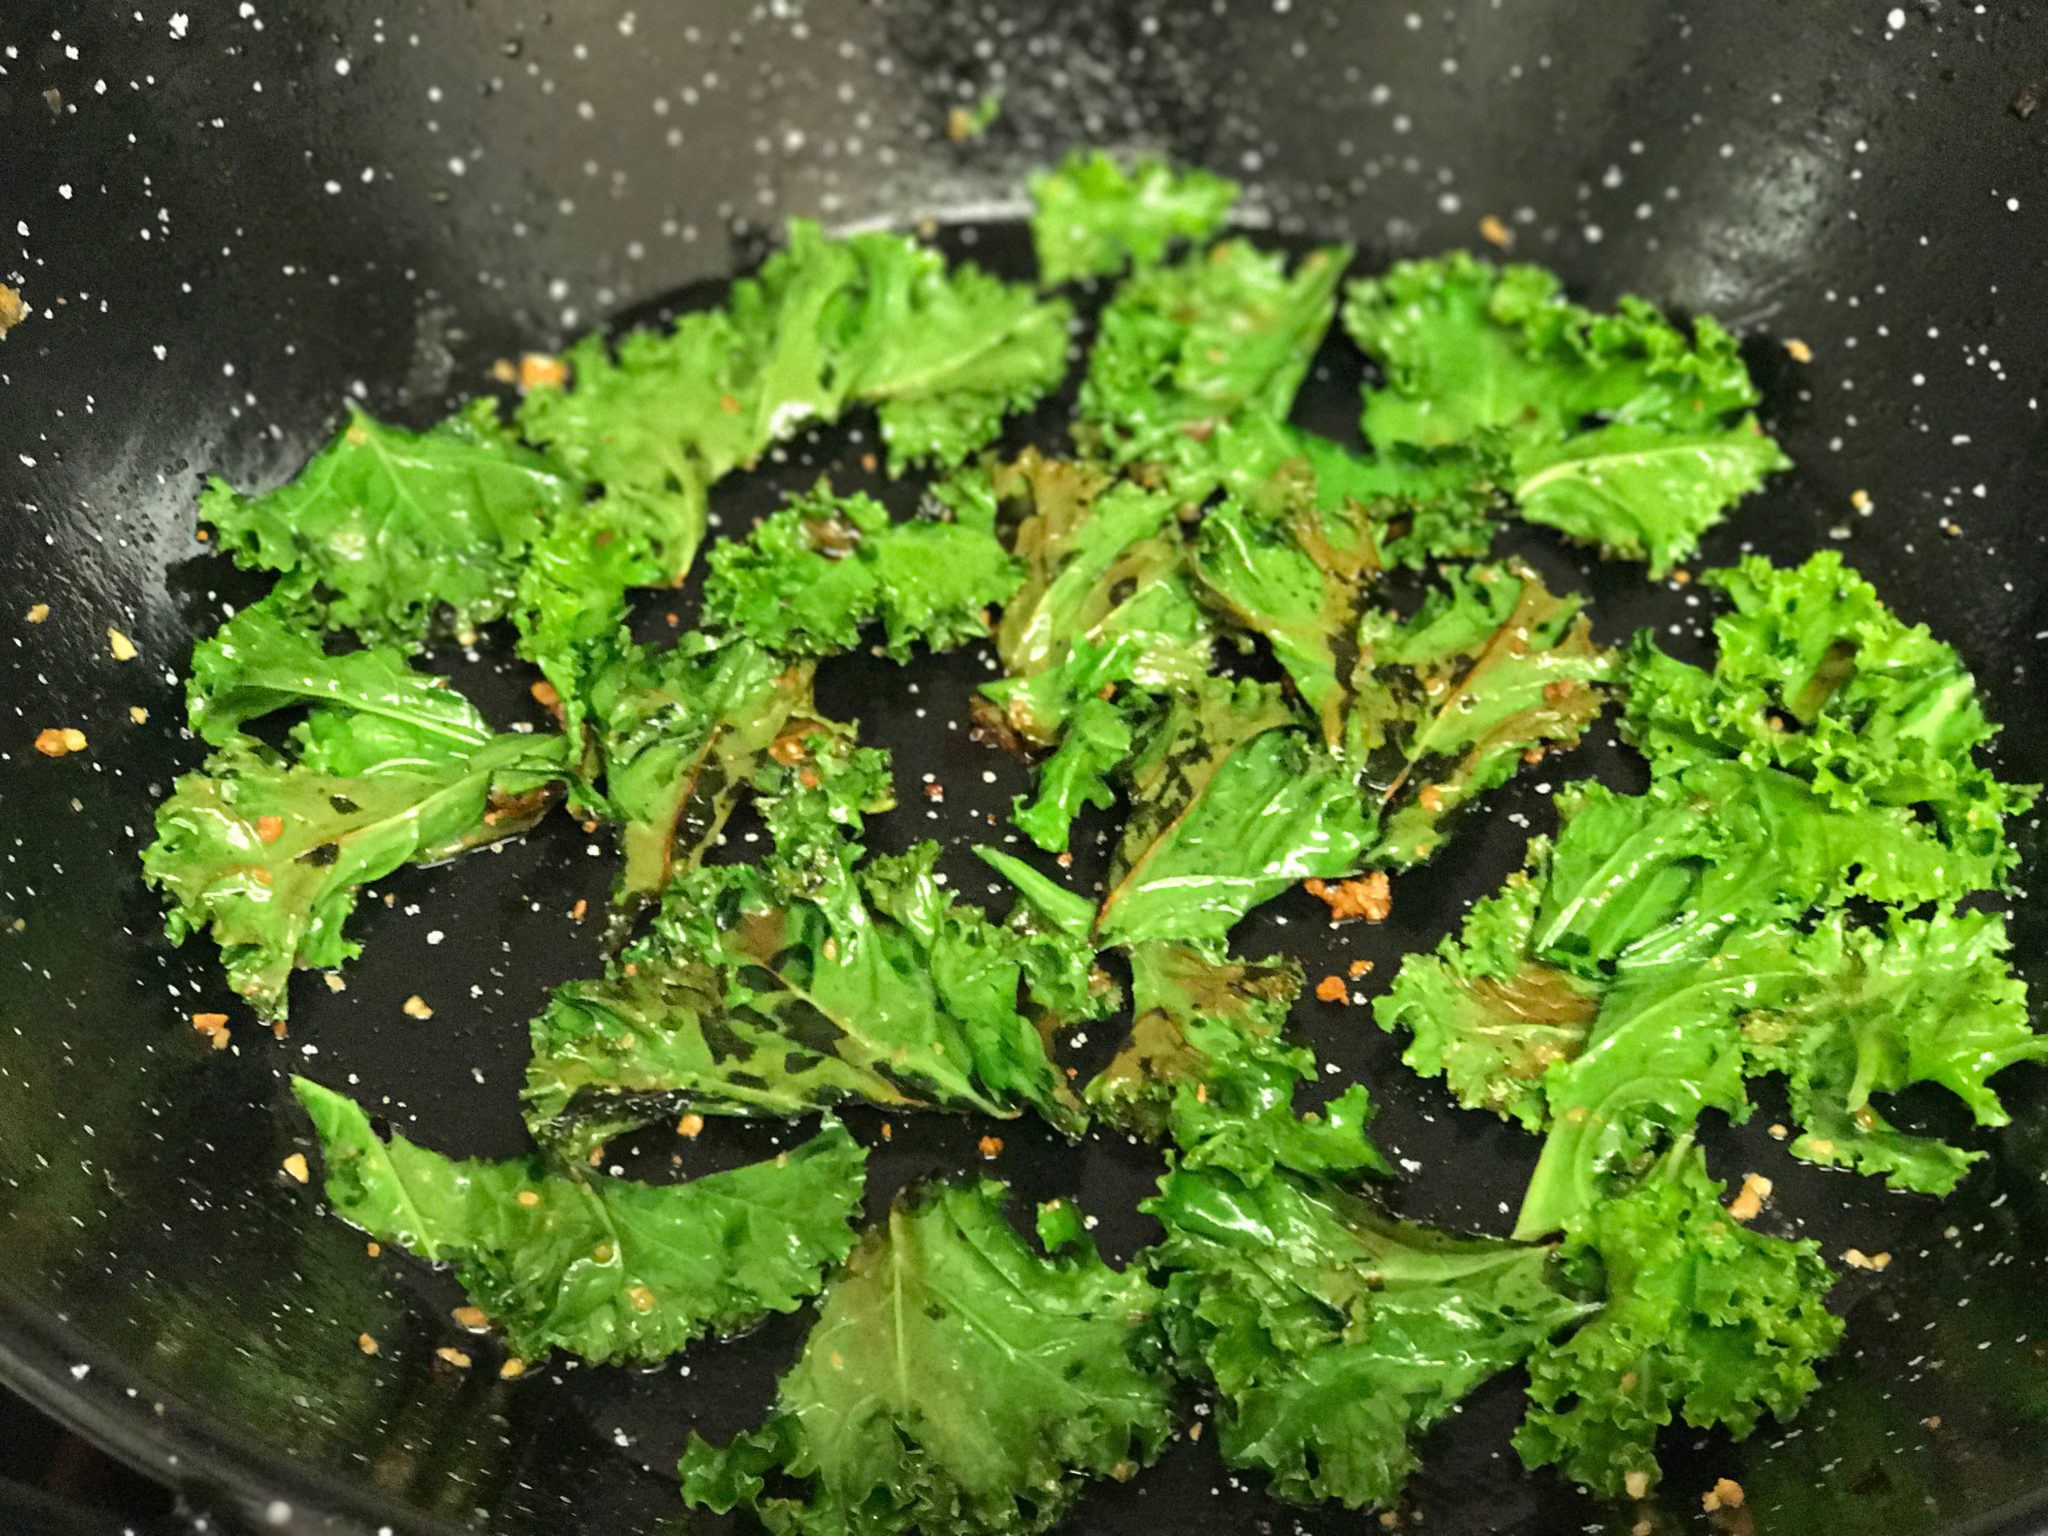
it all looks crispy!
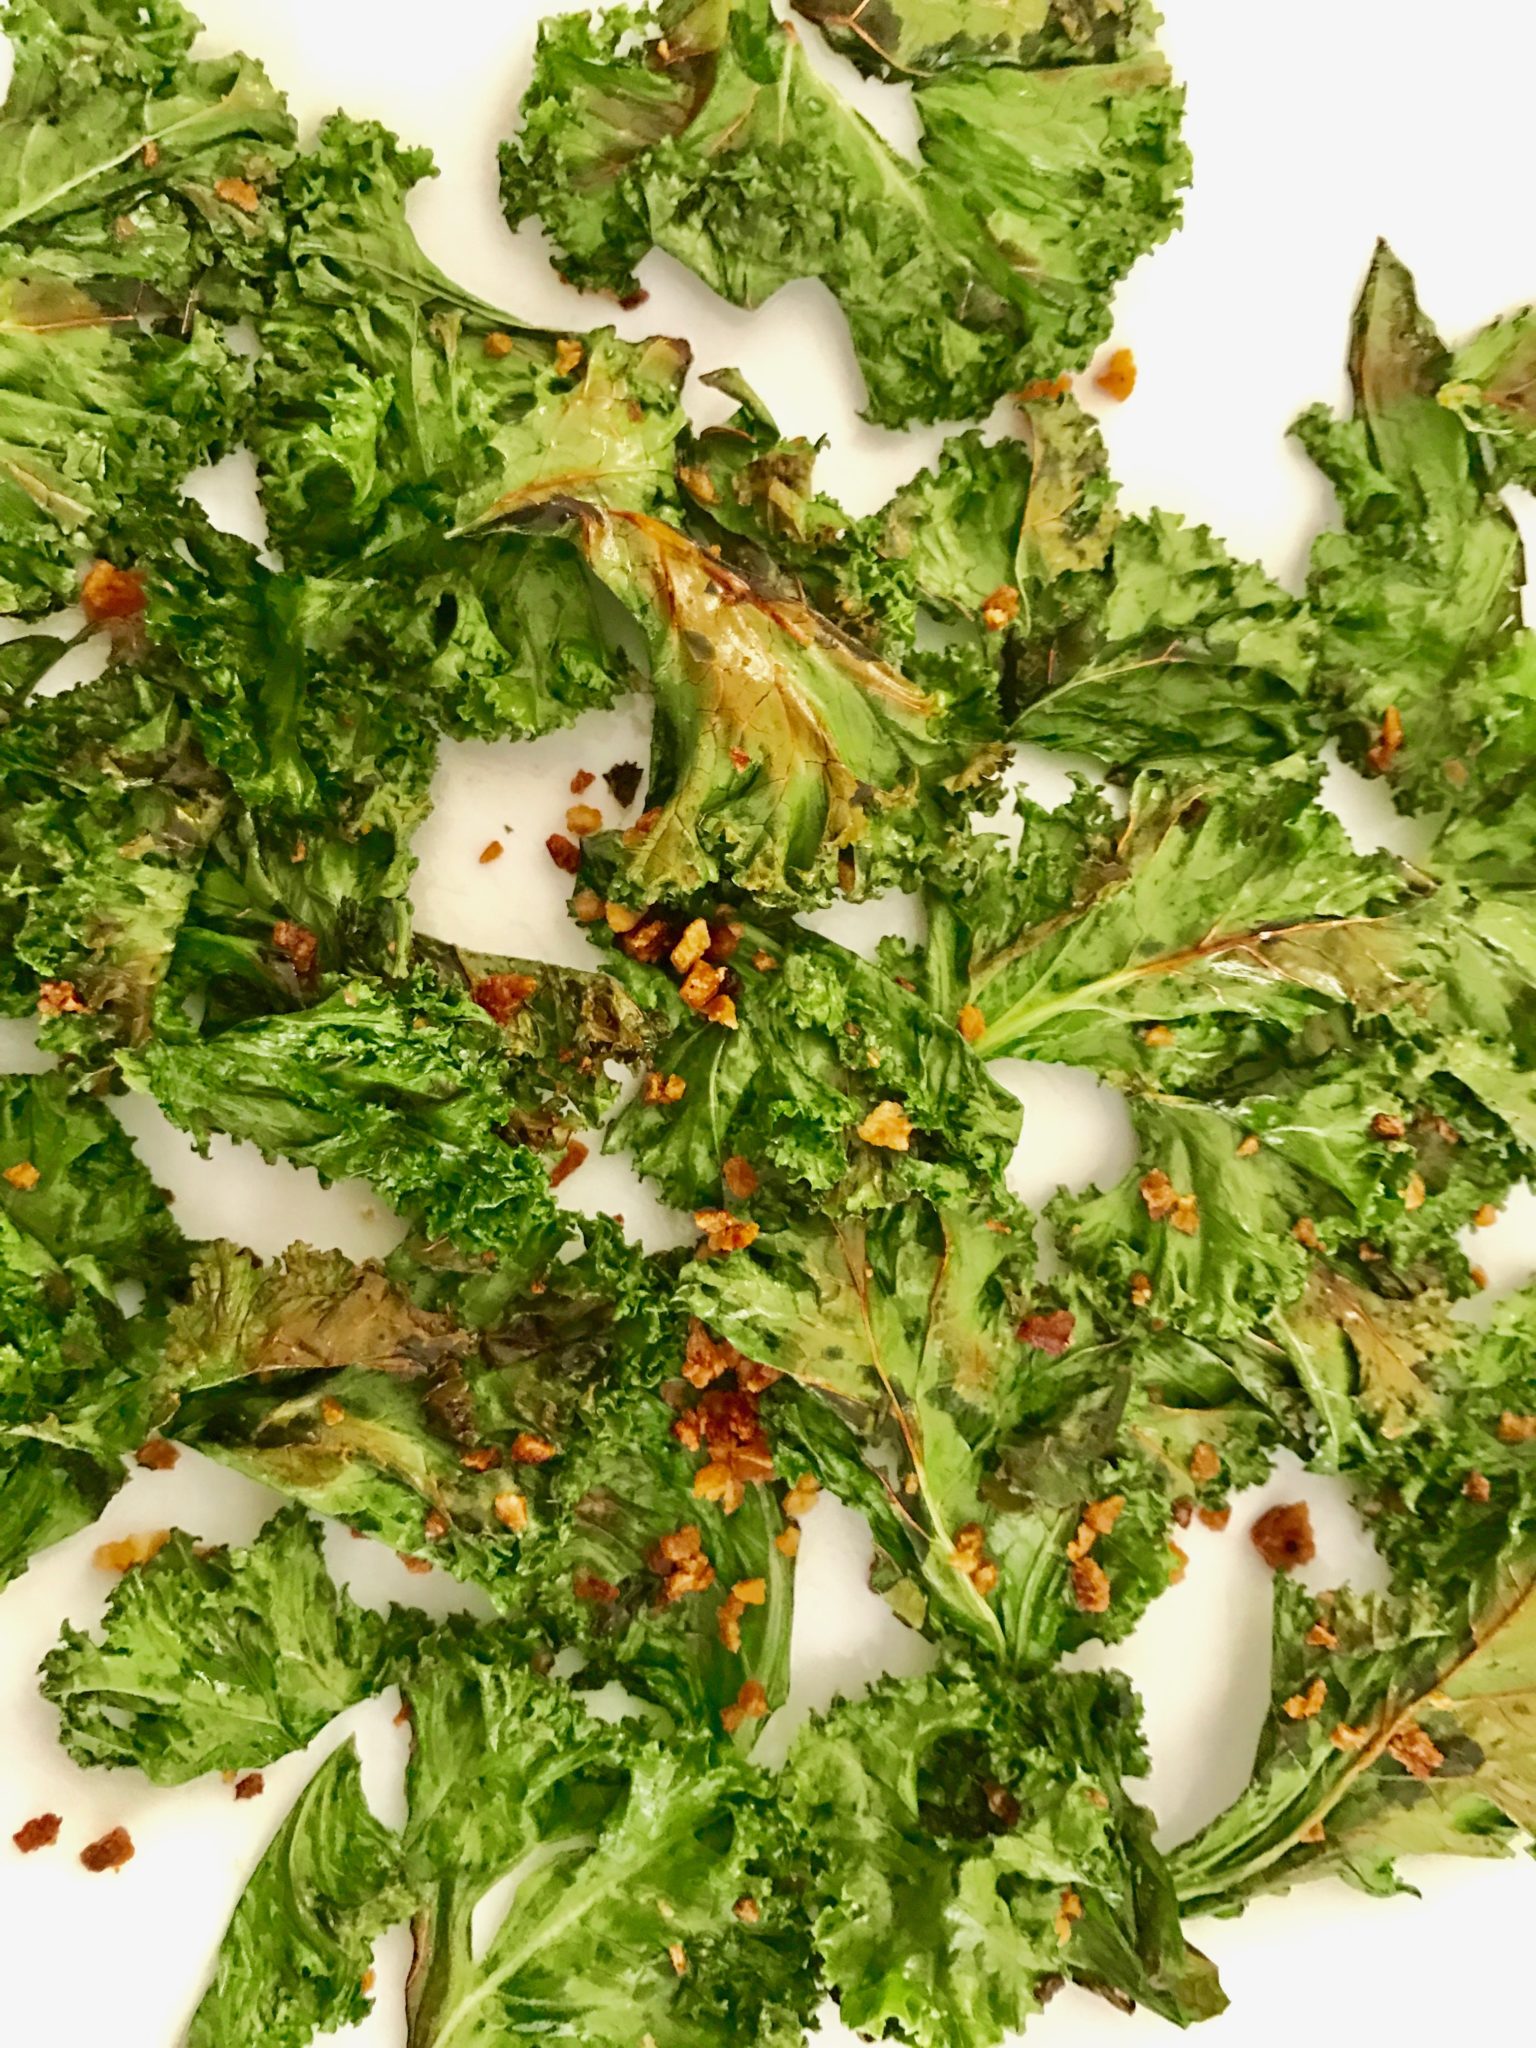
kale chips being cooled on a plate
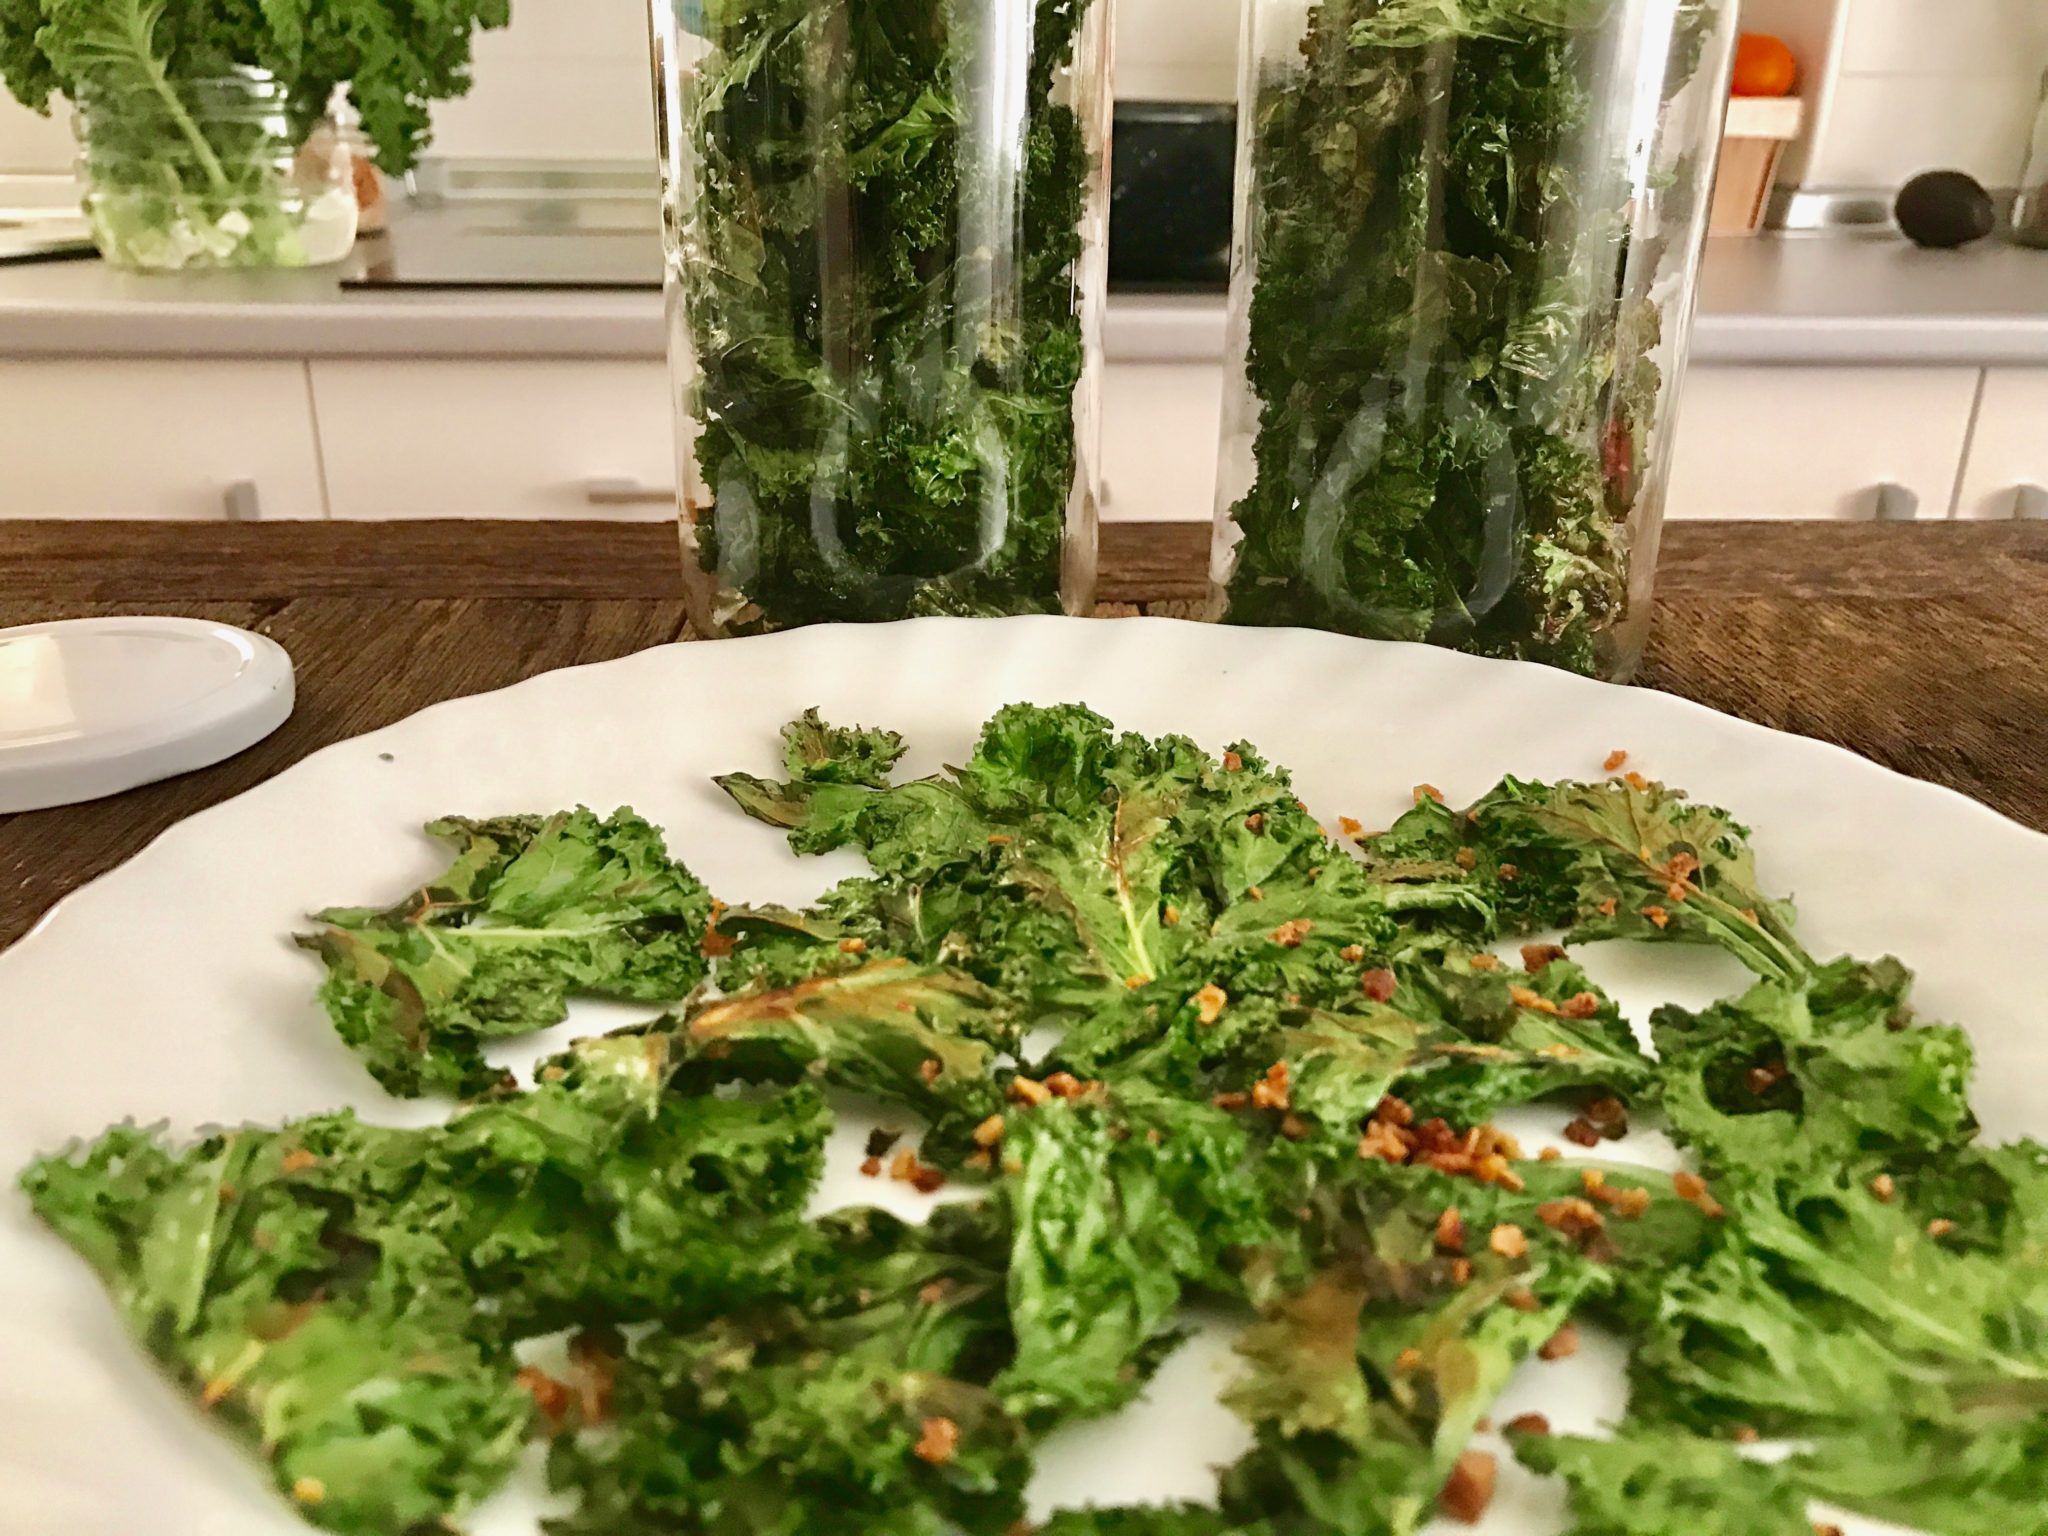
store them in glass jars and enjoy often!
Note: if you use an oven, just follow step 1-5 and lay the pieces on a cookie sheet and bake them at the lowest temperature in your oven. The cooking time depends on your oven. Mine can only go down to 190 degrees, but it usually takes about 20 minutes.
Do you like eating kale this way? Please share with me how you make it, I really want to hear from you!
Greetings!
I came across the idea of “pan-fried kale chips” a few weeks ago whilst flitting around the internet, then I proceeded to forget where I read the article! I was SO happy to find your video on YouTube, and also the complete recipe on your excellent website. Heating up the oven seems like a huge waste of time and electricity, while this brilliant technique is fast and energy-efficient. The only difference is that I used garlic powder from a package, whereas your idea looks far more delicious. One site recommended sprinkling with a tiny bit of cayenne, yet I’m a bit nervous about adding too much.
Thank you again for posting this!